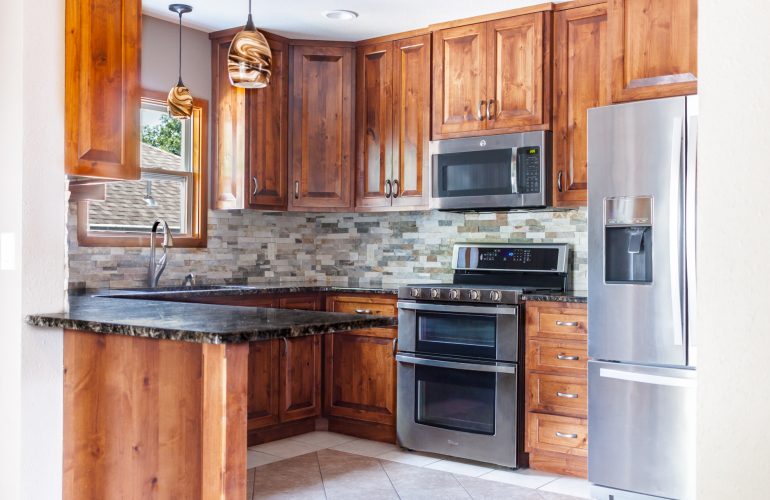
Hi, everyone! I have an exciting new chalk paint kitchen transformation to share with you today.

Bookshelf Makeover Part 1
Hi, everyone! What a crazy week it has been. Ben and I are self-quarantined/social distancing by choice for at least the rest of this week, and being cooped up has given me a fresh drive to tackle a few projects.

The Power of Paint: One Room Challenge Week 3
If you’re finding me through the One Room Challenge, welcome to my home on the internet! I’m Avery and I live in a charming 1910 Craftsman style home in rural Iowa with my husband. You can learn more about me here, and see some of my previous design work in my kitchen, and my Fall 2018 One Room Challenge: Cozy Eclectic Master Bedroom Reveal. My design style is cozy, whimsical, and collected. You can follow along with my homemaking adventures on the Holland Avenue Home Instagram.
Welcome to week three of my One Room Challenge! We are officially halfway!
Catch up on all of my progress for the Spring 2019 One Room Challenge:
Week 1: High Style, Low Budget Sunroom Transformation
Week 2: DIY Tree Stump Coffee Tables
This week, I saw monumental progress in my space through the power of paint.
I’ve said it before, and I’ll say it again: Paint is the easiest and cheapest way to completely transform a space. If you make smart and bold paint choices, you can achieve a significant transformation without breaking the bank.
This porch was previously pale yellow with wood trim around the windows. I started painting it white in 2017, and it took me hours because I was doing it all with a brush. One half of the walls are house siding, and the other half are either bumpy concrete, paneling, or window trim. A roller just didn’t work. So I spent hoooours on the porch during the warmer months, and only completed about 60%.
Enter, the paint sprayer.
Why, oh why, didn’t I just pursue this in the first place? Probably because I didn’t have any experience with a paint sprayer, and moving all of the furniture out seemed like a pain. (Spoiler: it was. But it wasn’t as painful as spending more hours of my life out here with a paintbrush.) My friend, JJ, is a painter, and said he could have the entire porch (including the ceiling) sprayed in under an hour if I already had everything prepped. SIGN ME UP.
The thought of me (a 5’2″ woman) painting a 300 square foot ceiling with a ladder and a roller just didn’t sound like my idea of a good time. (Shocking, I know.)
On Tuesday, Ben and I moved all of the porch furniture out. I filled the MANY nail holes, and cleaned the cobwebs and dust bunnies. My friend, Tessa, came over to show me how to use a masker. It is a neat tool that lets you load a roll of tape and a roll of paper, and puts them together for you as you roll the paper out and tape it to the windows. It is easiest to do with two people. We had the whole porch masked off in about an hour. When you are spraying, be sure to mask off EVERY SINGLE THING you do not want painted. We needed to cover the oak front door, which was difficult to do with the masker, so we left it cracked just a tiny bit, covered it with a tarp, and taped the tarp to the door frame so that overspray wouldn’t get into our house. That left about a three inch opening towards the bottom of the door where the tape wouldn’t hold it together, and our entire main floor was covered in a thin layer of white dust.
JJ was right- the painting took less than an hour. He showed up, set up his sprayer, showed me how it worked, and had the entire room finished in 45 minutes total. He let me do one wall, and I enjoyed using the sprayer!
Enough talk. Here are some incredible before & after photos of the white paint. I used three gallons of Sherwin Williams Extra White in a satin finish.
This one is Ben taking a picture… of me… taking a picture.
Louie, my furry photo assistant.
The “before” just felt kind of dirty. (Partially because it was… don’t @ me)
This was the chaos of our living room after moving in the porch furniture and masking off the windows and doors. We’re going for a “maximalist meets flea market meets condemned house” aesthetic in here now.
Now for the big reveal…
IT FEELS SO CLEAN! We didn’t worry about masking off the floors, because they will be painted next week when the weather permits open windows. I can’t believe what a difference the white makes in this space. Before now, I could only dream of what awaited me on the other side of a long-term, on-again-off-again relationship with a paintbrush.
Please excuse my paint buckets and mountain of paper and tape. Maybe this could be a new decorating style. I would call it “Reno-Chic”. It’s where you leave out all of your renovating supplies, but in an artistic and revolutionary way. So edgy.
I also started painting the navy accent wall, but not without a little lettering fun!
The paint is still drying in this photo, so it looks streaky. I’m going to take the navy all the way up to the ceiling- I just ran out of time to finish it today! I also have to figure out whether or not to paint the half of that concrete column. It is incredibly bumpy, and I’m a bit worried I won’t be able to get a clean line. It will be covered by curtains, but I don’t want to leave a mess for future occupants of this house!
Continuing the navy all the way to the ceiling will draw the eye upward, and ultimately make the space feel taller. I still need to paint the window trim on the outside walls (the ones on the right), and paint the inside of the door on the right. I would love to paint the actual front door because the stain is uneven and looks very worn, but I don’t paint original woodwork in this house since we don’t own it. (Except for the upstairs porch, where the window trim was damaged beyond repair and needed a coat of paint for protection.)
I used three gallons of white paint, and one quart of Annie Sloan Aubusson Blue for this space! I’ll be using a light grey epoxy paint for the floors next week, and black paint for the window trim. This was not a complicated or expensive update, but it made a very significant impact! I’m very excited to see how it all looks once the floors have a solid, fresh coat of paint as well.
That’s all I have for this week! The other major progress will be happening this weekend. My brother-in-law, Kirk, will be showing me the ropes (literally) of building a bed swing. I showed him my vision, and he created a custom plan for beginner builders that utilizes a twin sized mattress and dimensional lumber. You will be able to buy the plans if you want to tackle the project yourself! I’ll also be working on dyeing the curtains and painting the floors next week. Things are coming together quickly now, and I’m still enjoying the process and trying to have fun at every stage!
You can follow along on the Holland Avenue Home Instagram and Instagram Stories for behind-the-scenes progress before it comes to the blog. I’ll be sharing weekly updates here on my blog, and you can get reminders every time a post goes live through entering your email into the “brighten my inbox” tab to the right of this post.
Don’t forget to check out the design plans of the Featured Designers and other Guest Designers on the One Room Challenge Blog.
Thanks for following along, and stay tuned for next week’s project- the bed swing!
Catch up on all six weeks of my Spring 2019 One Room Challenge:
Week 1: High Style, Low Budget Sunroom Transformation
Week 2: DIY Tree Stump Coffee Tables
Week 4: DIY $150 Bed Swing and Painted Concrete Floors
Week 6: Before & After High Style, Low Budget Sunroom

DIY Tree Stump Coffee Tables: One Room Challenge Week 2
If you’re finding me through the One Room Challenge, welcome to my home on the internet! I’m Avery and I live in a charming 1910 Craftsman style home in rural Iowa with my husband. You can learn more about me here, and see some of my previous design work in my kitchen, and my Fall 2018 One Room Challenge: Cozy Eclectic Master Bedroom Reveal. My design style is cozy, whimsical, and collected. You can follow along with my homemaking adventures on the Holland Avenue Home Instagram.
Welcome to week two of my One Room Challenge! Last week, I revealed my High Style, Low Budget Sunroom Design Plan. Here is a quick recap of my moodboard.
I’m planning to tackle quite a few DIY projects for this space, and I finished the first one yesterday! I originally planned to make a coffee table with wood and strips of leather, but that was before I saw these stumps in the lobby of an antique store.
I frequent Celia’s Antiques in Storm Lake, Iowa. The owner, Celia, is a cheerful and welcoming woman who is always sporting a pair of oversized overalls, and has a gift for styling her unique collection of antiques. These two stumps were in the lobby, and I “went out on a limb” to ask her how much she wanted for them. Her exact, surprised response was, “You want the stumps?!?!” I told her that, yes, I very much “wanted the stumps” and would like to buy them. She told me that if I wanted them, I could just take them! I couldn’t be-leaf it!
I came back later with my husband and our Honda CRV, ready to load them up and make some magic. Celia gave me a small cart to get them into the car, and sent me home with it so I could get them out, too!
On the way home, we stopped by Rent-All in Storm Lake so that I could rent a sander. (I actually don’t own any tools, but I am hoping to pick up a few now that I have discovered a love for projects galore!)
Rent-All is a magical place where you can rent anything from a hand sander to a bouncy house to a forklift! Our friend from church is the manager, and he always hooks us up with tools for projects and inflatables for church parties.
I asked him if he knew how I could level out the uneven stump, and he went out to the car to take a look. He said it would be easy enough with a chainsaw, and they had it leveled that afternoon!
I made a quick trip to Ace Hardware for my supplies before heading home.
If you want to do this project, you’ll only need a few supplies. (Some of these links are Amazon affiliate links, which means I will make a small percent commission at no extra cost to you if you decide to purchase anything from Amazon through my links.)
DIY Stump Coffee Table Supplies
- A dried-out stump of your choice (or two!)
- Dewalt Hand Sander
- Minwax Polycrylic- Semigloss (I bought a gallon, but only used about 1/4 of it for two coffee table sized stumps. I would recommend buying a quart for this size or smaller project.)
- 80 Grit Sandpaper
- 100 Grit Sandpaper
- 220 Grit Sanding Block
- 1 yard felt (My Walmart had precut yards of felt in the fabric section)
- Nail-on Furniture Glides (four per stump)
- Mask to cover nose and mouth
- Safety Glasses
Instructions
- Choose your stumps. If your stumps are freshly cut, they will need time to dry out completely. (These stumps were inside the store lobby for a few years, so this step was already finished!) Make sure that your stump is not rotten or infested with bugs. If you are choosing two stumps and you have options, try to pick two that aren’t exactly the same height. You can look around on Craigslist and Facebook Marketplace for people getting rid of stumps, or contact a local lumber yard or tree removal service. You might get lucky!
- Remove the bark. This step was also already finished when I got my stumps. If your stump has bark, you will need to remove all of it with a hammer and chisel or pry-bar.
- Sand top and sides with 80 grit sandpaper. I sanded the top very thoroughly, and sanded the sides where it was possible with the electric sander. I wanted the smooth parts of the stump to be a little smoother, but didn’t worry about smoothing out every nook and cranny. They are trees, after all, and I didn’t want them to look like a bowling alley.
- Sand top and sides with 100 grit sandpaper. The lower the “grit”, the more abrasive the sandpaper will be. Always start with the lower number, and move up to the higher grit.
- When you are content with the smoothness, sand lightly with 220 grit for a reeeally smooth finish before coating.
- Wipe away dust. You can use a wet rag- just allow to dry completely before moving on.
- If you want to stain the stumps, do that before the clear coat. I chose not to stain my stumps because I like the natural look of the unfinished wood. (And definitely not because it was just less work! 😉 )
- Apply first coat of poly. This step makes a huge difference. I used clear, semi-gloss polycrylic, which darkened the stumps just a bit. Watch for drips around the top and out of any cracks down the sides.
- After poly is dry, sand with 220 grit sanding block. Repeat this poly/sand process until you’ve done three or four coats of poly with a light sanding in between.
- Cut out felt for the bottom of the stump. I flipped my stump upside down after the poly was completely dry, and draped the bottom with my yard of felt. I roughly cut out a piece of felt that was about an inch smaller in circumference than the stump.
- Nail in the furniture glides. I tried to space them out evenly around the stump. (I’ll share a photo of this step later.)
- Secure the edges of the felt with tiny nails.
- Admire your new fancy coffee table and laugh at all of the places that sell them for $1,000+
- Take some ibuprofen because your back will probably KILL in the morning (especially if you had to move the stumps around by yourself!)
Here are some photos of my process. This is a beginner level project, and using this hand sander is actually the first time I’ve used a power tool by myself!
This photo was taken after completing the stump on the left, just before starting on the other stump. The poly gave it a really nice, high-end finish, while maintaining the organic stump-like features.
One finished stump, and one raw stump. Just a little bit of work made a tree-mendous difference!
This is the bottom of the first stump after the poly was dry.
To create the felt base, I draped my yard of felt over the stump and roughly cut a piece that was 1″ in diameter smaller than the edges of the stump.
I nailed in the furniture glides, and then secured the edges of the felt with tiny nails. (Sorry, I forgot to take a photo of this step!)
I don’t have a photo of both finished stumps because they are still in my garage, and we’ve had rain today! I can’t wait to see them em-bark on their new journey as coffee tables in my sunroom.
This project took me two afternoons (about 7-8 hours total), and about $35-$40 in supplies. (I bought a $50 gallon of poly, but only used 1/4 of it, averaging about $12)
Cost Breakdown
Stumps: free
Sandpaper: $15
Poly: $12 (would be $20 to buy a quart)
Felt: $2
Nail-in Furniture Glides: $8
Total: About $40
If you want to skip the DIY and just buy a stump coffee table, here are a few options. First, allow me to wish you luck in getting approved for a coffee table loan, and second, allow me to walk away so I don’t accidentally laugh to your face about how expensive these are.
- $2,500 Arhaus Clayhill Coffee Table (The top is composed of 1/4 inch slices of petrified wood. The table itself is made from resin. Oh, and shipping is $500.)
2. $1,499 Arhaus Root Outdoor Bleached Coffee Table (This is made from concrete)
3. $449 Crate & Barrel Teton Natural Solid Wood Table (Okay, at least this one is real wood!)
4. $287.25 Etsy seller Shefford Woodlands (this is a more affordable option if you really love the look, but don’t think you can find stumps. This listing is for one large stump.)
5. $120 Amazon Teak Reclaimed Stump or Stool (Here is the normal-person option if you really want the look, but take note that it is only 10 inches wide and about 16 inches tall!)
I documented the whole process of finishing these stumps on my Instagram stories! You can follow along there for behind-the-scenes progress before it comes to the blog. I’ll be sharing weekly updates here on my blog, and you can get reminders every time a post goes live through entering your email into the “brighten my inbox” tab to the right of this post.
Don’t forget to check out the design plans of the Featured Designers and other Guest Designers on the One Room Challenge Blog.
Thanks for following along, and stay tuned for next week’s project- PAINT!!!
Catch up on all six weeks of my Spring 2019 One Room Challenge:
Week 1: High Style, Low Budget Sunroom Transformation
Week 2: DIY Tree Stump Coffee Tables
Week 4: DIY $150 Bed Swing and Painted Concrete Floors
Week 6: Before & After High Style, Low Budget Sunroom
Don’t forget to save this post on Pinterest!

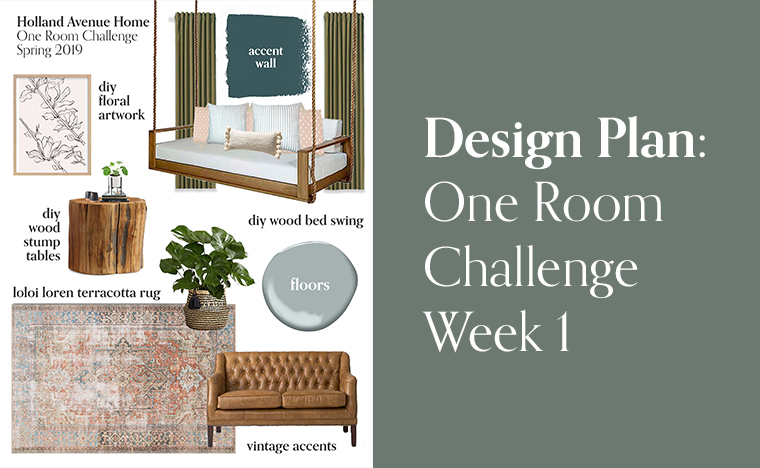
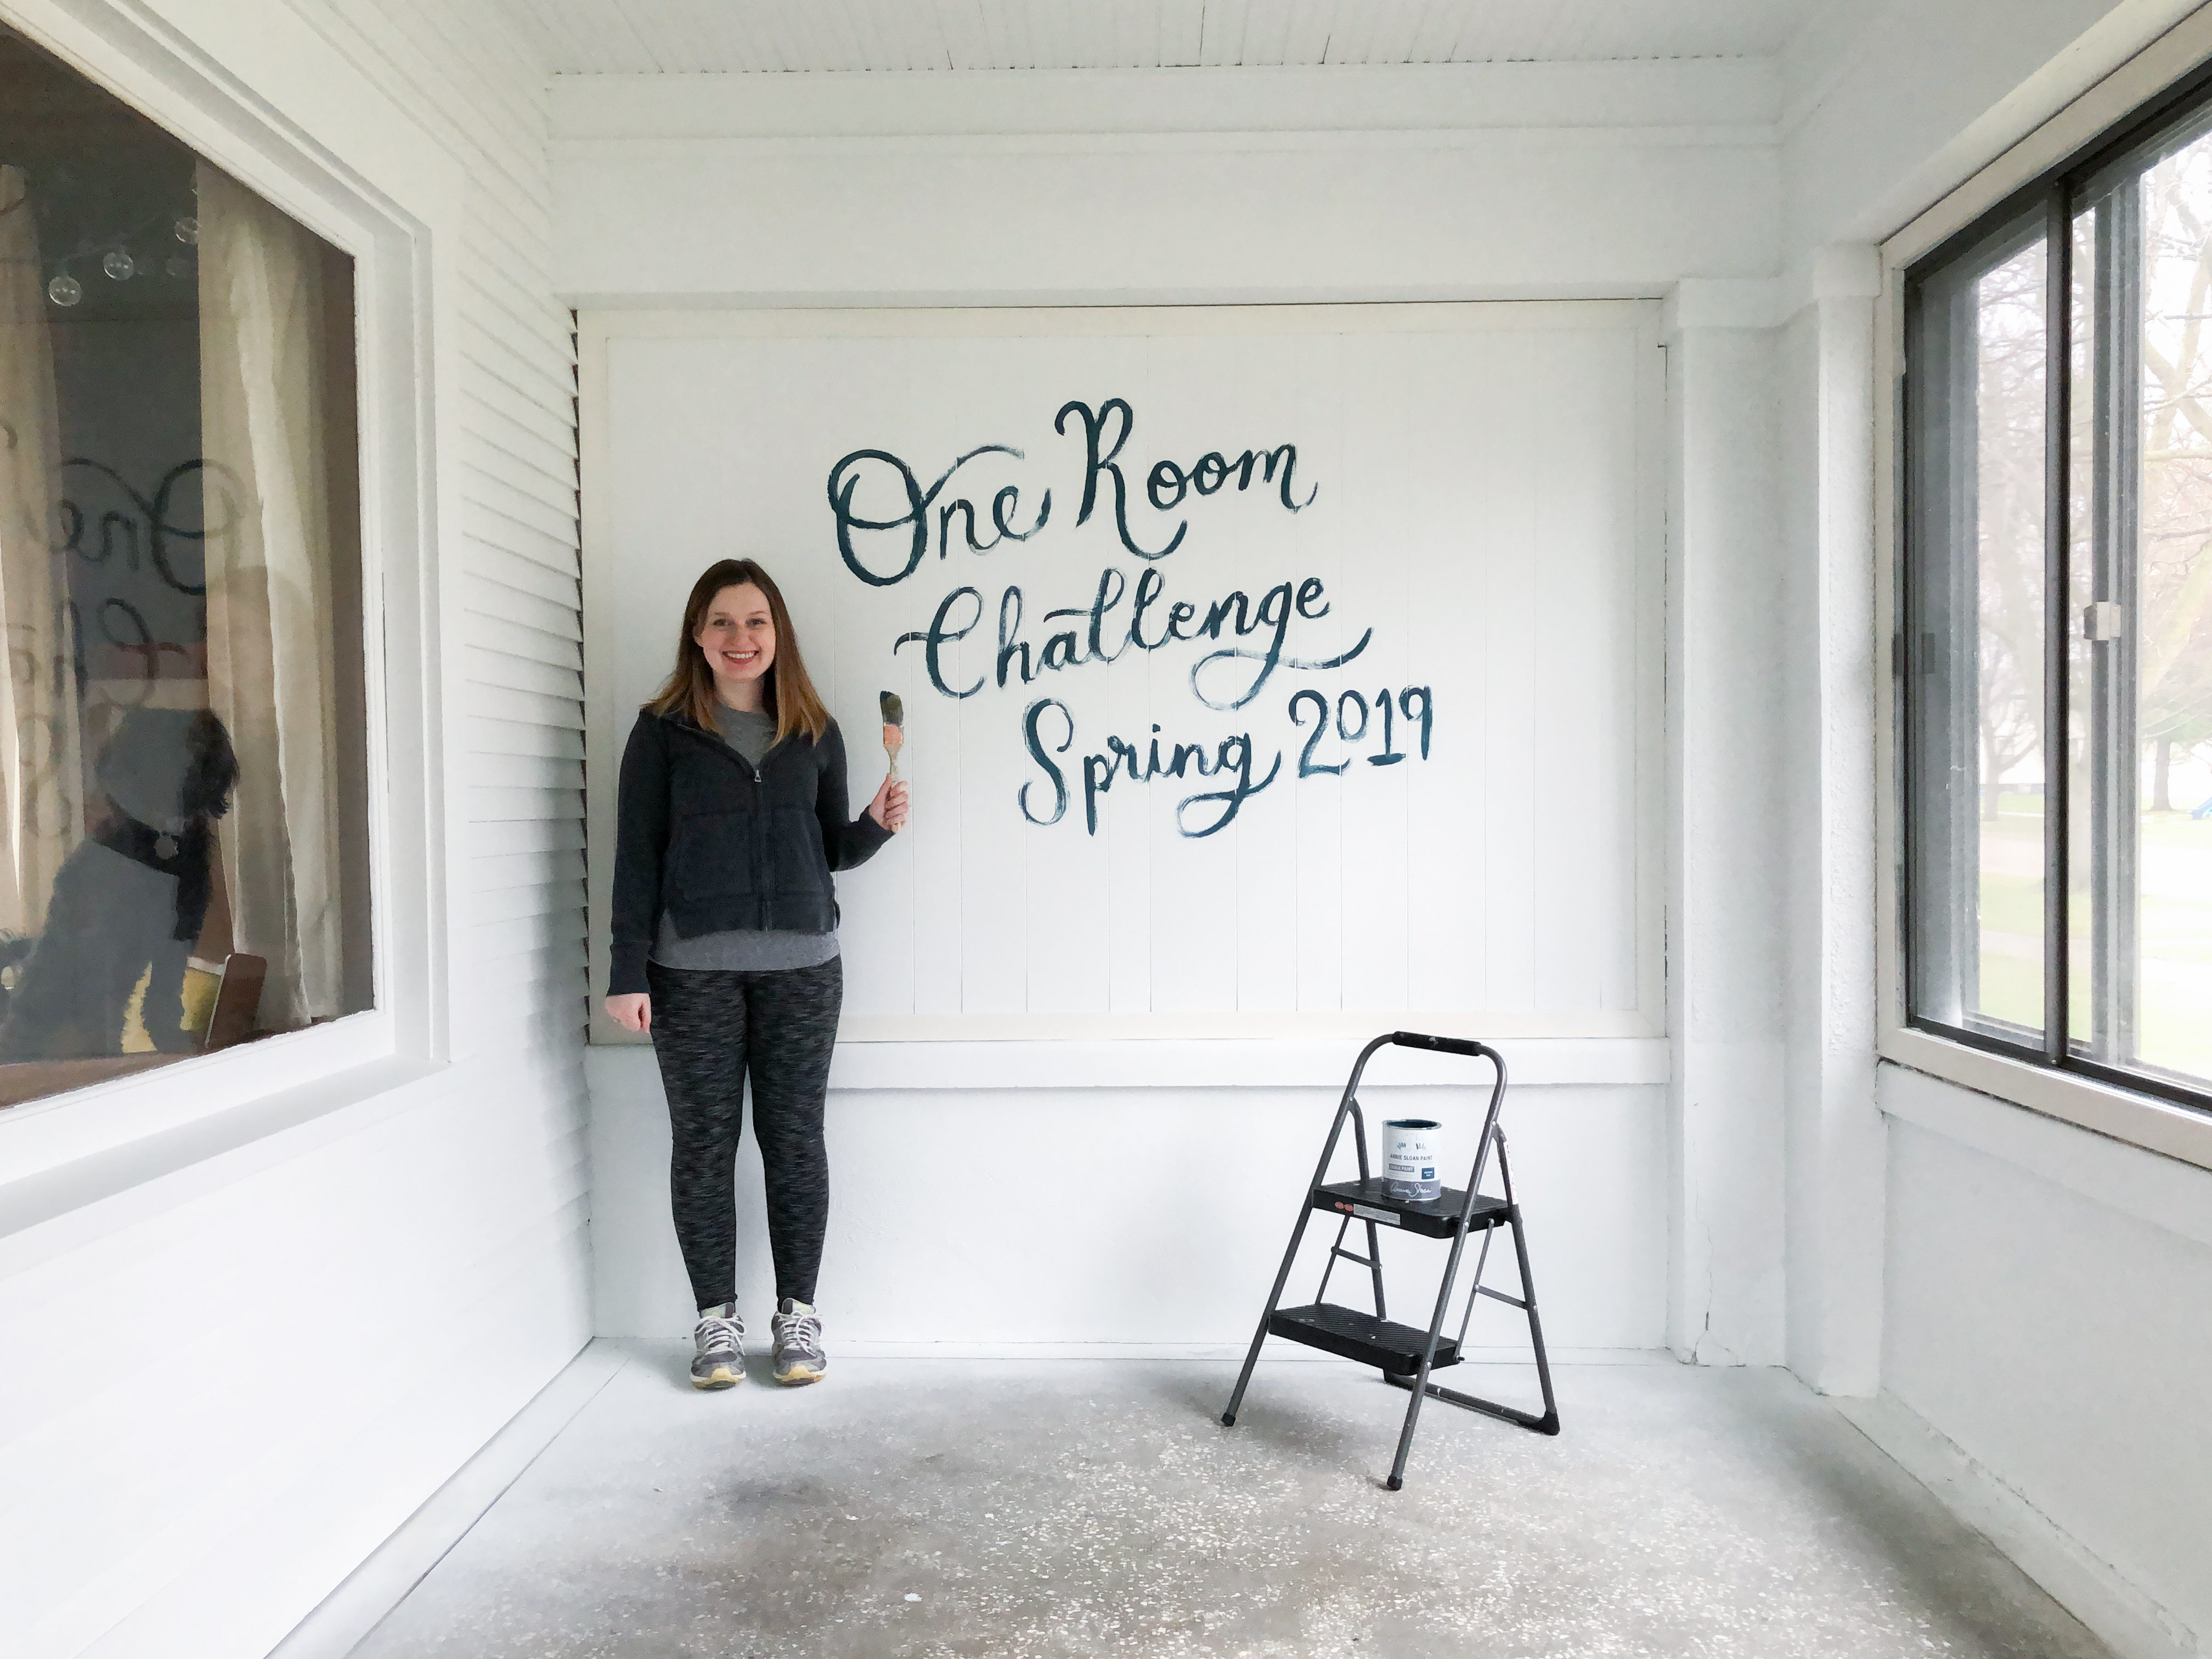
High Style, Low Budget Sunroom Transformation: One Room Challenge Week 1
If you’re finding me through the One Room Challenge, welcome to my home on the internet! I’m Avery and I live in a charming 1910 Craftsman style home in rural Iowa with my husband. You can learn more about me here, and see some of my previous design work in my kitchen, and my Fall 2018 One Room Challenge: Cozy Eclectic Master Bedroom Reveal. My design style is cozy, whimsical, and collected. You can follow along with my homemaking adventures on the Holland Avenue Home Instagram.
For this round of the One Room Challenge, I will be transforming our sunroom!
This space has incredible potential, and will be a dream come true once it is given a little love (and a lot of white paint). It is on the front of our house, and has three walls of windows. It is a “three-seasons” porch, meaning it is too cold to use in the winter. But for the glorious warmer months, we put this space to work for morning coffee, hosting friends in the evenings, and every excuse we can find in between.
For those of you that have been around Holland Avenue for a while, the “Before” of this space is the beloved “Granny Porch”. This space was (and still is) very sad underneath, so I created a temporary fix to add some cheer through bright colors and vintage decor from our wedding. We bought a mustard yellow floral couch for $30 on Facebook, which gave the sunroom some much needed “sunshine”. The space was fun, but the bones of it were still dreary. I plan to give this room new life through fresh paint, warm textiles, and a cozy bed swing. Here is a “before” photo of the “Granny Porch”.
It is definitely “fun”, but I’m hoping to give it a more sophisticated (yet cozy and comfortable) upgrade. I’ll be focusing my energy on the far end that used to have the yellow couch, but the other end with my mid-century gingham furniture will be getting some love, too. This porch is 9×30, and presents some unique design challenges because of the long and narrow layout.
The “Granny Porch” served its purpose of concealing my half-finished paint job and the unpainted concrete floors, but a sad scene remains underneath all of the granny chic glory.
Here is a more recent view of what the porch looks like without anything to cover up the bones (and my less-than-half-finished paint job).
In a word? Rough. In another word? Potential.
I believe that paint is the easiest and most affordable way to completely transform a room, and I plan to put that belief to work in this space.
The first step of transforming this room will be finishing my white paint job with the help of a friend who is a pro, and painting the concrete floors in a refreshing light grey.
After that, I plan to build a bed swing with the help of my awesome brother-in-law.
There will be plenty of other DIY and affordable elements (like the wood stumps I am getting for FREE), and I will also be taking advantage of a few blogger “perks” in the form of sponsored products. (Companies regularly “advertise” through bloggers, and will send us free product in exchange for advertising. I limit the number of advertising partnerships I take on, and am committed to only showing you products I either already use and love, or have specifically chosen with my mission and readers in mind.)
Enough “telling”… let’s get to the “showing”! I’ve tweaked this plan so many times over the last month, but allow me to reveal my final design plan for my “High Style, Low Budget Sunroom Transformation”!
It will be a lot of work, but I am excited to finally give this space the love it deserves. I’m planning to include warm colors and textures to create a sophisticated-yet-comfortable lounge space. I’ve already received a few of the elements in the moodboard, and a few of the pieces are coming from other places in my home (because #budget). This design is what I am working towards, but certain elements may be tweaked and refined along the way. I hope you will follow along with me as I transform this sunroom through resourceful and attainable projects, and that you will be given the confidence to work with what you have to tackle a space of your own.
Be sure to follow Holland Avenue Home on Instagram for plenty of behind-the-scenes posts and sneak peeks of my progress. I’ll be sharing weekly updates here on my blog, and you can get reminders every time a post goes live through entering your email into the “brighten my inbox” tab to the right of this post.
Don’t forget to check out the design plans of the Featured Designers and other Guest Designers on the One Room Challenge Blog.
Thanks for following along, and stay tuned for a High Style, Low Budget transformation!
Catch up on all six weeks of my Spring 2019 One Room Challenge:
Week 1: High Style, Low Budget Sunroom Transformation
Week 2: DIY Tree Stump Coffee Tables
Week 4: DIY $150 Bed Swing and Painted Concrete Floors
Week 6: Before & After High Style, Low Budget Sunroom
Follow along with the rest of my One Room Challenge posts!
Week 2: DIY Tree Stump Coffee Tables

Car Styling Tips for Spring
Spring is in the air, which always gives me fresh energy and determination to clean out our cars. Over the long winter, it can be easy to accumulate literal “junk in the trunk” (In addition to inevitable holiday weight gain: a figurative, yet very real kind of “junk in the trunk”.) We had a day over 60 degrees last week, so we marched out to the Honda (armed with our new cordless Dyson and motivation to get our car looking so fresh, and so clean.)
Seeing April 1st on the calendar feels like the official start of a new season, so I wanted to take this opportunity to share my automotive styling tips for Spring.
Decorating the front of your car can be tiring, and styling the back of your car can be just plain exhausting. But it doesn’t have to be! No matter what kind of car you drive, you probably have to work with limited square footage, and little to no wall space. My typical principle of “decor goes on the walls” is forced out the window (or in this case, the sunroof), and a bit of ingenuity is required to achieve a comfortable “home-on-the-way-to-and-from-home”.
1. Fuel your color palette with textiles.
While the exterior of your car may have color, the interior is most likely neutral. Hearing a “pop” is never a good sign while in your car, but seeing a “pop” of color is the best way to achieve a cozy and “lived-in” vibe. (But not too lived in…)
When choosing textiles for your back seat, it helps to think of the space as a loveseat-on-the-go. Two coordinating throw pillows and a throw blanket will add necessary color and comfort without feeling too cluttered. The exterior of our car is navy, so I chose to echo this on the interior with a vintage indigo throw. Keeping your color palette limited is always a good idea when you are working with a small space, so I chose to focus on blues and pinks.
They often say that “the rug makes the room”, and cars are no exception. I’ve seen plenty of helpful guides that show you how to choose the right size rug for a living room or a bedroom, but I’ve never seen one that shows the best rug size for your backseat.
I opted for a doormat (roughly 1.5×2), but it dominated the floor space and couldn’t be laid out flat. After a quick Google search, I found that this is the smallest size rug you can purchase that isn’t for a dollhouse, so I had to get creative. Folding a doormat in half makes it the perfect size for the tricky long and narrow space in between seats.
Adding greenery to a space is the easiest way to infuse a bit of life, but working with limited square footage can be a challenge for larger houseplants (carplants?).
2. If you need more square footage in the back seat, push the front seats all the way forward for a more “open concept” space.
When the seats were in a safe driving position, the back seat felt cramped.
But look at how much valuable floor real estate opened up when I pushed the seats forward! There was suddenly enough room for a medium sized fiddle leaf fig tree, which really elevated the space.
3. Carry the touches of greenery into the front seat.
While a large houseplant is perfect for the back seat, you’ll want to find a more low-profile option for the front. A small, potted fern will carry the greenery moment into the front (without taking up too much precious dashboard space.) If you actually plan on driving your car, put the large plant behind the passenger seat, and scoot the driver’s seat back to a safe position. The dashboard is an excellent place to display bits of life, like small plants and family photos.
4. Most people don’t know that the cupholders were actually designed with the intent to store vases of flowers.
A few blooms in your accent color and a sprig of eucalyptus is all it takes to create a statement bouquet for the center console. Be sure to choose a vase that is equal or smaller in size to a large McDonalds cup, which is the typical capacity for most cupholders.
5. Decorating your dashboard with vintage books adds character and charm, and guarantees reading material in case you encounter traffic.
6. Utilize your trunk space to create an inviting lounge area.
When you stand at the back of your car and think about how to style your trunk, there is no need to be exhausted. Remember to focus on your color palette, and opt for a mix of textures to create visual interest and depth that isn’t overwhelming.
When choosing a rug for your living space, a good rule of thumb is to have at least the two front legs of your furniture on the rug. We drive a Honda CRV, which has a fairly large trunk. I used a vintage 2×3 rug in my accent color to really ground the space.
Depending on your trunk space, you may be able to include both an armchair and an end table. In this case, I chose a child’s vanity stool and a small rattan ottoman. Since cars have limited storage space, I grabbed one of the throw pillows from the back seat to accessorize this lounge area. Repurposing car decor is one of the most important principles for achieving a cozy, uncluttered car design. The dashboard reading material and a small succulent give this space its finishing touches, which will invite your car guests to curl up in the child’s stool and settle in for a good read.
I hope that these car styling tips were helpful, and will fill your inspiration tank with fresh fuel for Spring on this beautiful April 1st. 😉

My Number One Tip For Decorating “On a Budget”
I received a question this morning about how I practically decorate on a budget. My husband and I don’t have “home” as a line item on our budget, but we do each have a monthly “fun budget”. If I want to go to a thrift store or buy something off of Facebook marketplace, I take it out of my “fun budget”. So when I use the words “budget decorating”, what I really mean is “decorating and furnishing your home for as CHEAP as possible”. Cheap doesn’t mean you have to skimp on quality though.
Here is my number one tip for small decorating budgets (we’re talking “not even a line item” here). If you are looking for a specific piece of furniture or decor, I’d recommend NOT buying the first new thing you see.
If you’re patient, determined, and keep your eyes open, you can probably find something secondhand that is higher quality and a lower price. Example: this leather ottoman I got yesterday. I wanted one for functionality and looks for this chair, but couldn’t afford a new one. The new ones I could maaaybe save up for were still $100+, and probably wouldn’t have been real leather. I waited and waited and searched, and got lucky to find a real leather ottoman on Facebook marketplace for $20! Is it super modern/trendy/perfect? Nope. Is it a leather ottoman that has the same general aesthetic as the fancy high end ones for a fraction of the cost? You bet!
We’ve taken this approach for most of the furniture in our home. A handful of our furnishings were purchased brand new, but we saved so much money overall by waiting to find the right pieces secondhand. Our tiny home budget couldn’t have afforded anything fancy if we bought everything new, but we’ve found a few high quality pieces for a fraction of what buying new furniture costs. If you have a general idea of what you’re looking for, and the patience to not impulse buy the first thing you see at Target or HomeGoods, you can decorate and furnish your home with pieces that will last (and won’t break the bank.) The key to decorating on a budget is not buying cheap junk- it is being thoughtful about the purchases you want to make and then having patience for the right piece to come along.
I wrote more about shopping secondhand in my HomeMade series. You can find helpful decorating tips and guidance in my post , HomeMade: Does Your Home Have A Recipe? .

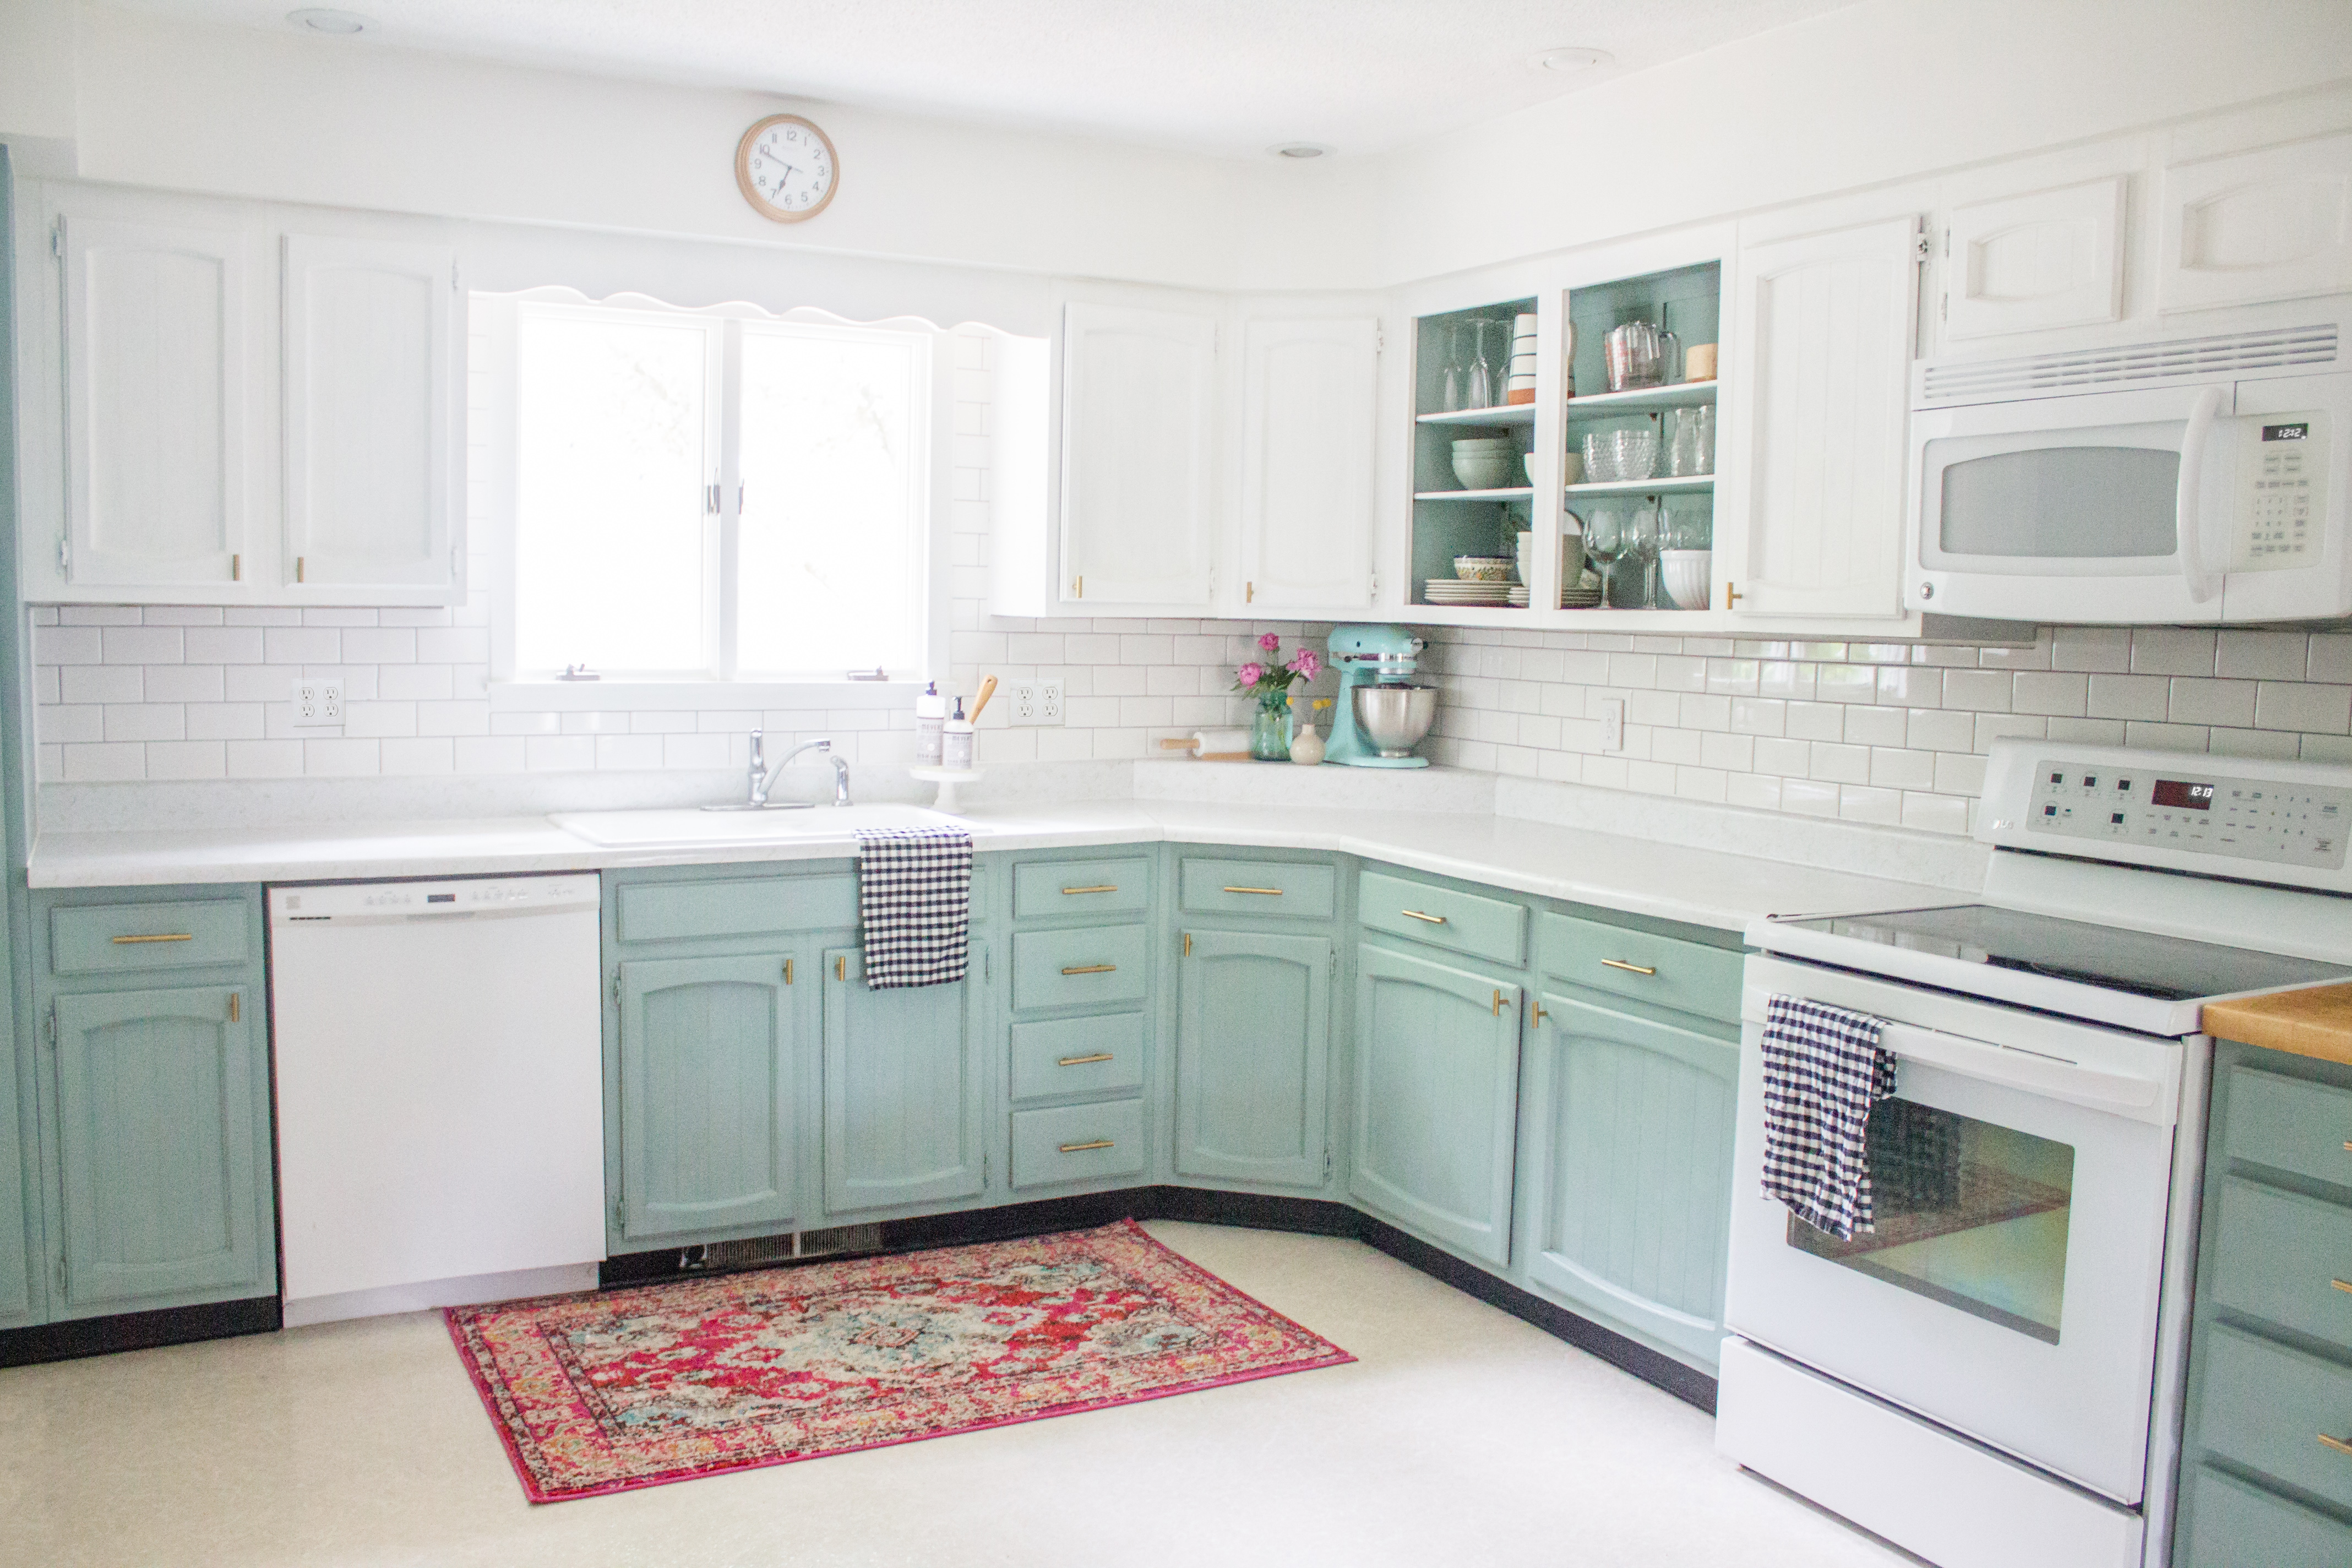
Chalk Painted Kitchen Cabinets Two Years Later
In January 2017, I chalk painted my kitchen cabinets with Annie Sloan Chalk Paint. This is my honest chalk painted kitchen review two years later.
Since the initial update in January 2017, I’ve added a subway tile backsplash and switched out the 9×12 rug for a smaller antique rug. Here are a few photos from the original 2017 Before & After, a feature from Annie Sloan bookazine after the subway tile, and a recent photo from last week (January 2019).
Here is my honest opinion of Annie Sloan Chalk Painted cabinets two years later…
THEY ARE STILL AMAZING.
The thing I don’t want you to miss about that sentence is that my ANNIE SLOAN Chalk painted cabinets are still in excellent condition two years later. If I had used an off brand chalk paint, I might not have the same results or opinions. I properly painted and sealed the cupboards with Annie Sloan Clear Wax, and they look just as incredible as the day I finished painting them. It feels silly to write a review because I have nothing bad to say about how they have held up. If we spill or splatter anything on them, I wipe it off with a wet rag and they look as good as new. I gave all of the cabinet fronts a thorough cleaning before Christmas, and they look great. My husband and I are relatively tidy and we don’t have kids, so they haven’t had to see any major wear and tear. But from the cleaning I have done, I’ve never once been concerned about the paint scratching.
If you are considering chalk painting your kitchen, RUN don’t walk to your nearest Annie Sloan distributor and just go for it! I am ridiculously happy with my decision to paint the cupboards, and I would do it again and again.
One funny thing that I’ve watched over the last two years is the rise of the colorful kitchen. When I painted mine in 2017, neutral kitchens were all the rage. Everything was white, grey, or black. I almost decided on one of these neutrals for the bottom, but my heart told me to go with my favorite color, Duck Egg Blue. I decided to do what I loved instead of what was trendy, and I am so happy with that decision. Since then, blue kitchens have popped up everywhere. (And surprisingly, so have rugs in kitchens!) It is fun to have a trendy kitchen, but that isn’t what makes me happy with my decision.
I’m happy with my blue kitchen because I will love it forever whether it is trendy or not. If I had focused on what was trendy instead of what I loved, I would be sitting here in 2019 with a neutral kitchen, jealous of everyone else’s blue kitchens. Of course, you can always repaint your cabinets. But why go to that trouble when you can be happy from the start?
If you’re considering painting your own kitchen, choose a color (or neutral) that brings a smile to your face. Ignore what the magazines tell you is “in” and listen to what you love.
I’ve received countless questions about the kitchen, so I will post the original questions and my answers here. If you have another question that is not answered on this list, send me a message and I’d love to answer!
Q:What type of chalk paint did you use and what color?
I used Annie Sloan chalk paint. It is the only brand of chalk paint I would recommend. It is more expensive per ounce of paint than latex or oil paint, but it goes so much further and has excellent coverage. You do not need to sand your cabinets or remove any doors before painting. I used 3 coats of Pure White on top and 2 coats of Duck Egg Blue on bottom. You can find a local Annie Sloan stockist through the Annie Sloan Website.
Q: Did you seal your cabinets with wax or poly?
I sealed my cabinets with three thin coats of Annie Sloan Clear Wax. You can use white or black wax for a rustic or distressed look. All of Annie Sloan’s waxes dry hard and should not feel tacky with proper application.
Q: Have you had to re wax?
I have not re-waxed anywhere, and it still feels and looks well sealed and strong.
Q: Did you paint the sides of your drawers or insides of doors?
I did not, but you totally can. I painted the insides of the two cabinets I took the doors off of, but you can if you want to!
Q: How hard/easy is it to get oil splatters off the wax?
Very easy. If I catch it right away, I wipe any spills off with a wet rag. Some spills have gone unnoticed for who knows how long, and those also come off easily with a wet rag.
Q: Seriously, how long did it take?
It took me almost a full week of working for a few hours every morning and afternoon, and a few evenings with my husband. (To paint and wax everything, including painting all of my walls and trim)
Q: What are the “I wish I would have…” things?
I have no regrets about the design decisions I made, and I am happy with the quality of my work! You can read more about my process in the post, $200 Kitchen Update: Sources and Process
Q: Did you paint the hinges?
I did. They don’t look great, but they were pretty rough before. I prefer for them to just blend in. If you have really nice hinges, I might recommend not painting them.
Q: Do you regret not doing or doing any steps?
No. I was very, very, very, very thorough with the cleaning step, which is the most important in my opinion. You need to degrease your cabinets with a degreasing soap. If you have grease spots (which you probably do without realizing it- especially if you have dark wood cabinets) they will show through the paint no matter how many coats you use to try to cover. If you miss a spot and don’t realize it until you’ve painted, sand it down and touch up the paint before waxing. I don’t have photos, but I missed one tiny spot on a bottom cabinet and it was an orange color showing through the blue paint. I sanded down and repainted, and you can’t tell at all.
Q: Were the cabinets previously painted?
No. They were wood cabinets from the 1980’s kitchen expansion.
Q: Did you roll or brush the paint?
I brushed. You cannot see any brush strokes on the Duck Egg Blue, but you can see some brush strokes on the Pure White. It doesn’t bother me, but if it bothered you, you could just do another coat of paint to conceal brush strokes. I used Annie Sloan’s wax brush to apply the wax.
Q: Is the Duck Egg Blue mixed with any Pure White, or is it full strength?
It is full strength.
Q: Where is your rug/towel/hardware/etc. from?
You can find all sources for the kitchen (and other rooms in our home!) on the Shop My Home page of this website.
The rug and hardware are linked (along with my other favorite Amazon household finds) on my Amazon Storefront. I make a small percent commission (at no extra cost to you) if you purchase anything through my storefront. Thanks for supporting Holland Avenue Home!
I think I answered all of the questions I’ve received in preparation for writing this post, but if you still have a question please send me a message! I really really reeeaallyy love this project, and I would encourage you to just go for it if you’re looking to make an affordable and high-impact change in your kitchen. You don’t need to rip it out and start from scratch to have your dream space. Just pick your favorite colors, buy a few quarts of paint, and see what happens! My guess is that you will be SHOCKED by how different your space will look after a fresh coat of paint and a little personality. You do not need to have any special skills to do this project! I would recommend it to anyone looking to make a drastic change without spending an arm and a leg on an actual renovation.
If you missed the original kitchen posts, you can find them below.
Before & After: A Bright, Affordable DIY Kitchen Update
$200 Kitchen Update: Sources and Process
Be sure to follow Holland Avenue Home on Instagram for daily snapshots of life and encouragement towards thoughtful homemaking. Want to join the Holland Avenue Home community? Sign up for my Newsletter, then hop over to Facebook and join the Thoughtful Homemakers group for project inspiration, an encouraging community, and behind the scenes of Holland Avenue!
With love,
Don’t forget to save this post on Pinterest!
Want to see some more affordable transformations?
If you want to see more of the kitchen, check out my Low Budget Pantry Makeover with Leftover Paint and $20 of Organization Supplies, or How-to Repurpose an Antique Table as a Kitchen Island.
Check out my Basement Family Game Room, One Room Challenge High Style, Low Budget Sunroom for more inspiration!

Sofa Update with Comfort Works
Hello, everyone! I’m writing today to share an exciting living room update we recently completed in partnership with Comfort Works. When Ben and I were shopping for a new sofa last Spring, we looked at so many options from a lot of different companies. Our priorities were comfort, affordability, and durability. (Of course, I wanted it to look nice too!) I wanted a light gray couch that would be timeless and durable for years to come.
I liked the style of one of Ikea’s more expensive couches (modern, clean lines, came in light gray). But when we visited Ikea and tested all of them, the classic Ektorp was our favorite. It was the comfiest AND the cheapest, which is a win-win- if you ask me. (Or a win-win-win if you watch The Office). The major selling point for me was the fact that it is slipcovered. I was initially uneasy about spending so much money on a piece of fabric furniture, but when we decided on one with a slipcover, all of the worries went away! We love the chaise, though we rarely get to use it because our dog, Louie, has claimed it has her spot 🙂 .
The only downside to the Ektorp was that a light grey slipcover was not an option. Ikea does have the Ektorp in dark grey, but for $200 more than the classic beige.
Before making the final decision to order the beige, I did a little slipcover research. I quickly found information about Comfort Works. They make beautiful replacement sofa covers for IKEA, Pottery Barn and Muji sofas (among other things!) They have endless fabric and color options to choose from, and their turnaround time is only a few weeks.
Ben and I decided to go with the cheaper Lofallet beige cover from Ikea, thinking that we could always buy a second slipcover from Comfort Works down the road. After living with the beige for a few months, I decided to reach out to Comfort Works about a partnership. To my delight, they said yes! (I am selective about the brands I choose to partner with, and I felt comfortable promoting Comfort Works on my blog because we were planning to purchase from their company at some point anyway.)
If you’re looking to update your own sofa, you can choose from a wide array of cottons, linens, velvets, wools, and heavy-duty or mixed blends. We decided to stick with a basic cotton cover because of our puppy.
While I initially thought I wanted a light grey slipcover, I ultimately decided on the darker charcoal grey Ektorp sofa cover in the Madison Coal Panama Cotton. Our dog has black fur, and it showed very badly on the beige cover. I was worried that her fur would also show on the light grey, but thought that the dark grey might conceal it better. (We vacuum the sofa a few times a week, but in between vacuuming it looked really bad!)
If you’re unsure about how a fabric will look in your space, Comfort Works offers physical fabric samples. I chose to skip this step because I was confident in our color choice, but if I were designing for a client I would absolutely order the samples.
The slipcover arrived much quicker than I expected, and it felt like Christmas morning when I got the package!
The first step to replacing the slipcover is taking off the old one! This process can definitely be done by one person, but it goes much more quickly with a helper. Ben had to leave for an event right after we got the package, but I was determined to switch the covers before hosting Bible study that evening. I ironed the covers before putting them on, so the whole process took a little over an hour from start to finish.
That night at Bible study, a few of the women asked me if we got a new sofa! My response was, “Basically!” I adore the dark grey color. It feels so much more inviting than the beige.
The dark grey doesn’t feel too dark, and I was surprised that it didn’t make the room feel too dark either.
When I pulled the new slipcover out of the bag, I had a moment of panic because I thought they accidentally sent me the velvet fabric instead of the cotton. Nope! Their cotton really is that much softer than our old slipcover. It definitely feels durable, but it is also ridiculously soft and cozy.
Looks good from the back, too!
Louie approves, which is good because she was an important part of our decision!
We’ve had these covers for juuuust over a month, and I still love them just as much as the day we received them! I wanted to wait the full month to write my review so that I could give one from experience! I love that I don’t have to worry when we host friends with kids. We don’t want anything in our living spaces to be too precious, because this is where real life happens. If someone spills, I can just throw the cover in the washer. I haven’t had to wash this cover yet (*knock on wood*), but we were able to get many different stains out of the old covers.
The covers themselves are snug, but not too tight. They are easier to maneuver than the Ikea covers, and they fit the Ektorp frame and cushions perfectly. We thought it would be nice to have two covers so we could switch them out, but after feeling the quality of the Comfort Works covers I don’t know if I can go back!
These photos were taken right after ironing the covers, so they do have a little bit of natural wrinkle. The fabric isn’t pulled super tight over the cushions (like a non-slipcovered sofa) so that you can easily remove them. This tiny bit of wrinkle doesn’t bother me, but adjust your expectations if you decide on a slipcovered sofa!
I’m incredibly happy with our Comfort Works slipcover, and would definitely recommend them to anyone looking to update their sofa! You can check out all of their replacement sofa covers on their website.
Thank you, Comfort Works, for providing my new slipcovers! I received free product in exchange for this blog post, but all thoughts and opinions are my own.

Living Room Update with Annie Selke
*This post was sponsored by Annie Selke. I only partner with brands I love, and all thoughts and opinions in this post are my own. Thank you for supporting Holland Avenue Home!*
Hi, friends! I’m here today to share a very exciting living room update with you. If you’ve been around Holland Avenue for a while, you’ll remember that our colorful kitchen rug recently made an appearance in the living room. I loved the warmth and color it added to the space, but the color was a bit overwhelming. Don’t get me wrong- I love color. In my opinion, totally neutral spaces are missing out on opportunities for warmth and cheer. But when I brought in the colorful rug, all of my other colorful accents seemed like too much. A few weeks later, it was time to bring out the Christmas decorations. I knew that all of the red and green would clash with my brightly colored rug, making the space feel too hectic and “thrown together”.
Here’s a peek into our living room decked out for Christmas while we still had the colorful rug. It is definitely cheerful, but it felt too overwhelming in person.
I started looking for a more neutral rug that would allow me to keep the color in other places without feeling too crazy. We previously had a white rug in this room, but it was too small and too boring. (It is currently living in the dining room, and is the perfect size and color for that space!)
In my hunt for a neutral rug, I was only finding boring options that I didn’t love. I wanted something that still felt warm, but could help tone down the color craziness that was happening. You guys know that I love black and white gingham, so when I saw the Annie Selke Tattersall Woven Cotton Rug, I was in love. I love that the pattern is classic and traditional, but still feels fresh and modern. This plaid pattern would be right at home with many different decor styles, and provides a perfect base layer for either colorful or neutral spaces.
I reached out to Annie Selke to see if they would be interested in sponsoring a post, and to my delight, they said yes!
Louie was my little helper the day the rug arrived. I moved all of the furniture off of the colorful rug to give it a thorough vacuuming before rolling it up.
We recently removed the carpet from the living room, and haven’t yet refinished the original hardwood floors. Luckily, the 9×12 rug is large enough to cover the weird dark spot on the floor until we can refinish it.
The rug arrived in a large cardboard box, and was rolled up and folded in half inside a plastic cover.
Even the ribbons were fancy! “Dash & Albert” is the name of the rug department of Annie Selke. If you’re shopping for your own Annie Selke rug, don’t be alarmed if you see the name “Dash & Albert”!
Louie needed to inspect the giant foreign object before we rolled it out across the whole living room.
Luckily, it passed her inspection!
Here are my toes for reference for the scale of the pattern. On their website, the 2×3 rug is shown no matter what size rug you select. In some of the reviews, people said they were surprised that the scale of the pattern is so small. I wasn’t surprised because I’ve seen other photos of this rug in actual homes, but if you’re expecting a large scale pattern it might be a bit surprising.
The following photo is how the rug appears on their website, which could make it seem like this part of the rug is the whole thing! Just be aware of the small scale pattern if you decide to purchase the rug for yourself.
The black and white will look great in our living room year-round, but it is really perfect with our Christmas decorations.
Here’s a view of the other side of our living room, where most of the color lives! I was worried that the bold mustard yellow rocker might look strange with the bold black and white, but I love the combination. The modern plaid pattern seems to bring the vintage La-z-boy into the 21st century. (Also, I moved around the floral bird pillow for some of these photos, so that is why it is showing up in multiple chairs!)
When I was looking at this rug online, I didn’t really pay attention to the word “woven” in the name of the rug. I suppose I expected the plaid pattern to be printed onto the rug like my other wool rugs, but the fibers really are woven to make the pattern! It looks exactly the same on the underside of the rug.
I waited the full month after receiving the rug to write this blog post so that I could give an accurate review, and I can attest that this is a high quality rug that will make your space! The only negative I’ve found is that it really needs a rug pad underneath to prevent it from bunching up. It is thinner than wool rugs, but that doesn’t mean it is poor quality. The woven cotton makes it floppier than wool rugs, but the material is sturdy and well-made. It is very soft and comfortable to walk on, and having a rug pad underneath would make it perfect! I’m hoping to purchase a rug pad after Christmas to help with the bunching.
I love getting a peek of the rug from the office. It grounds the space (pun intended), and is the perfect neutral solution for our cozy living room.
Annie Selke has a lot of wonderful rug designs, and after working with them I can highly recommend their company! The Tattersall Woven Cotton Rug is an A+ in my book, and I love that complements many different interior styles (including mine!)
I want to say a huge “Thank you!” to Annie Selke for providing this rug and sponsoring this post. I am very thoughtful about which brand partnerships I take on, and I say “no” to brands that are not a good fit. This partnership was exciting for me because I reached out to them, and I’m thankful that this blog allows me to work with incredible companies like Annie Selke! Stay tuned for Part 2 of our Living Room Update coming next week.
Thanks again, Annie Selke!
With love,