

Hi, everyone! Today, I have a quick and easy, low-budget pantry makeover to share with you. I see gorgeous walk-in pantries all the time on social media and in magazines, and I have to admit they usually make me jealous. The beautifully organized and meticulously labeled containers have previously seemed like a reality that only exists in my pantry dreams. We have this closet-like cabinet as a pantry, and it has been a source of frustration for me. It is dark, deep, and food seems to disappear, never to be seen again (until I inevitably discover it long after it expired, where it then takes a one-way trip to the garbage). I didn’t have smart organization for our tricky pantry, and it was causing me to be wasteful.

Yesterday morning, I decided to completely empty the pantry so that I could get rid of expired items and put everything back with some semblance of order. I didn’t take a photo of the embarrassing mess that existed before I emptied it- mostly because this WAS NOT SUPPOSED TO BE A PROJECT.
After I emptied it and gave it a good look, I started thinking about how pretty it would be if I “just painted the inside… that’s all”. I told myself that I had better things to do with my time than paint the inside of my pantry. Who even cares anyway? At that point, the idea was planted and it was already too late. I gave all of the surfaces a good cleaning with my trusty Thieves household cleaner and got to work. 
After inspecting the inside of the pantry, I realized there were some random nail holes. I knew that after painting the inside white, they would be really obvious if I didn’t fill them. I used this spackle to fill all of the holes I could find. This is a really easy way to take care of pesky holes, and you just apply it with your finger. It is pink when you apply, and turns white when it is ready to be sanded. I sanded it smooth, and vacuumed up the dust. Make sure to wash your hands right away!
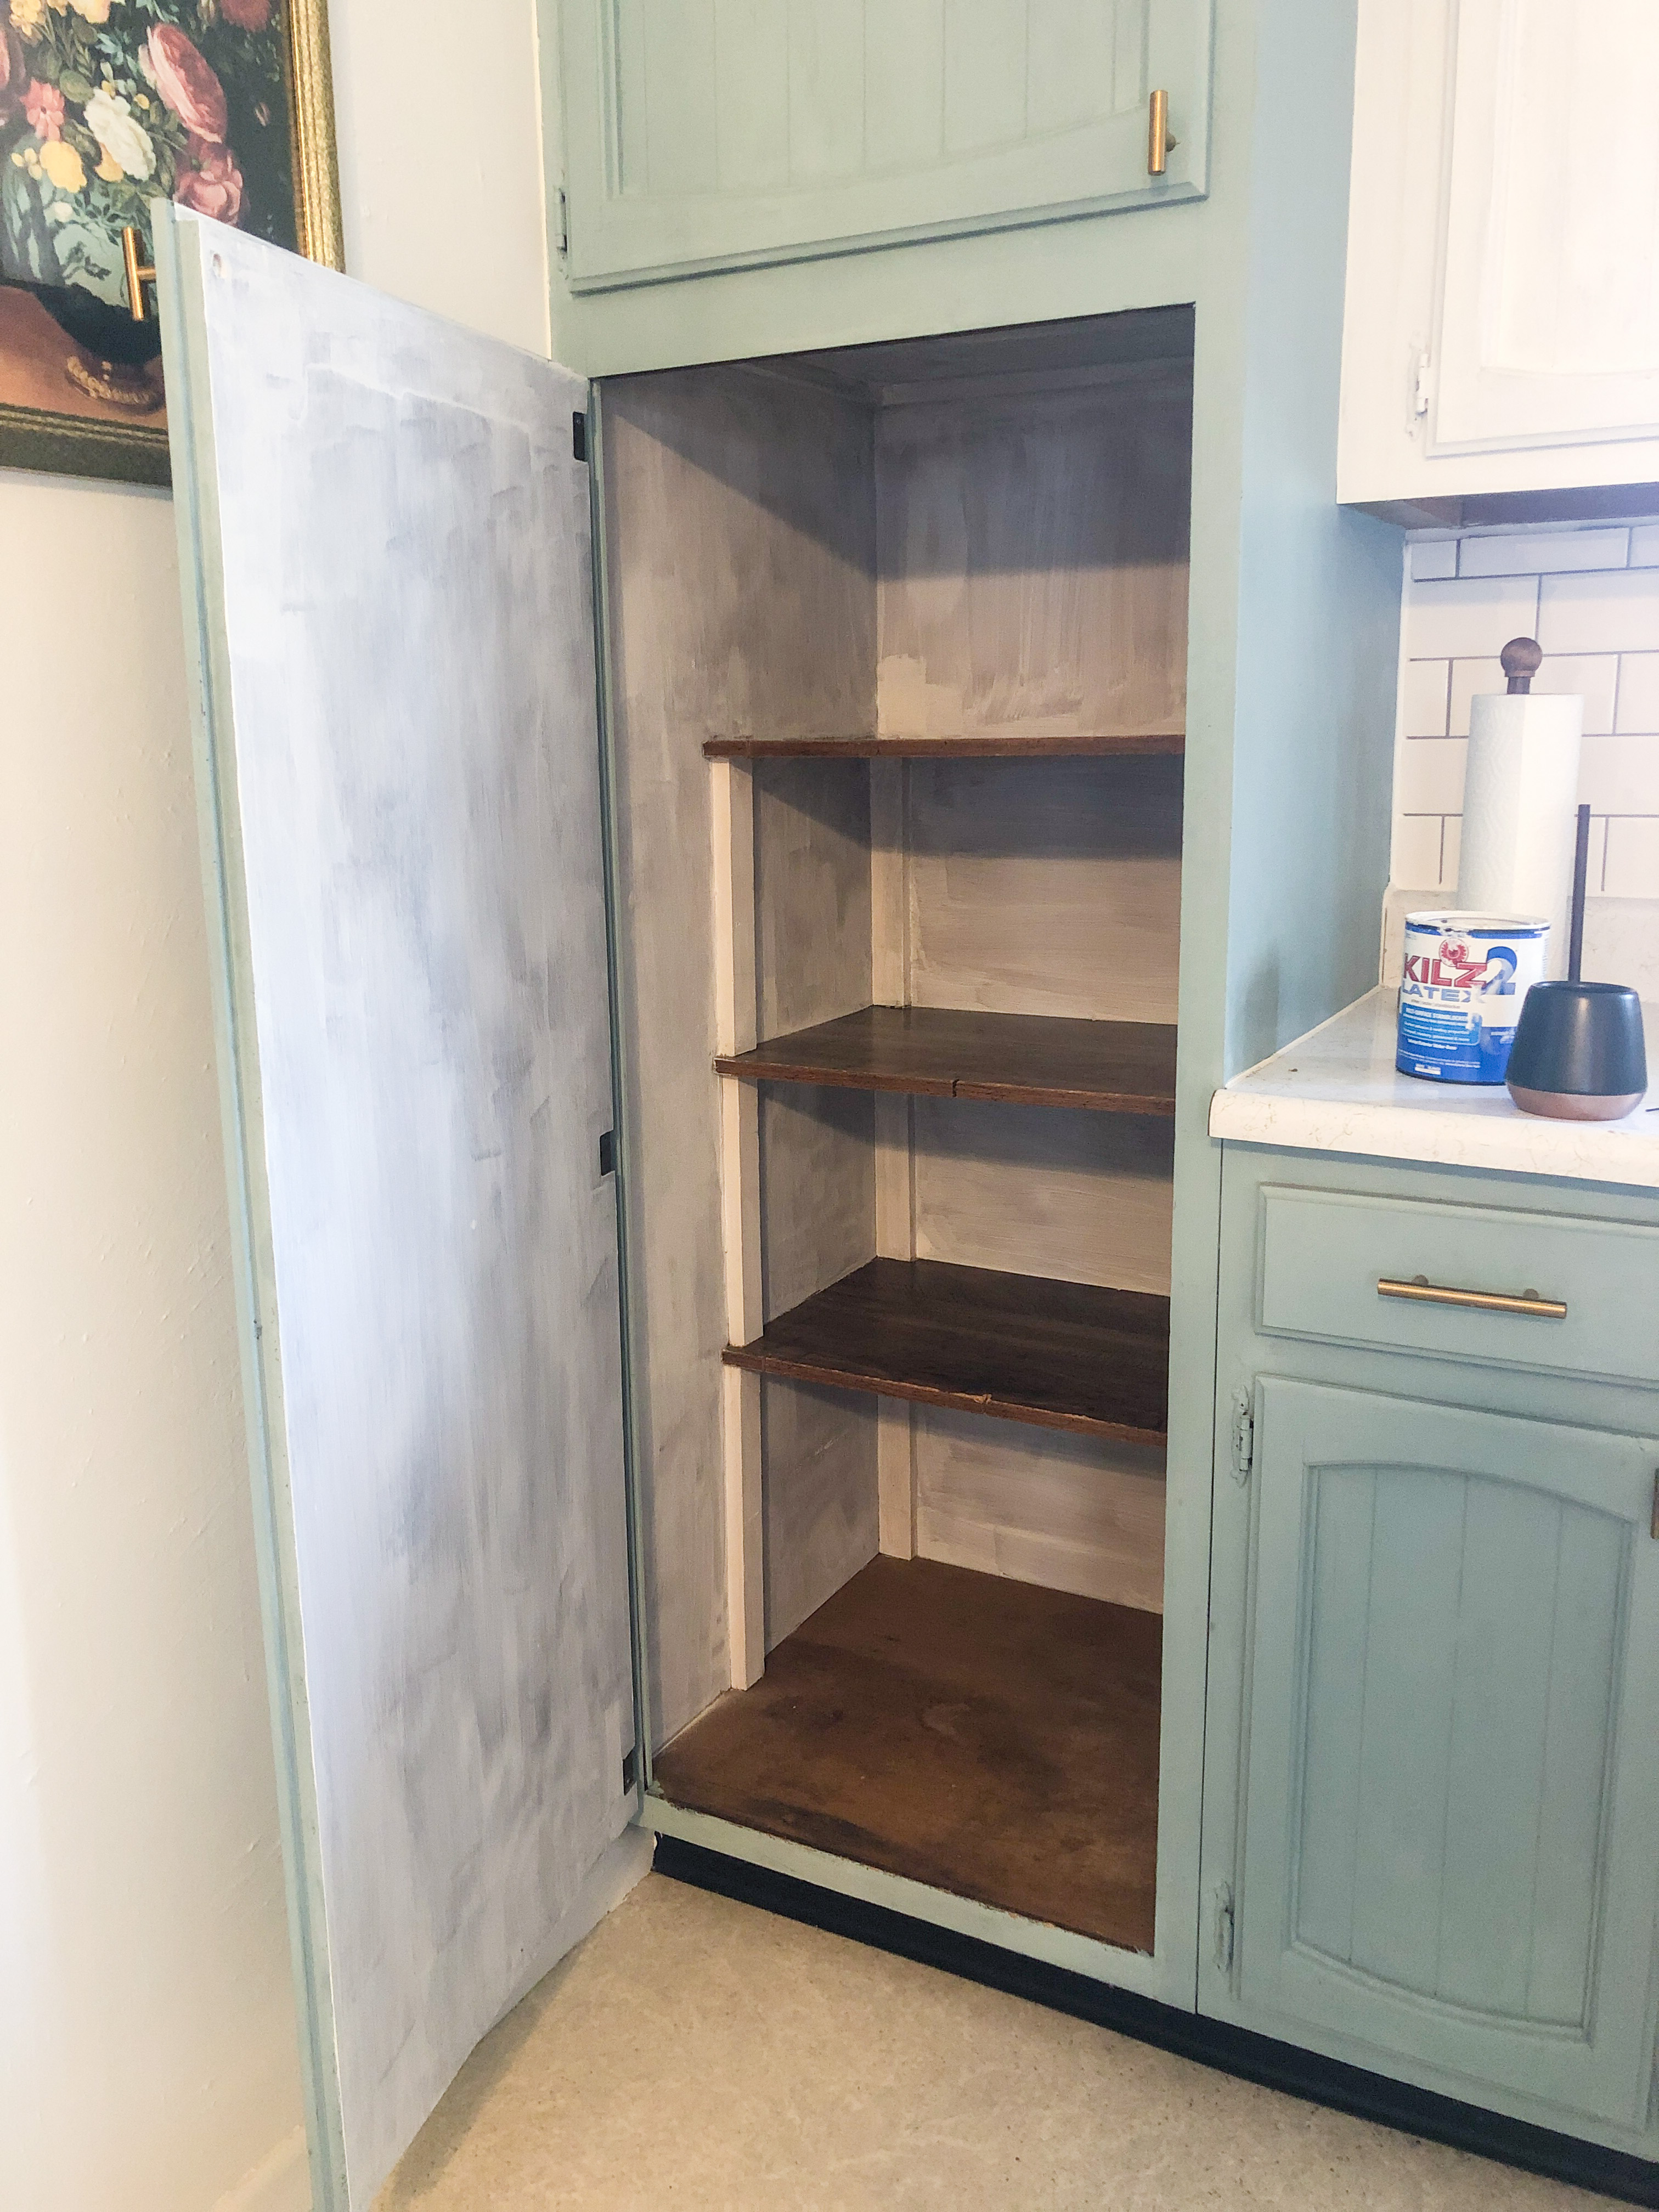
After that, I grabbed some leftover Kilz latex water based primer. I cleaned everything before priming, but any grease stains or other mystery stains would be blocked by the Kilz. This would also help me minimize the number of coats of paint required to cover the dark brown wood. 
Here’s what it looked like after about an hour of work and one coat of paint over the primer. I used leftover Sherwin Williams paint from our sunroom in the color “Extra White”. I did not tape anything off, and just used a high quality Handy Paint 2″ angled brush to cut in around the shelves. I planned to install contact paper, but figured I would leave the shelves wood in case future residents want to remove the contact paper. I could’ve painted the shelves, but I wanted to load everything back in as soon as possible without waiting for paint to cure. 
I debated about whether or not to do a second coat of paint, but I’m so glad I took the extra 30 minutes to do it right. The second coat always goes faster, and makes such a difference. If you’re wondering whether or not to take an extra 30 minutes to do the last 15% of a project, think about the payoff. I could spend 30 minutes with my already empty pantry and wet paintbrush to give it a nice, clean finish. Or, I could skip the 30 minutes of extra work and regret it every time I opened the door to see a sloppy paint job. When else will you have a cleared surface, a wet brush, and all of your supplies ready for another coat? I like to just do the work right the first time instead of regretting my laziness for years to come!

After the second coat was finished, I went to Walmart for some groceries and a few baskets. I checked Dollar Tree first because I wanted to spend as little as possible on organization. I initially checked Amazon to see what I could use and share for affiliate linking, but the prices were a bit outrageous. $30 for one or two bins? I don’t know about you, but that is way out of my budget. I decided to just do this project the way I would do it if I weren’t a blogger, and I’m glad I did!
Dollar tree had a few plastic bins, but they were really small and flimsy. I would’ve needed to buy quite a few in order to utilize all of my shelf space. I decided to see what Walmart had instead, and I’m glad I did. I found this set of three baskets for only $11. I took shelf measurements before shopping, so I knew that these baskets would fill quite a bit of shelf space. I also liked the texture and warmth that they would provide with the freshly painted white interior. I also found this can rack and decided to try it out for the affordable price of $11. I spent $22 total on organizing supplies for the entire pantry, which is what one clear plastic bin would’ve cost on Amazon!

My next step was to install marble contact paper that I already had on hand. I bought this on Amazon for $8, and had enough to cover the top three shelves. I will share an affiliate link to this, but it comes with a warning. I used this product on our basement minibar, and now in our pantry. In both places, this contact paper will not wrap around and stick to the bottom. I have tried to superglue it underneath, but even that doesn’t work very well. I used blue painter’s tape to secure it on the bottom of each shelf, which seems to work just fine. Here is an affiliate link to the contact paper (which just means that I’ll make a small percent commission at no extra cost to you if you purchase anything from Amazon through my link!)
Marble Contact Paper on Amazon
I didn’t do a perfect job of installing this, but I didn’t worry about it too much. It doesn’t look perfect, but I realized that it wouldn’t matter once I put all of the food back in the pantry!
 Next up, I made tags for my new baskets with a piece of cardstock and leftover ribbon from Christmas! After the baskets were ready to go, I loaded everything back in the pantry!

I actually tested the size of the baskets based on my categories and quantity of dried goods before making the labels.
The can organizer ended up working great!

I didn’t paint the bottoms of my shelves because you can’t see them when you’re standing in front of the pantry in person. But my camera tripod allows you to see the unpainted underside and my blue painter’s tape. I was going for an improvement, not perfection here!
Here’s a reminder of where I started on Thursday morning (with my mediocre phone photography because- THIS WASN’T SUPPOSED TO BE A PROJECT!)
And here’s what I was able to accomplish with just $22, an afternoon of work, and some leftover supplies.

I almost forgot to mention one of my favorite details- the “Decoration” on the door! I thrifted that doorknob basket for $1 and hung it on the door with a command hook. The mini artwork is a framed Rifle Paper Company card that is just perfect for a pantry!
I really wish I would’ve taken a photo that had our jumbled mess of food before I emptied it, but just know it was really bad. I didn’t leave anything out of the “after” photos to make it look more organized. This is really everything (after a grocery run to stock up on a few things). I’m amazed at what an afternoon, some white paint, and minimal organization supplies can do for a space!
I left the door open yesterday so that the paint fumes wouldn’t get trapped inside, but I might leave the door open more often just to admire my new beautiful pantry!
If you have a sad or disorganized pantry, don’t lament because you can’t have a huge walk-in pantry with hundreds of dollars worth of containers. I bet your food storage space could function better and make you smile with just a coat of paint and a few thrifted baskets. I know mine did!
Did you like this makeover? Pin the image below on Pinterest to save for inspiration to tackle your own sad pantry!


Leave a Reply