
Hi, everyone! I’m writing today to share about my latest project as part of a Thrift Shop Challenge with a few other bloggers. The goal of the challenge is to breathe new life into a secondhand treasure, and to share the process with our followers. I chose to restore an antique wooden table to use as a kitchen island. I’ll walk you through the process I used to restore the wood and make this piece more functional with a set of caster wheels.
This is the piece I found on Facebook Marketplace for a grand total of $65. I was searching for a few weeks for an antique, real wood table with character. I didn’t expect to find something so unique!
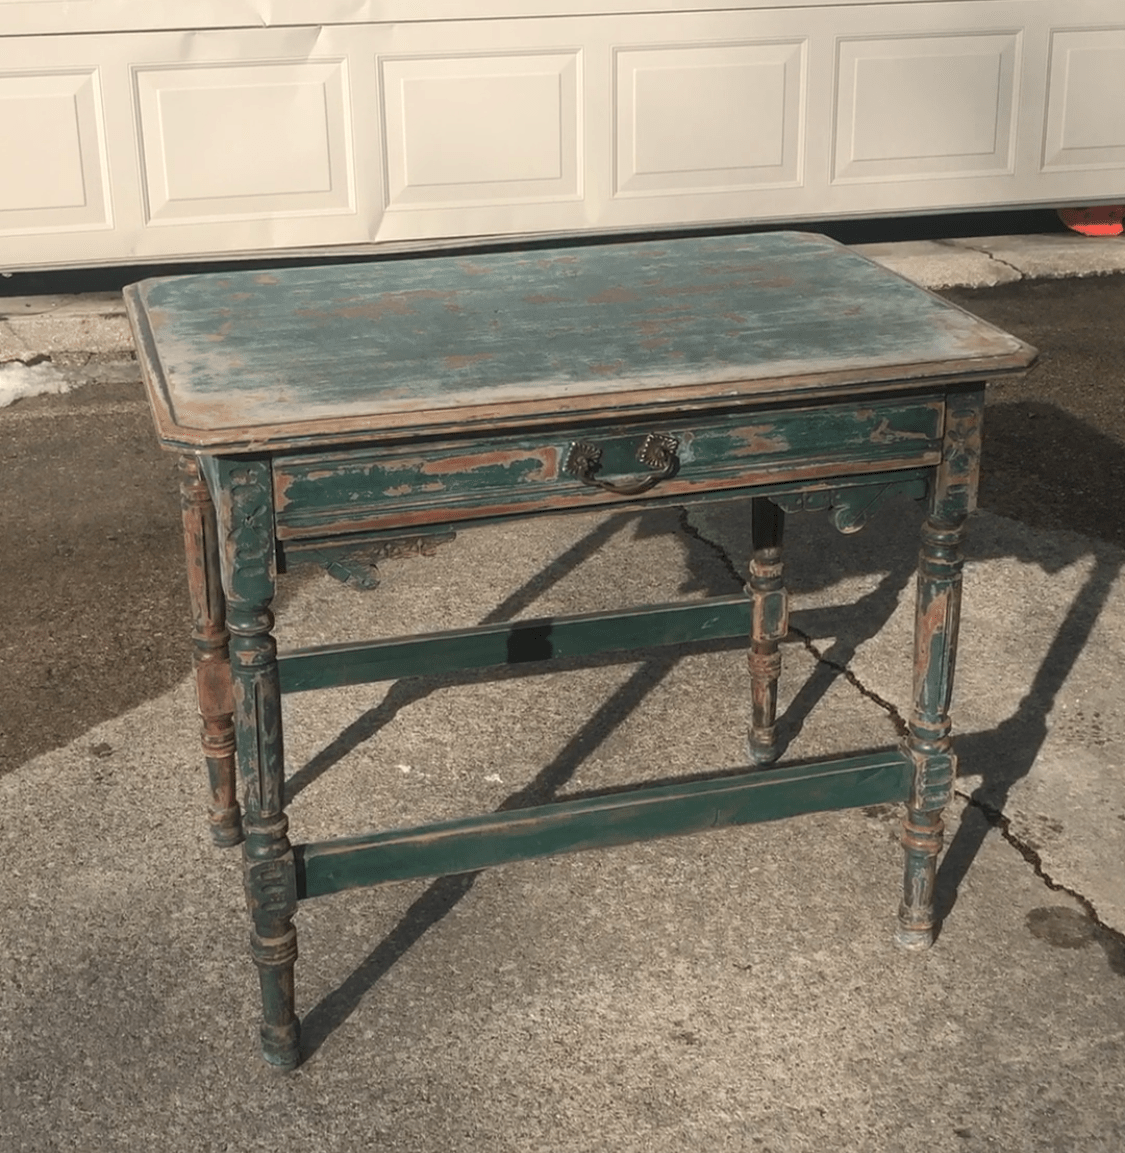

The table has authentic patina, and has clearly been well loved for many years. The hand carved details are to die for. It was gorgeous already, but I knew that a little restoration would go a long way in bringing out the craftsmanship of this piece.
I originally wanted a solid wood look, but this authentic weathered green paint just can’t be replicated. I love the color green, so I decided to take the route with less painstaking stripping and sanding, and focused my attention on the top of the table.
The plan was to restore the top to raw wood, polish the real brass hardware, and add casters to give the table a few extra inches of height and mobility to function as an island.

I sanded the tabletop starting with 80 grit sandpaper to remove the paint and multiple layers of stain. Paint stripper also could’ve worked, but it is winter in Iowa and was too cold to use paint stripper outside! Using it inside requires good ventilation, and I didn’t want to make our house freezing cold or full of toxic fumes, so I opted to sand the top down to the raw wood.
After using the 80 grit, I hit it with 120 grit until I was happy with the blank slate.
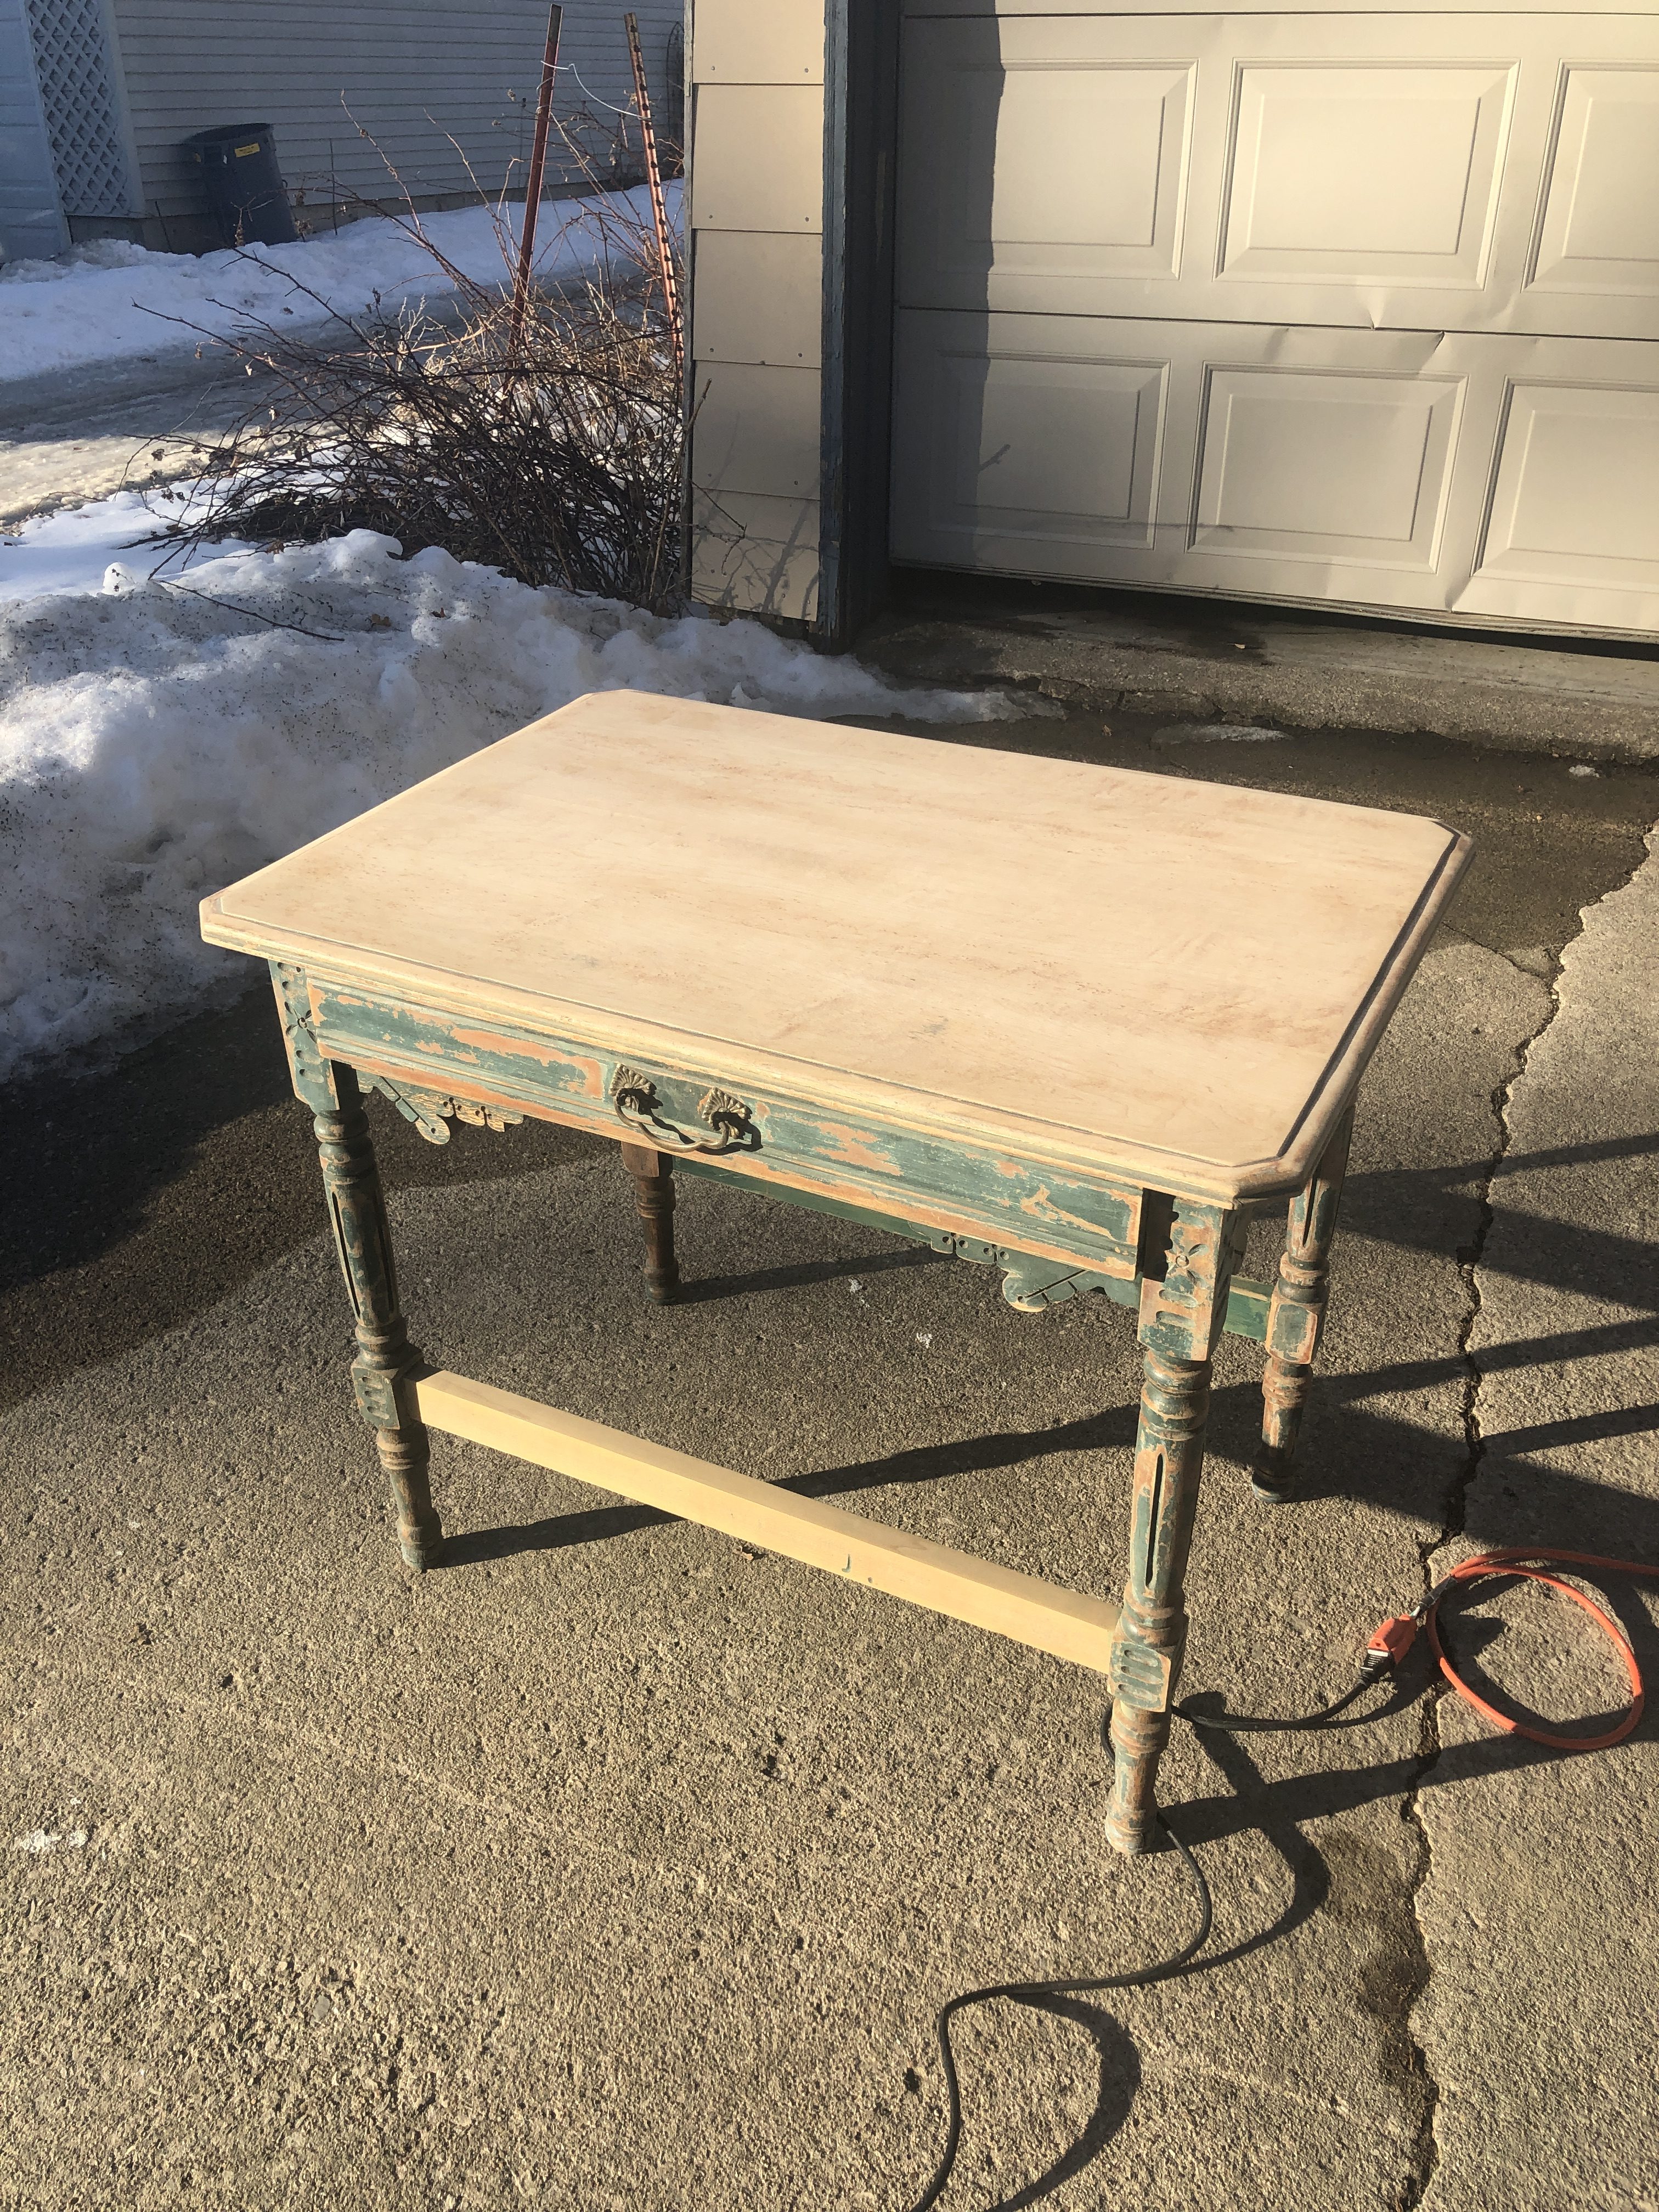
I also sanded down the horizontal braces because the paint wasn’t as weathered there, and I didn’t want the paint to distract from the more intricate details on the legs.

I originally planned to just seal the raw wood, because I was going for a weathered wood look. After doing a little research, I decided to mix a few Minwax stains to achieve a warmer color and bring out the grain of the wood.

This is the tabletop after coating it with one coat of Minwax Driftwood, followed by two coats of Minwax Special Walnut. The Driftwood is really light, and has some yellow undertones. I didn’t want the top to look yellow or orange, and I’m really pleased with how the Special Walnut layered to create a warm, weathered finish. It brings out the character of the wood, and doesn’t compromise the age of the piece. I didn’t want this table to look brand new, so the layered stains helped me restore it without getting rid of the aged quality I loved.
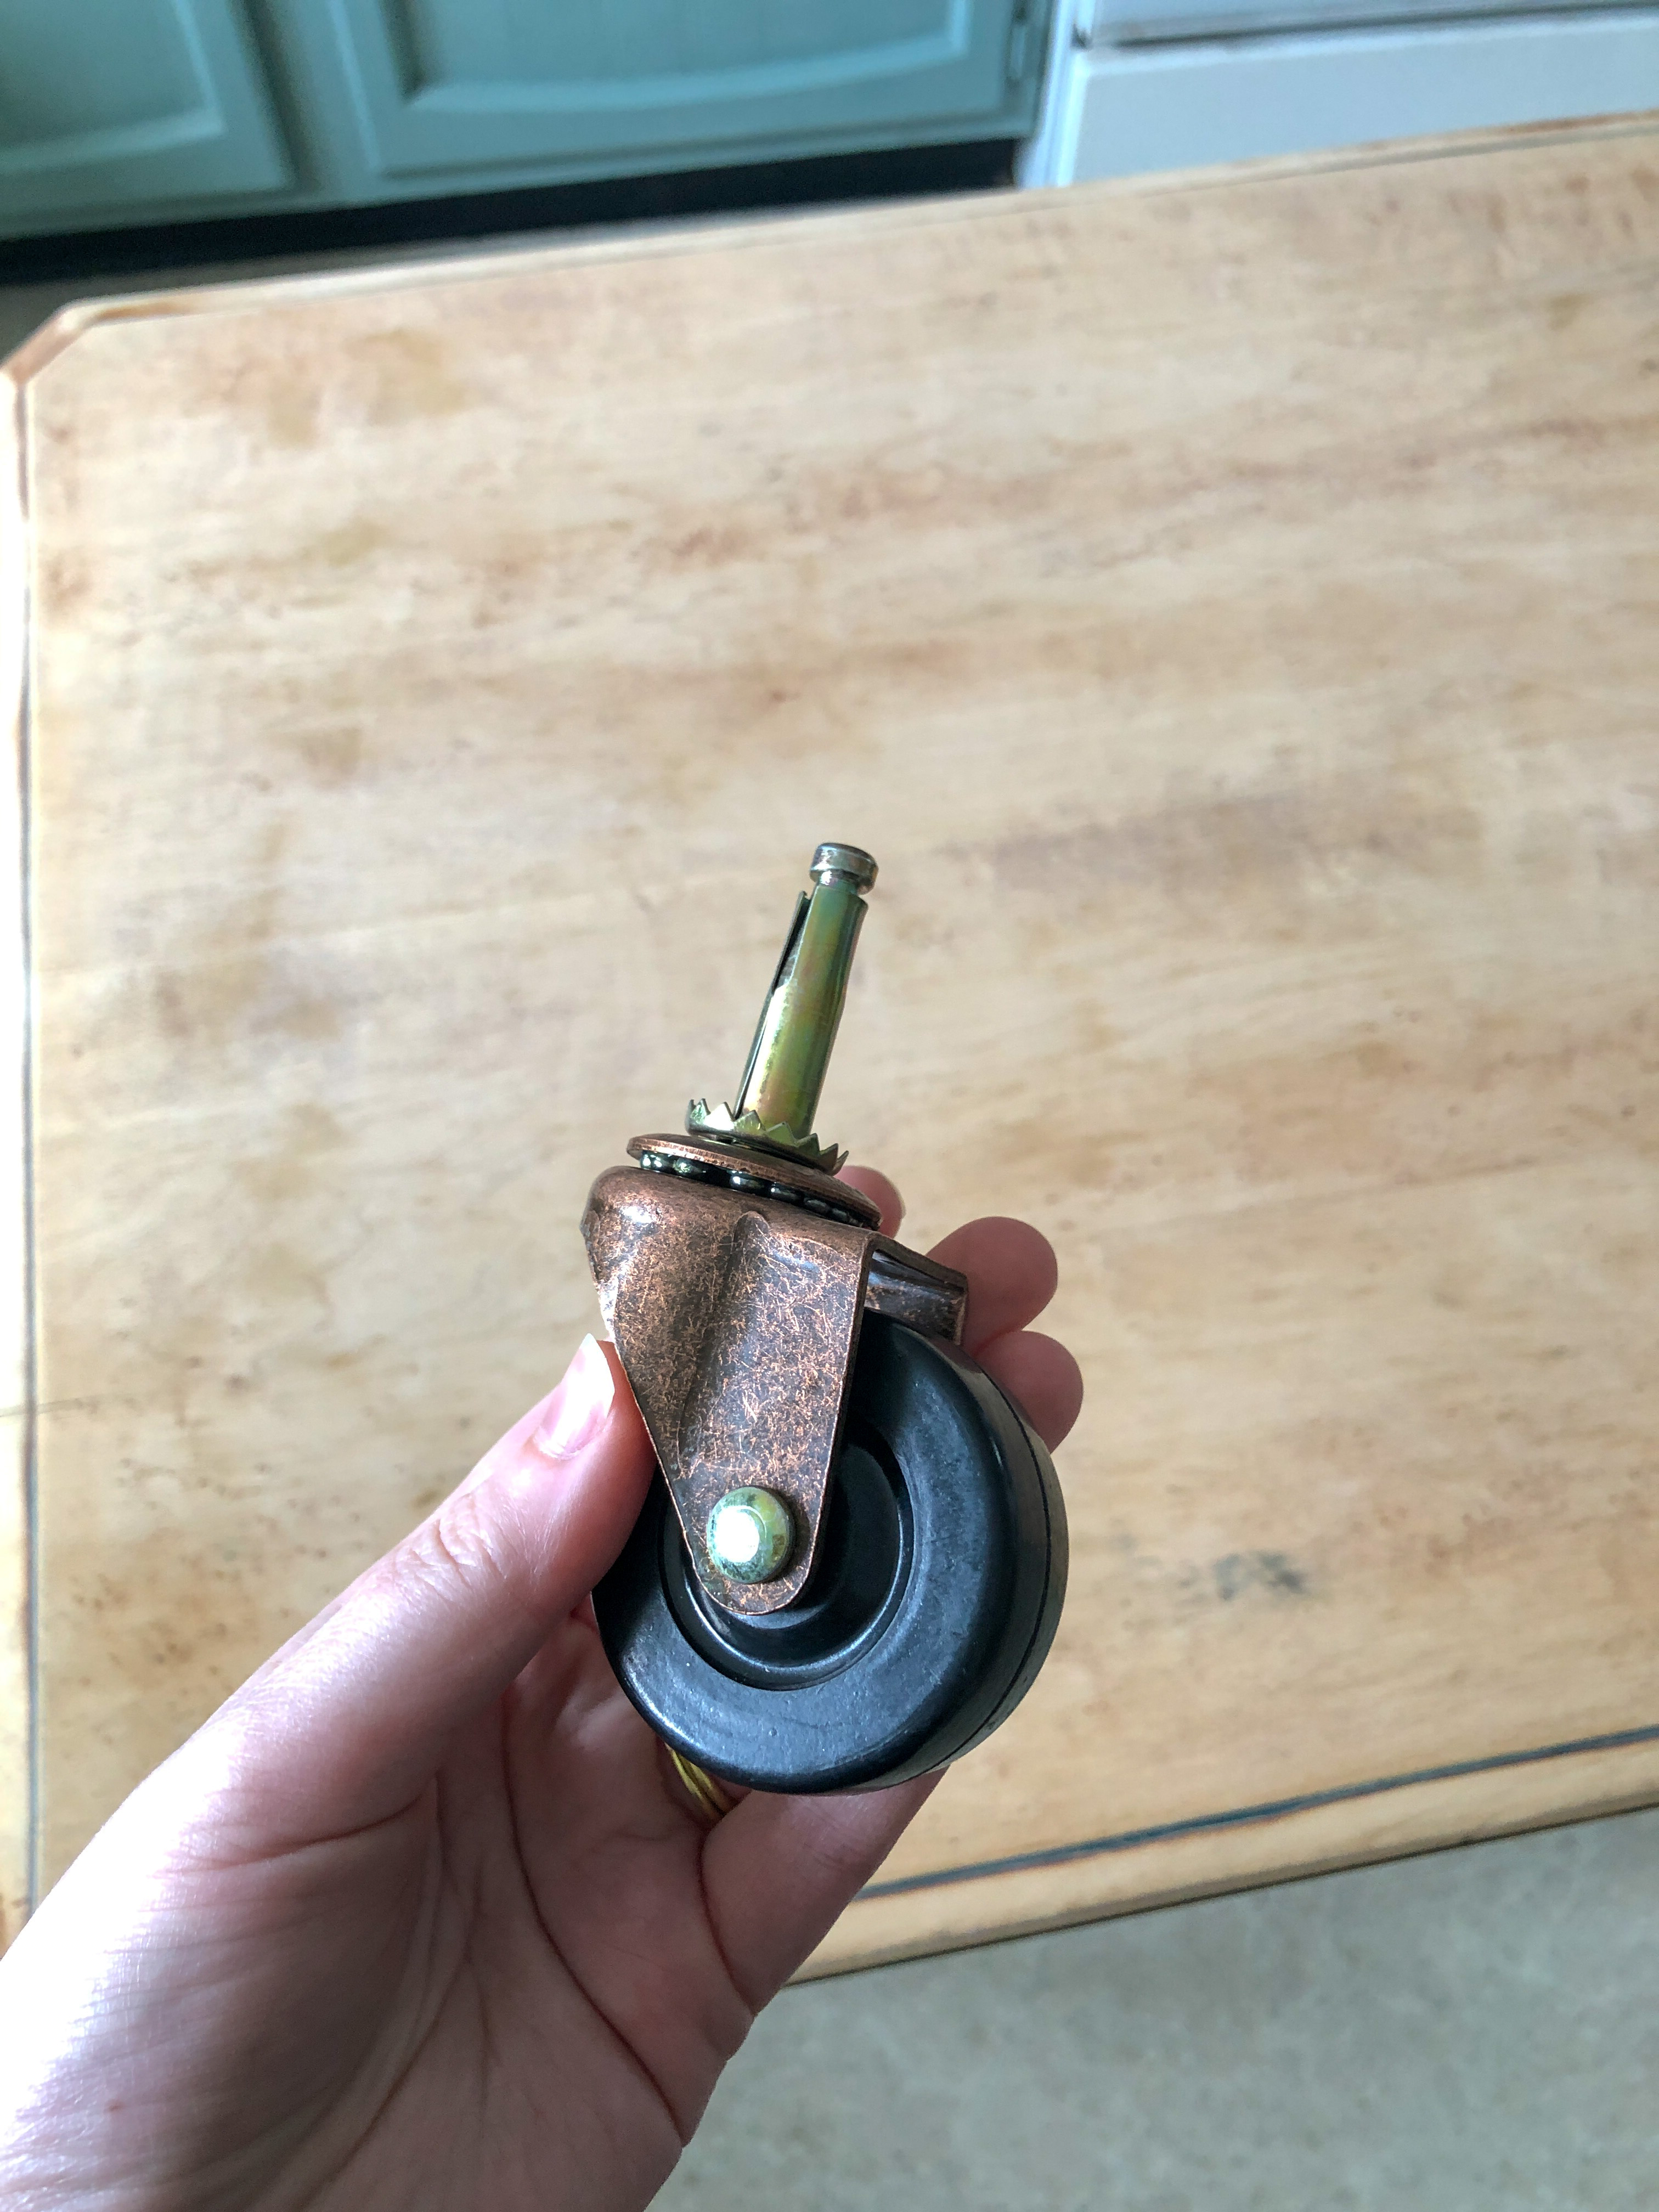
I added four of these smart casters that I bought from Lowes for $2 each. I love the aged copper! Like the rest of the table, I didn’t want the wheels to look brand new. To install the casters, I drilled holes in the legs starting with a small drill bit and working my way up to a bit the size of the gold peg. The outer part of the wheel peg separates from the rest of the wheel, and has little spikes on the bottom. I hammered this casing into the hole I’d predrilled, inserting the spikes into the bottom of the foot. The rest of the wheel just pops into that casing, and you are ready to roll!


I also restored the brass hardware by coating it in a layer of ketchup and giving it a good polish! There are products specifically made for brass polishing, but ketchup works too because the acidity breaks down the patina. I wanted the hardware to shine, but (say it with me) not look brand new. I could’ve polished this hardware to get rid of all of the age, but I love that it fits the historic look of the rest of the piece.

My final step was to clear coat the top surface with two coats of water based Polycrylic. This sealer won’t yellow over time, and will protect the wood from liquids. I used a satin finish because it’s what I had on hand, and I’m really happy with the result!
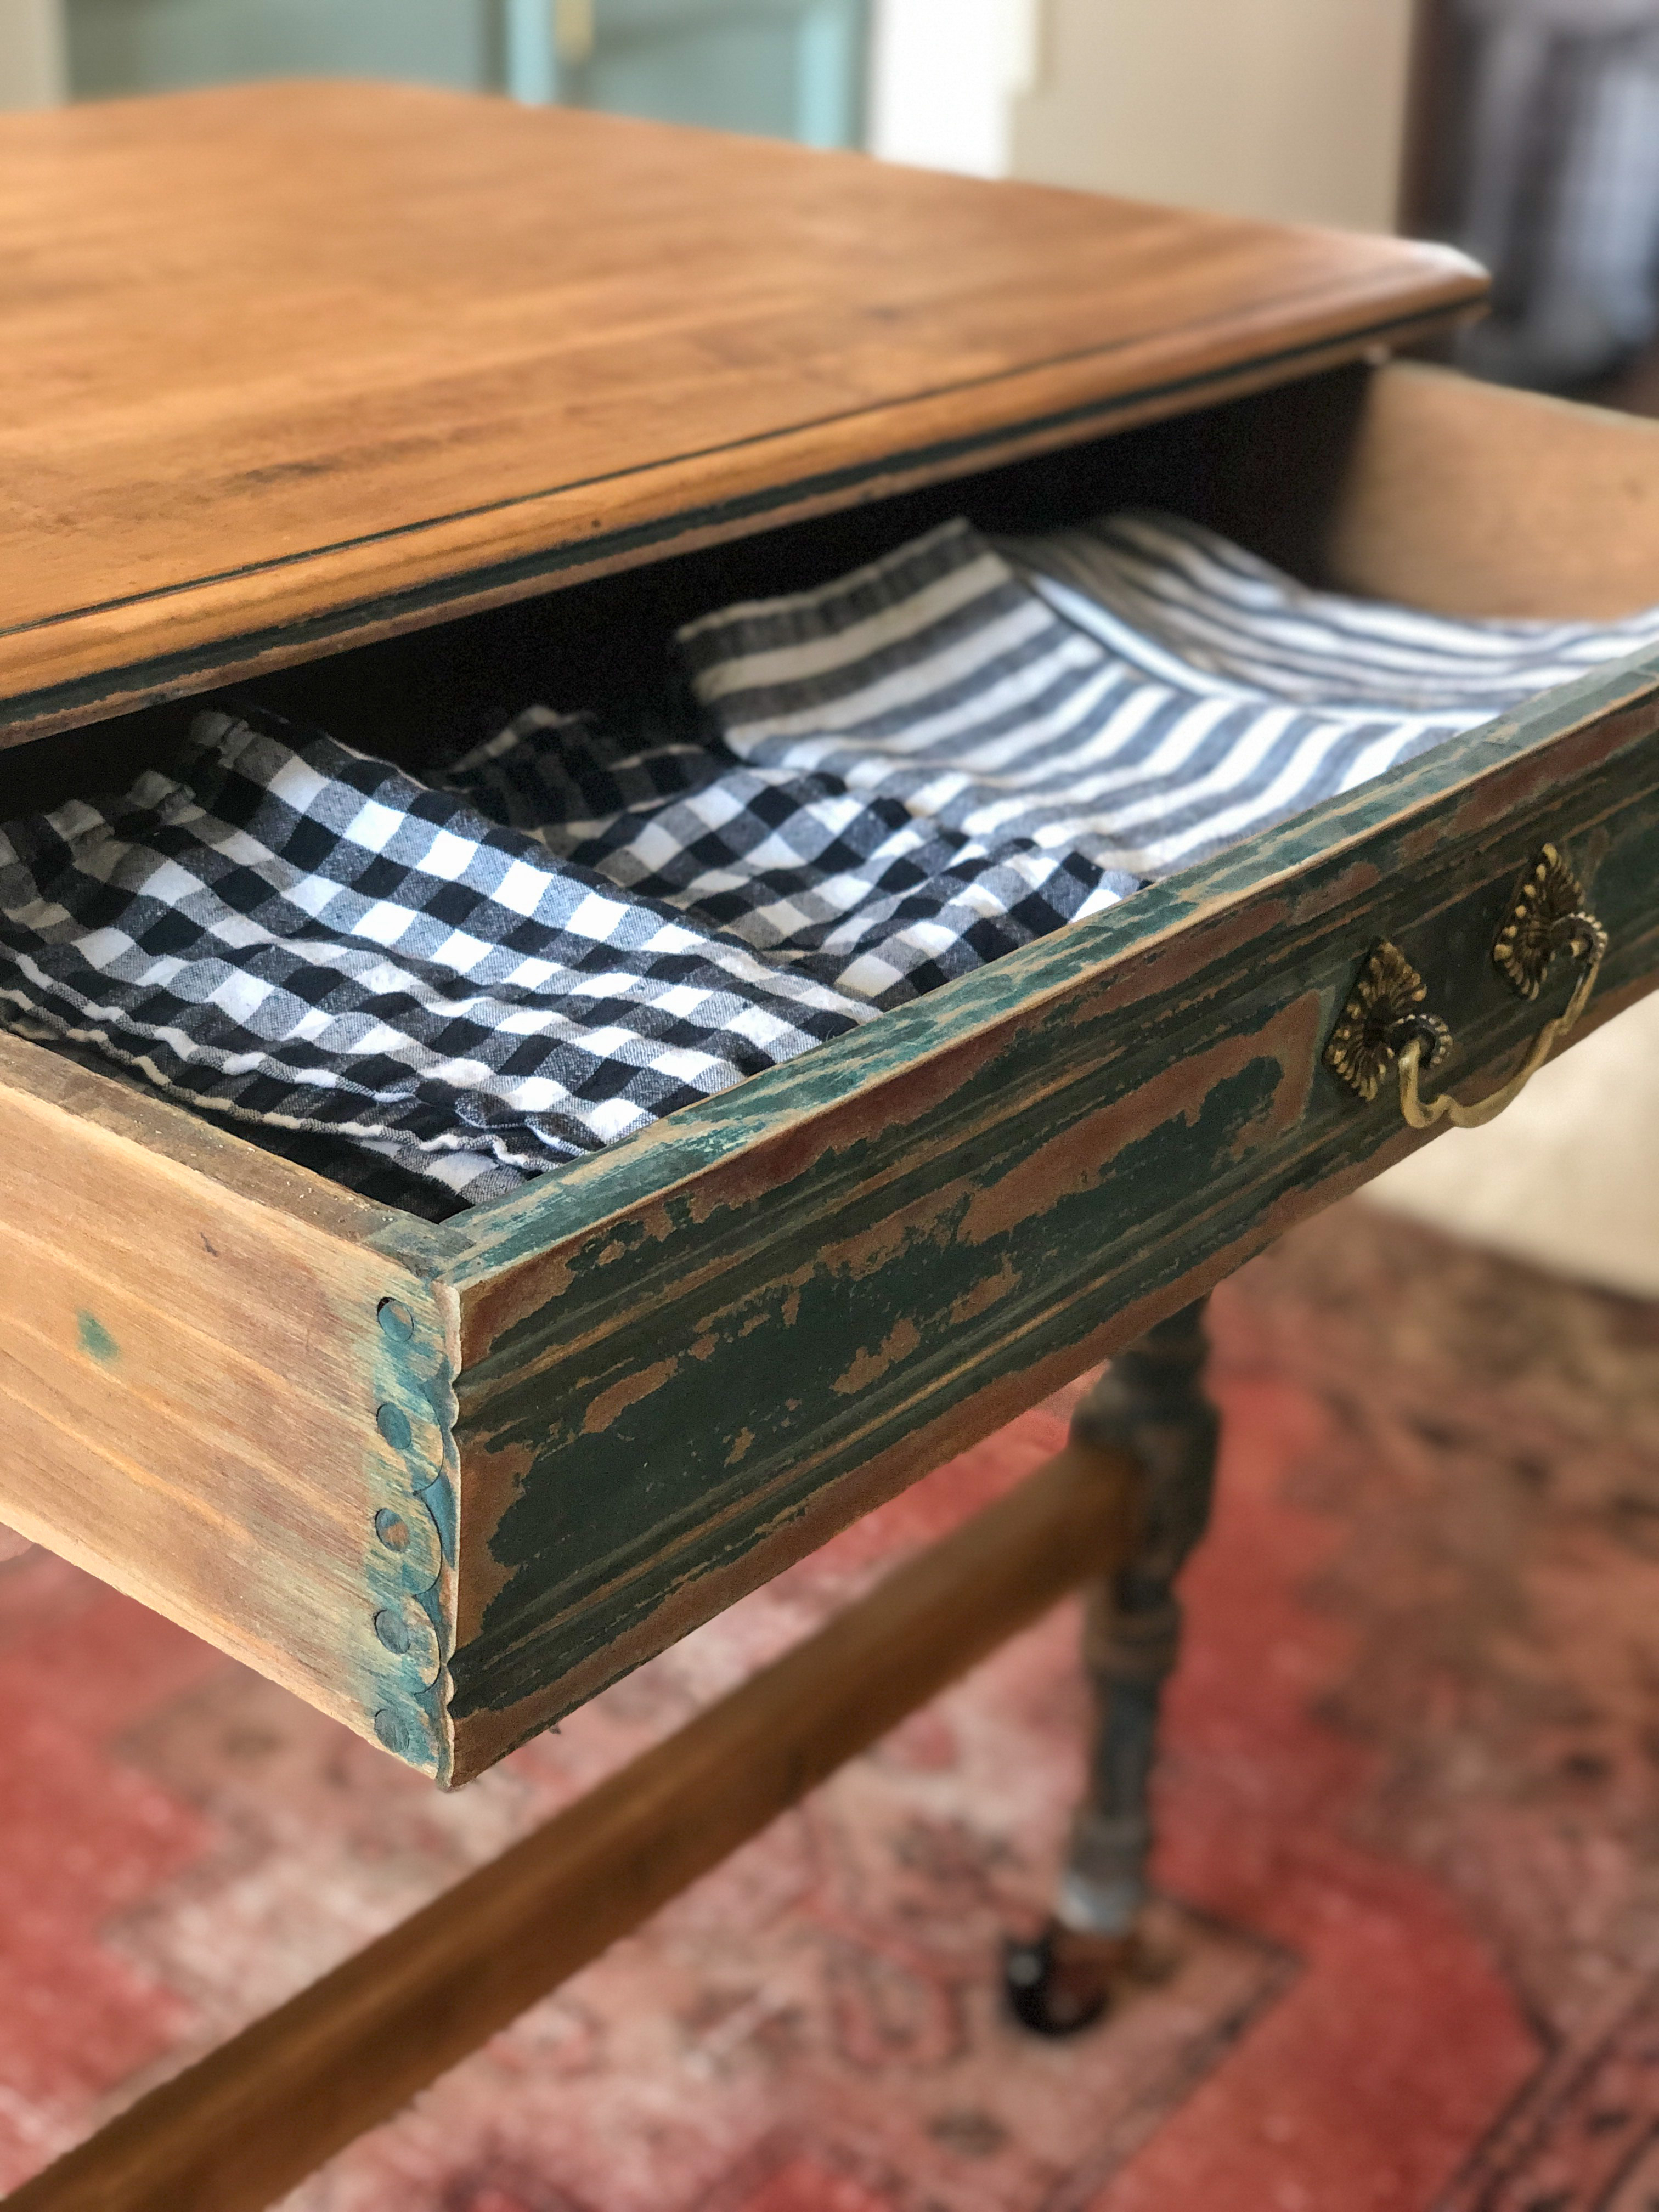
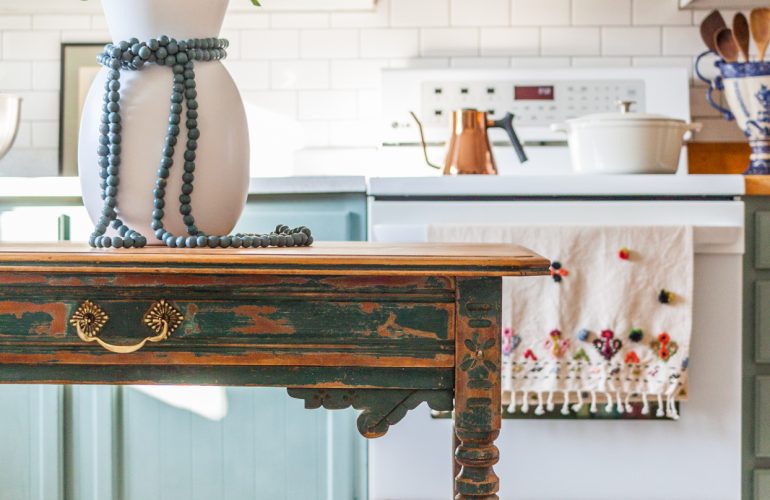
The scalloped dovetail on the inside of the drawer is one of the most unique craftsmanship details I’ve ever seen! This table is truly a work of art. It was beautiful when I bought it, but a little restoration work went a long way in accentuating the unique details and top quality materials.
Before
After


When I restore a piece of furniture, I love seeing the end result and thinking, “It must’ve always been this way!” Of course, this table didn’t start out with weathered green paint. But the layers and patina really tell the story of this piece, and it makes me smile to think about the person who spent hours crafting it by hand. I wish I knew when it was made or who made it, but I’m just thankful to have such a special piece to bring warmth and soul to the heart of our home!

The drawer is perfect for storing my cloth napkins!

If you want to repurpose an antique table as a kitchen island, consider restoring and sealing the top and adding a set of casters for extra height and mobility!
I spent $75 total on this project, which went towards the $65 table and $10 casters. I wouldn’t have been able to buy a NEW island for that cost, and I definitely wouldn’t have been able to find something with real wood or this much character. Shopping secondhand is a great way to fill your home with quality craftsmanship and plenty of personality without breaking the bank.
Be sure to check out the other participants in the Thrift Shop Challenge to see how they brought new life to their thrifted treasures!
At Charlotte’s House // Making Joy & Pretty Things // Love & Renovations
Making Manzanita // Small Stuff Counts // Green With Decor // Holland Avenue Home

Leave a Reply