

If you’re finding me through the One Room Challenge, welcome to my home on the internet! I’m Avery and I live in a charming 1910 Craftsman style parsonage in rural Iowa with my husband, Ben. You can learn more about me here, and see some of my previous design work in my kitchen, my High Style, Low Budget Sunroom from the Spring 2019 One Room Challenge, and my Cozy Eclectic Master Bedroom from the Fall 2018 One Room Challenge. My design style is warm, whimsical, and collected. I love sharing real-life home inspiration for people like me who want big style with a tiny budget. You can follow along with my homemaking adventures and thrifting trips & tips on the Holland Avenue Home Instagram.

For this round of the One Room Challenge, I will be finishing our unfinished basement to create a cozy family game room. You can catch up on my design plan through the link below!
Basement on a Budget: One Room Challenge Week One
Basement Demo and Waterproofing with Drylok: One Room Challenge Week 2
Catch-up and Ketchup: One Room Challenge Week Three
The Power of Paint: One Room Challenge Week Four
Week Five: You are here!

We are almost finished. I can’t believe I’m able to say that, but in just one short week I will be sharing the final reveal of our finished basement! This week, we finished painting, installed flooring, trim, the minibar, and built almost all of the furniture. I will give you a few photos of the finished, empty room, but I’m saving all of the furniture reveals for next week!
I hadn’t finished the paint touchups when I took these photos, but the trim looks even BETTER now that I’ve touched up the wall and trim paint. Ben’s brother-in-law, Kirk, is a trim wizard. He came to stay with us on Friday and Saturday to do the trim. I intended to help and learn how to install it, but we ended up needing more trim than I initially estimated so I spent most of the day sanding and painting trim. Kirk did an impeccable job installing all of the trim, which we created from dimensional pine lumber (more on that later).
Here’s a reminder of where we started only four weeks ago, and a glimpse of the completely finished space!


Like I said before, the edges look a little messy here because I hadn’t painted over the caulk yet. But can you believe the difference between these photos? I am completely overwhelmed by the finished result, and feel so undeserving of this space. We wanted to finish the basement so that we could have a large hosting space, and we aren’t wasting any time putting it to use. Ben is currently hosting a friend for games as I write this post! We will have an open house for our church members to come and hang out next weekend. (We live in a parsonage, which is a home that our church owns and maintains for the pastor and his family.)
Flooring
The flooring adds so much warmth to the room, and was incredibly easy to install. It is a loose-lay vinyl flooring that was generously sponsored by Iowa Floor Covering in Bondurant, Iowa.
Our exact flooring was recently discontinued, but there are many other options available from the manufacturer, Engineered Floors.
Why Loose-Lay Vinyl flooring?
Loose-lay vinyl is a floating floor that can be installed directly over concrete floors. Unlike vinyl plank flooring, loose-lay does not lock together. This allows for the product to adapt to a base floor that is not perfectly level. Our basement floors are not perfectly level, but the loose-lay is bendy and can compensate for this imperfection. The flooring does not need to be glued down, and can be removed if there were ever serious moisture issues in the basement.
How do you install loose-lay vinyl?
While it is not 100% necessary, you can secure the perimeter of the flooring with a pressure-sensitive vinyl flooring adhesive. This is a semi-permanent glue that holds the flooring in place, but could be removed later if you needed to. We used a small plastic trowel to apply a border of the adhesive around the perimeter of the room. The adhesive is fairly runny, and will be wet when you apply it. Wait until the glue is tacky and has changed color. When it is tacky, you can lay down your first strip of flooring. Some people recommend starting in the very center of the room with a pre-drawn straight line to ensure that your flooring is level. We were confident in the level-ness of our walls, so we used a chalk line to snap a guide onto the floor for our first row. Lay the planks snug against your guideline, and continue laying planks until you reach the wall. Measure the length you will need to fill the space.
Make sure to pull your planks from three different boxes while installing so that there is more variation in the woodgrain pattern on the planks.
We were able to cut the planks by scoring with a knife. Use a level and square to mark your line, and then score the plank with the knife. Once you’ve cut your end piece, you can lay it down with the factory edge against your previous plank (placing the scored edge against the wall where it will be covered by trim). You can use the remainder of your cut piece to start your next row.
It won’t hurt to use adhesive throughout your whole room, but it isn’t necessary. Loose-lay vinyl is designed to fit and lay snug without any adhesive. We were skeptical about this, but ended up being very surprised and pleased with the result! You just lay one plank next to the previous plank, and give it a little push to make sure it is as snug as possible. If your first row is level, you shouldn’t have any problem keeping the rows nice and snug.
If you come across an area that is not level enough for the plank to lay flat, you can use more adhesive to secure the ends of the plank. We had to do this over an old drain that is not necessary for the space. The floor just barely angles down toward the drain. We applied adhesive around the drain, and floored directly over it. We held these planks down with heavy objects until the adhesive cured completely.
The flooring we used is bendy, but very sturdy. It is a commercial loose-lay vinyl that is used in highly trafficked areas. We have no doubts about the longevity and durability of this product.
Ben and I had two friends helping us with the installation, but we could’ve handled it by ourselves if we had to. It took about four hours from start to finish to install the 400 square foot room, and a lot of that time was just sitting around waiting for the adhesive to become tacky. We had a cocktail break in the middle of this time lapse video while waiting for adhesive to dry around the drain. 🙂
How much does the flooring cost?
The retail price of this specific product is around $3 a square foot. It is a commercial grade product (nicer than residential grade), and does not require any underlayment to install. The flooring adhesive was around $20, and we did not use the whole container.
Trim

To save money in the budget, we decided to use precut pine lumber for our trim. We sourced all of our drywall and trim from a local lumberyard. They offered free delivery, which was excellent! Kirk wanted to have some extra lumber on hand so we didn’t run out, so we decided to take a quick trip to the lumberyard before they closed on Saturday morning. When we pulled up to get the 16ft boards, the employee said, “You’re gonna put it in that thing?” We said, “No! We’re gonna put it on top!” (People hire Kirk to do trim work in their homes, and he has done this many times with his CRV! It was strapped down very securely and we only had a very short, rural drive home.)
How did you prepare the lumber?
Before installing the trim, I sanded and painted every piece in my driveway. I first sanded with 80 grit sandpaper using an electric sander. Then, I painted one coat of Sherwin Williams Emerald Interior Latex in Alabaster with a satin finish. After the first coat dried, I sanded with a fine sanding block. This step was sooo worth it, and helped me achieve a really smooth paint job. I gave each piece a second coat, and then they were ready to be installed!

What size boards did you use?
Baseboards: 1×6
Doors: 1×4
Windows: 1×3
I ordered the largest lengths for each of my walls so that there would be minimal splicing of multiple boards. For example, I ordered two, 16 ft baseboards for our 28 ft wall. I ordered one 14 ft baseboard for each of our 13 ft walls.
The Minibar
Kirk and I also built a countertop surround for the DIY minibar. I found a cabinet at our thrift store for $5, and got lucky enough to find a mini fridge on Facebook Marketplace for $30 that is exactly the same height! We built this counter surround out of one 4×8 sheet of 3/4″ thick MDF.

Here are the cabinet and mini fridge, painted with Sherwin Williams Waterloo. I will paint the counter surround the same color, and will cover the counter with marble contact paper. Kirk built the floating shelves out of plywood, and I will finish them with a light stain and clear coat.

I prepped the mini fridge for paint by cleaning with mineral spirits to remove any grease and oil, then primed with Rustoleum Self-Etching primer. This was very easy to apply, and had a great coverage. You apply 2-3 thin coats, allowing 2 minutes in between coats for dry time. I used a small foam roller to apply two coats of paint to the cabinet and fridge.
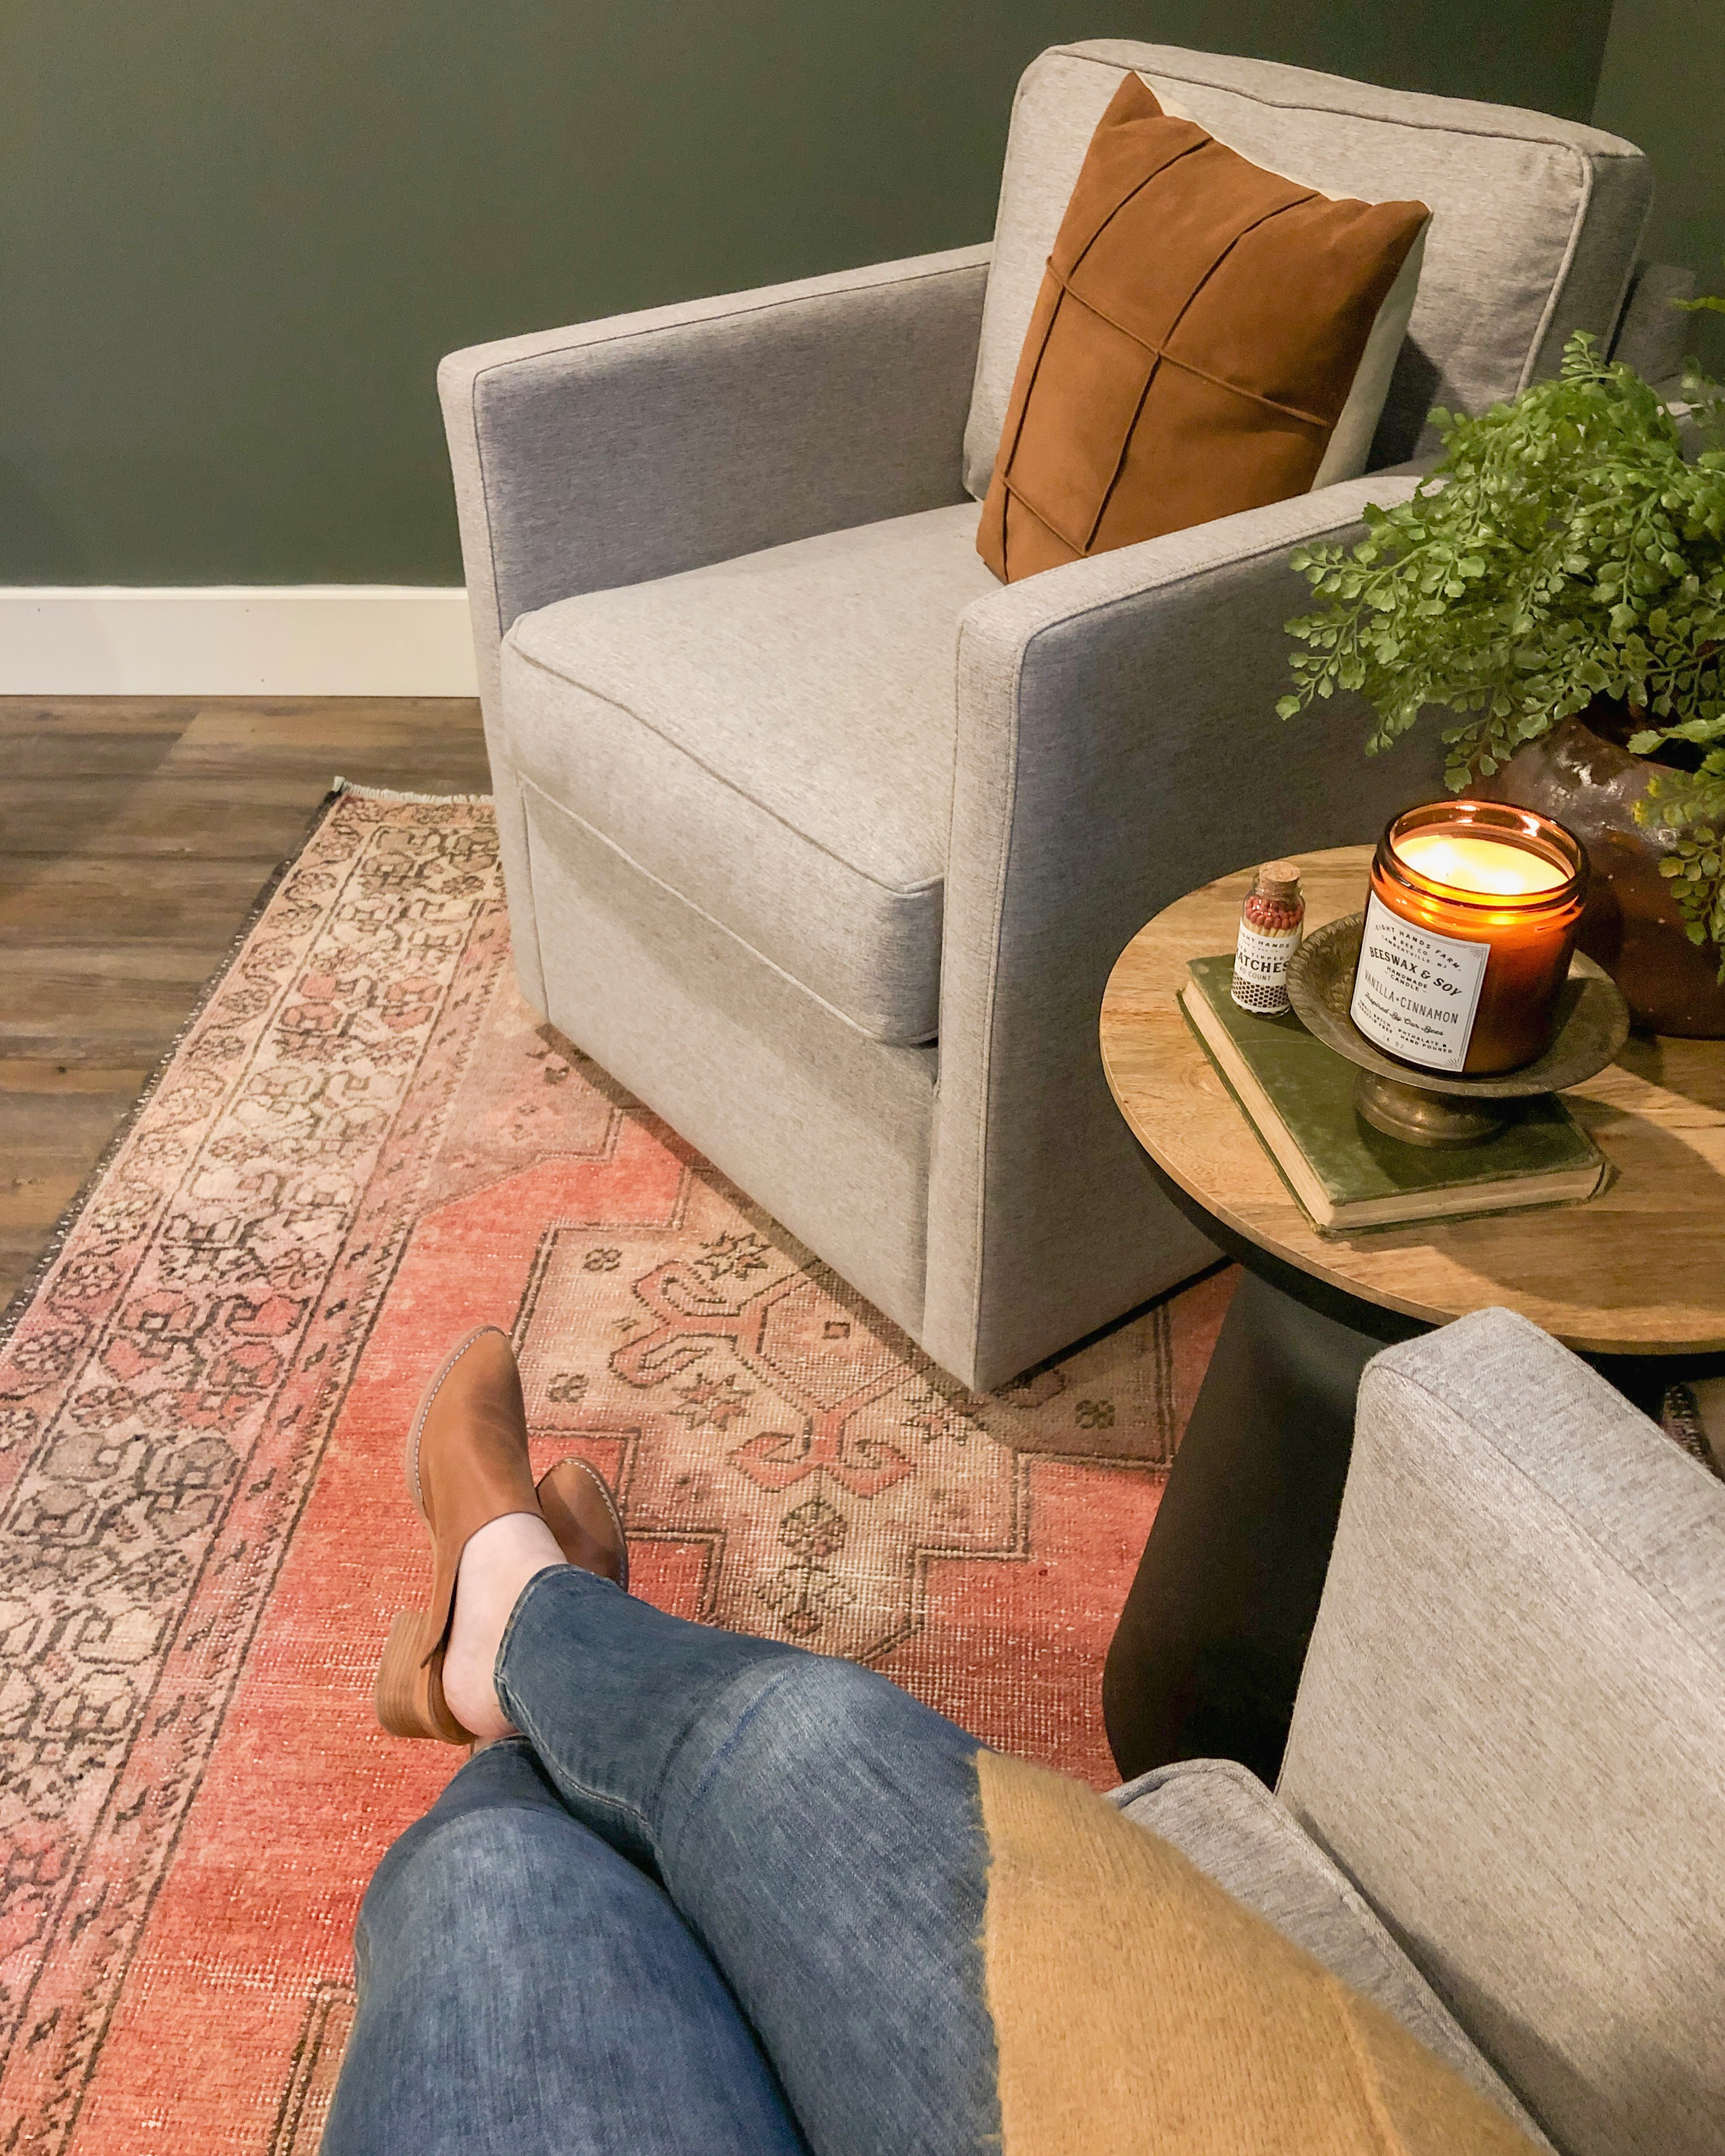
Here is one sneak peek of furniture in the space! This is the sitting area in the game room, next to the mini bar.
Before the big reveal next week, I still have quite a few projects to complete. However, I am completely confident that we will finish with plenty of time for me to style, shoot, and edit my photos!
Week Six To-Do’s:
- Paint stairs
- Paint door leading to storage room
- Touch up paint on minibar backsplash
- Install marble contact paper on minibar
- Finish floating shelves with stain and clear coat
- Paint game table
- Hang artwork
- Sew pillow covers
- Stock minibar
- Style, shoot, and edit photos
You can follow Holland Avenue Home on Instagram for plenty of behind-the-scenes progress before it comes to the blog next Wednesday. Head to the One Room Challenge blog to check out the other Guest Participants’ and Featured Designers’ posts for Week Five!
Don’t forget to check back next week for the big reveal!


Leave a Reply