
My friend Stephanie’s kitchen was just like mine. Large, dark, and perfectly fine. The dark 80’s cabinets are in great shape, but needed a little refreshing. When the lovely Tricia from The Purple Painted Lady® reached out to me about a partnership, I knew I wanted to help Stephanie with her kitchen.
*This post contains one affiliate link*
Tricia from The Purple Painted Lady® graciously mailed us enough chalk paint and supplies to give Stephanie a brand new kitchen! Not only was she kind and generous, but she was incredibly helpful during the design process. If you buy Annie Sloan Chalk Paint from The Purple Painted Lady®, she will help you select colors that work in your space. Tricia sent me photos of painted wood slices with the paint colors we chose so we could have a better idea of how they would look together in person. If you have any color or paint questions, she will help you throughout the entire process. The other great part of buying Annie Sloan Chalk Paint (ASCP) from The Purple Painted Lady® is that you can place your order online. Tricia mails the paint quickly and safely, includes tons of informational resources, and even decorates your box! Stephanie and I are both very thankful for this partnership with Tricia, and this post would be impossible without her. (Thank you, Tricia! You’re wonderful!)
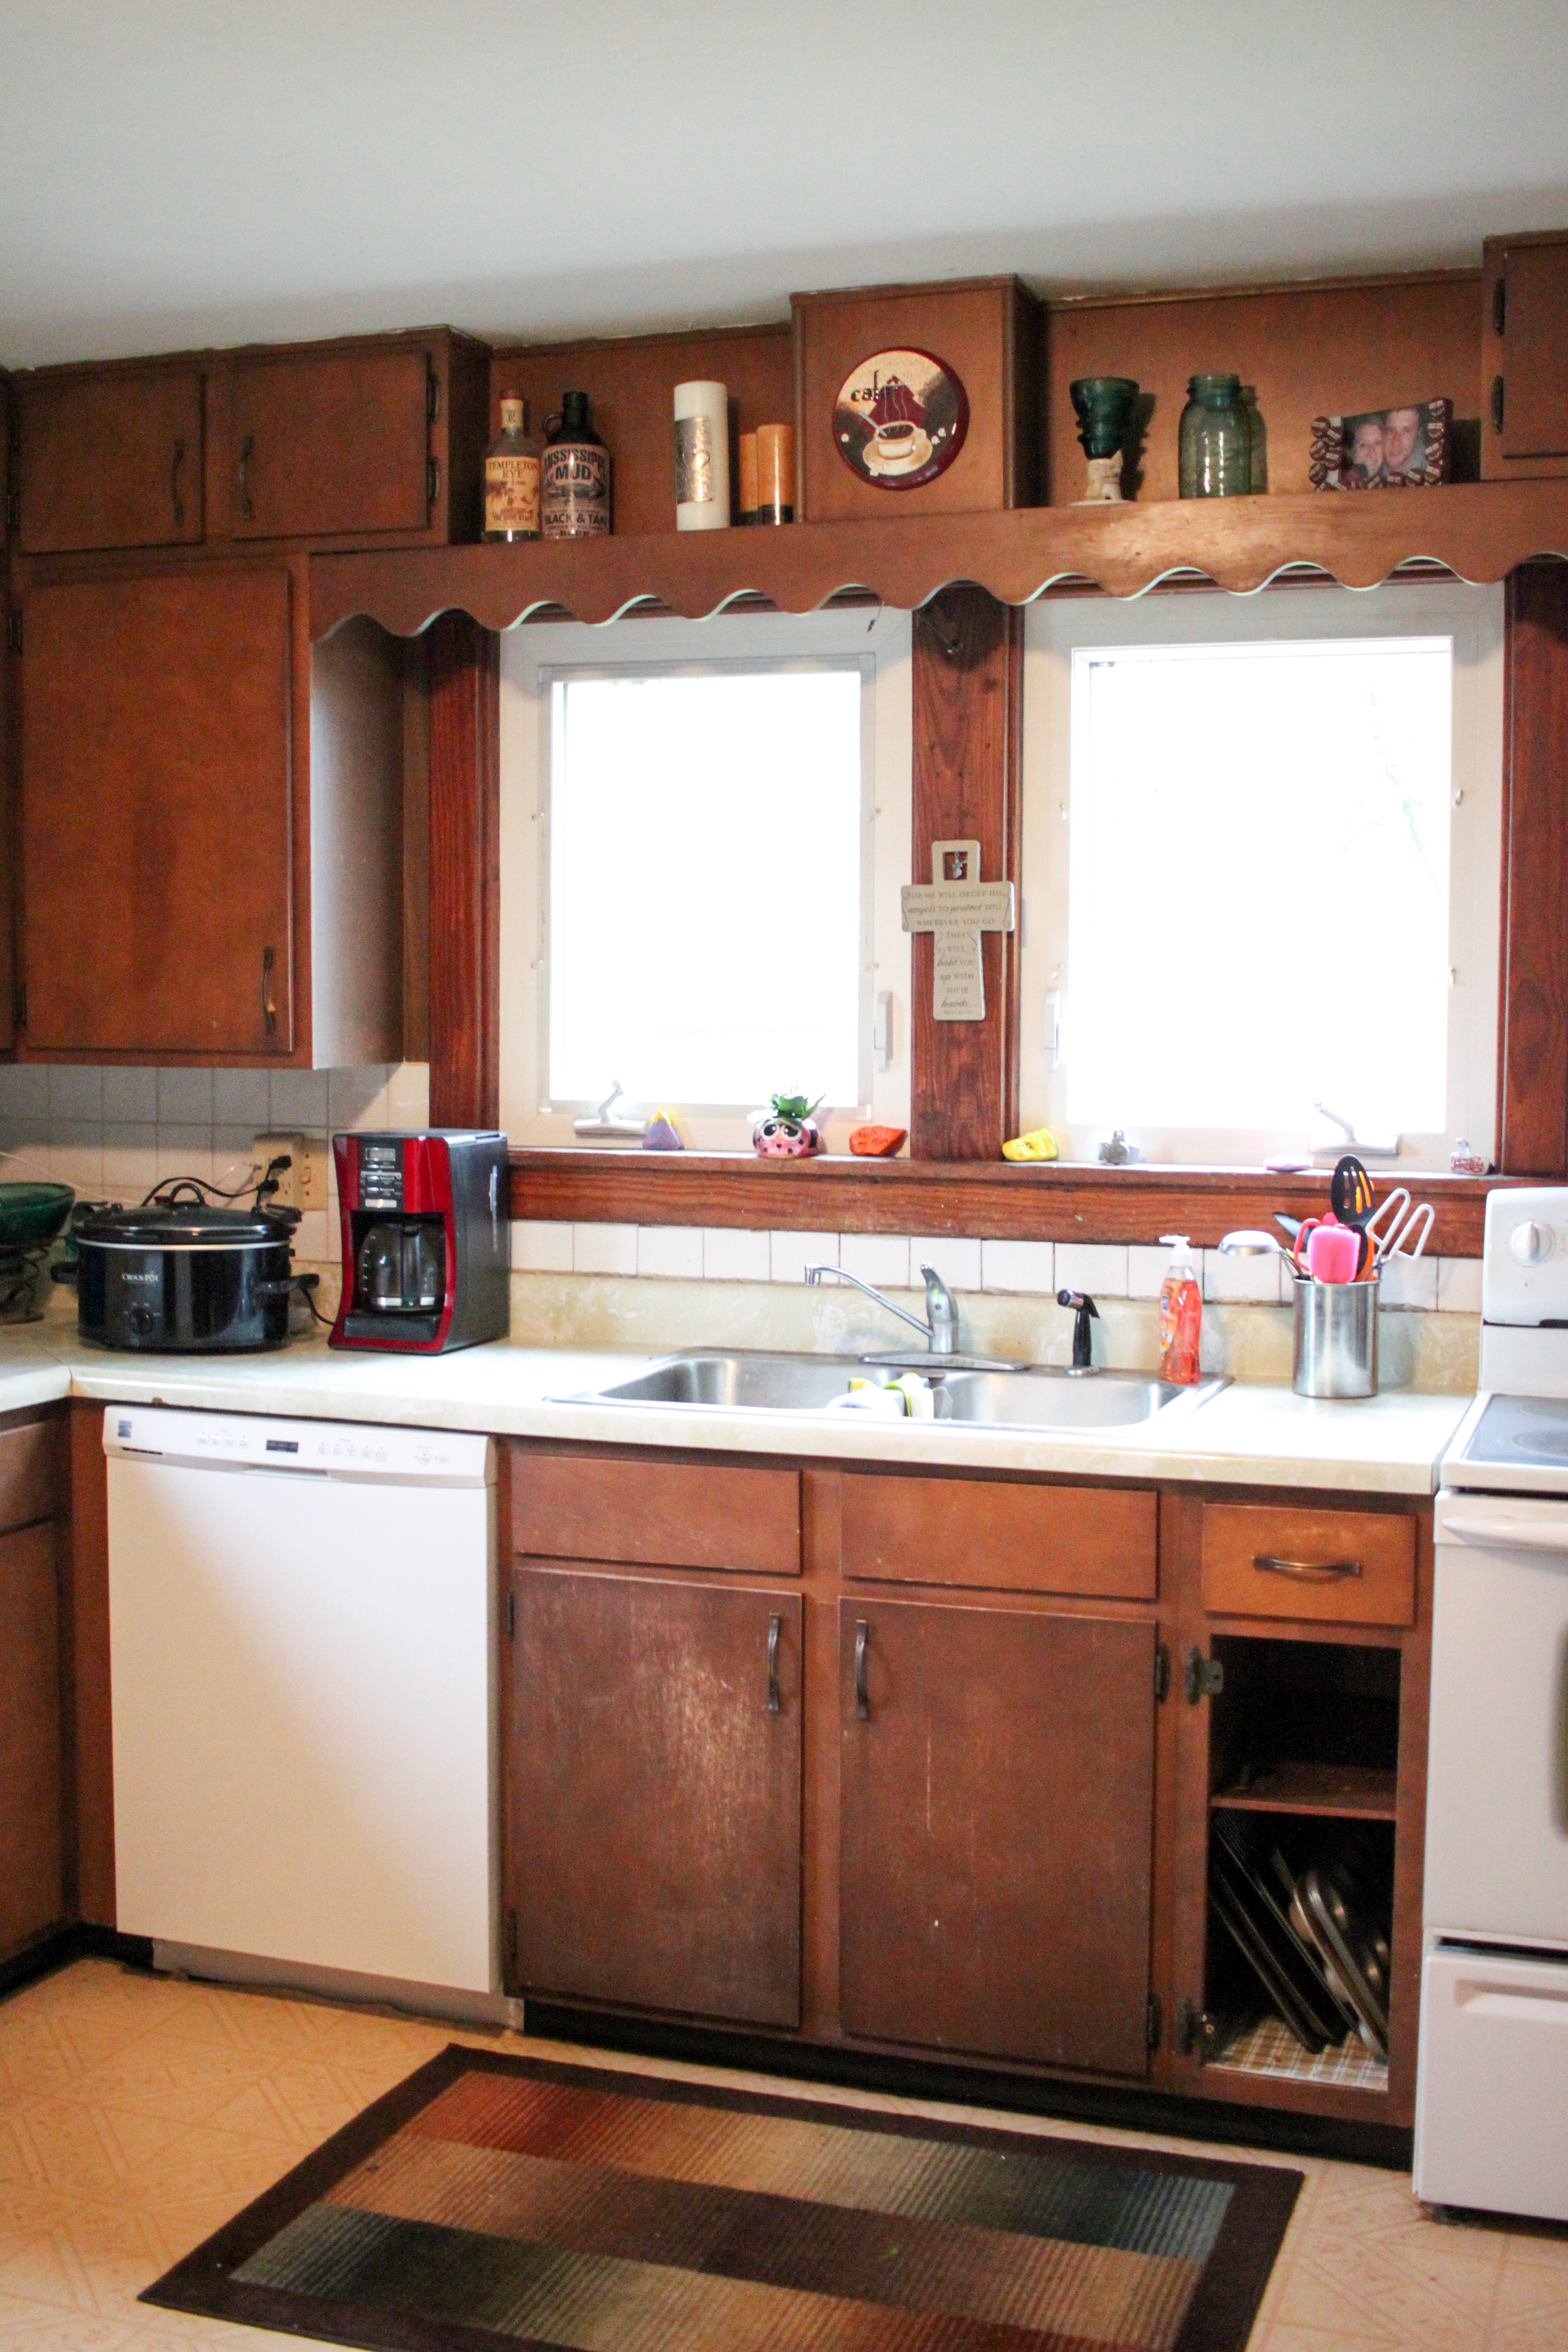
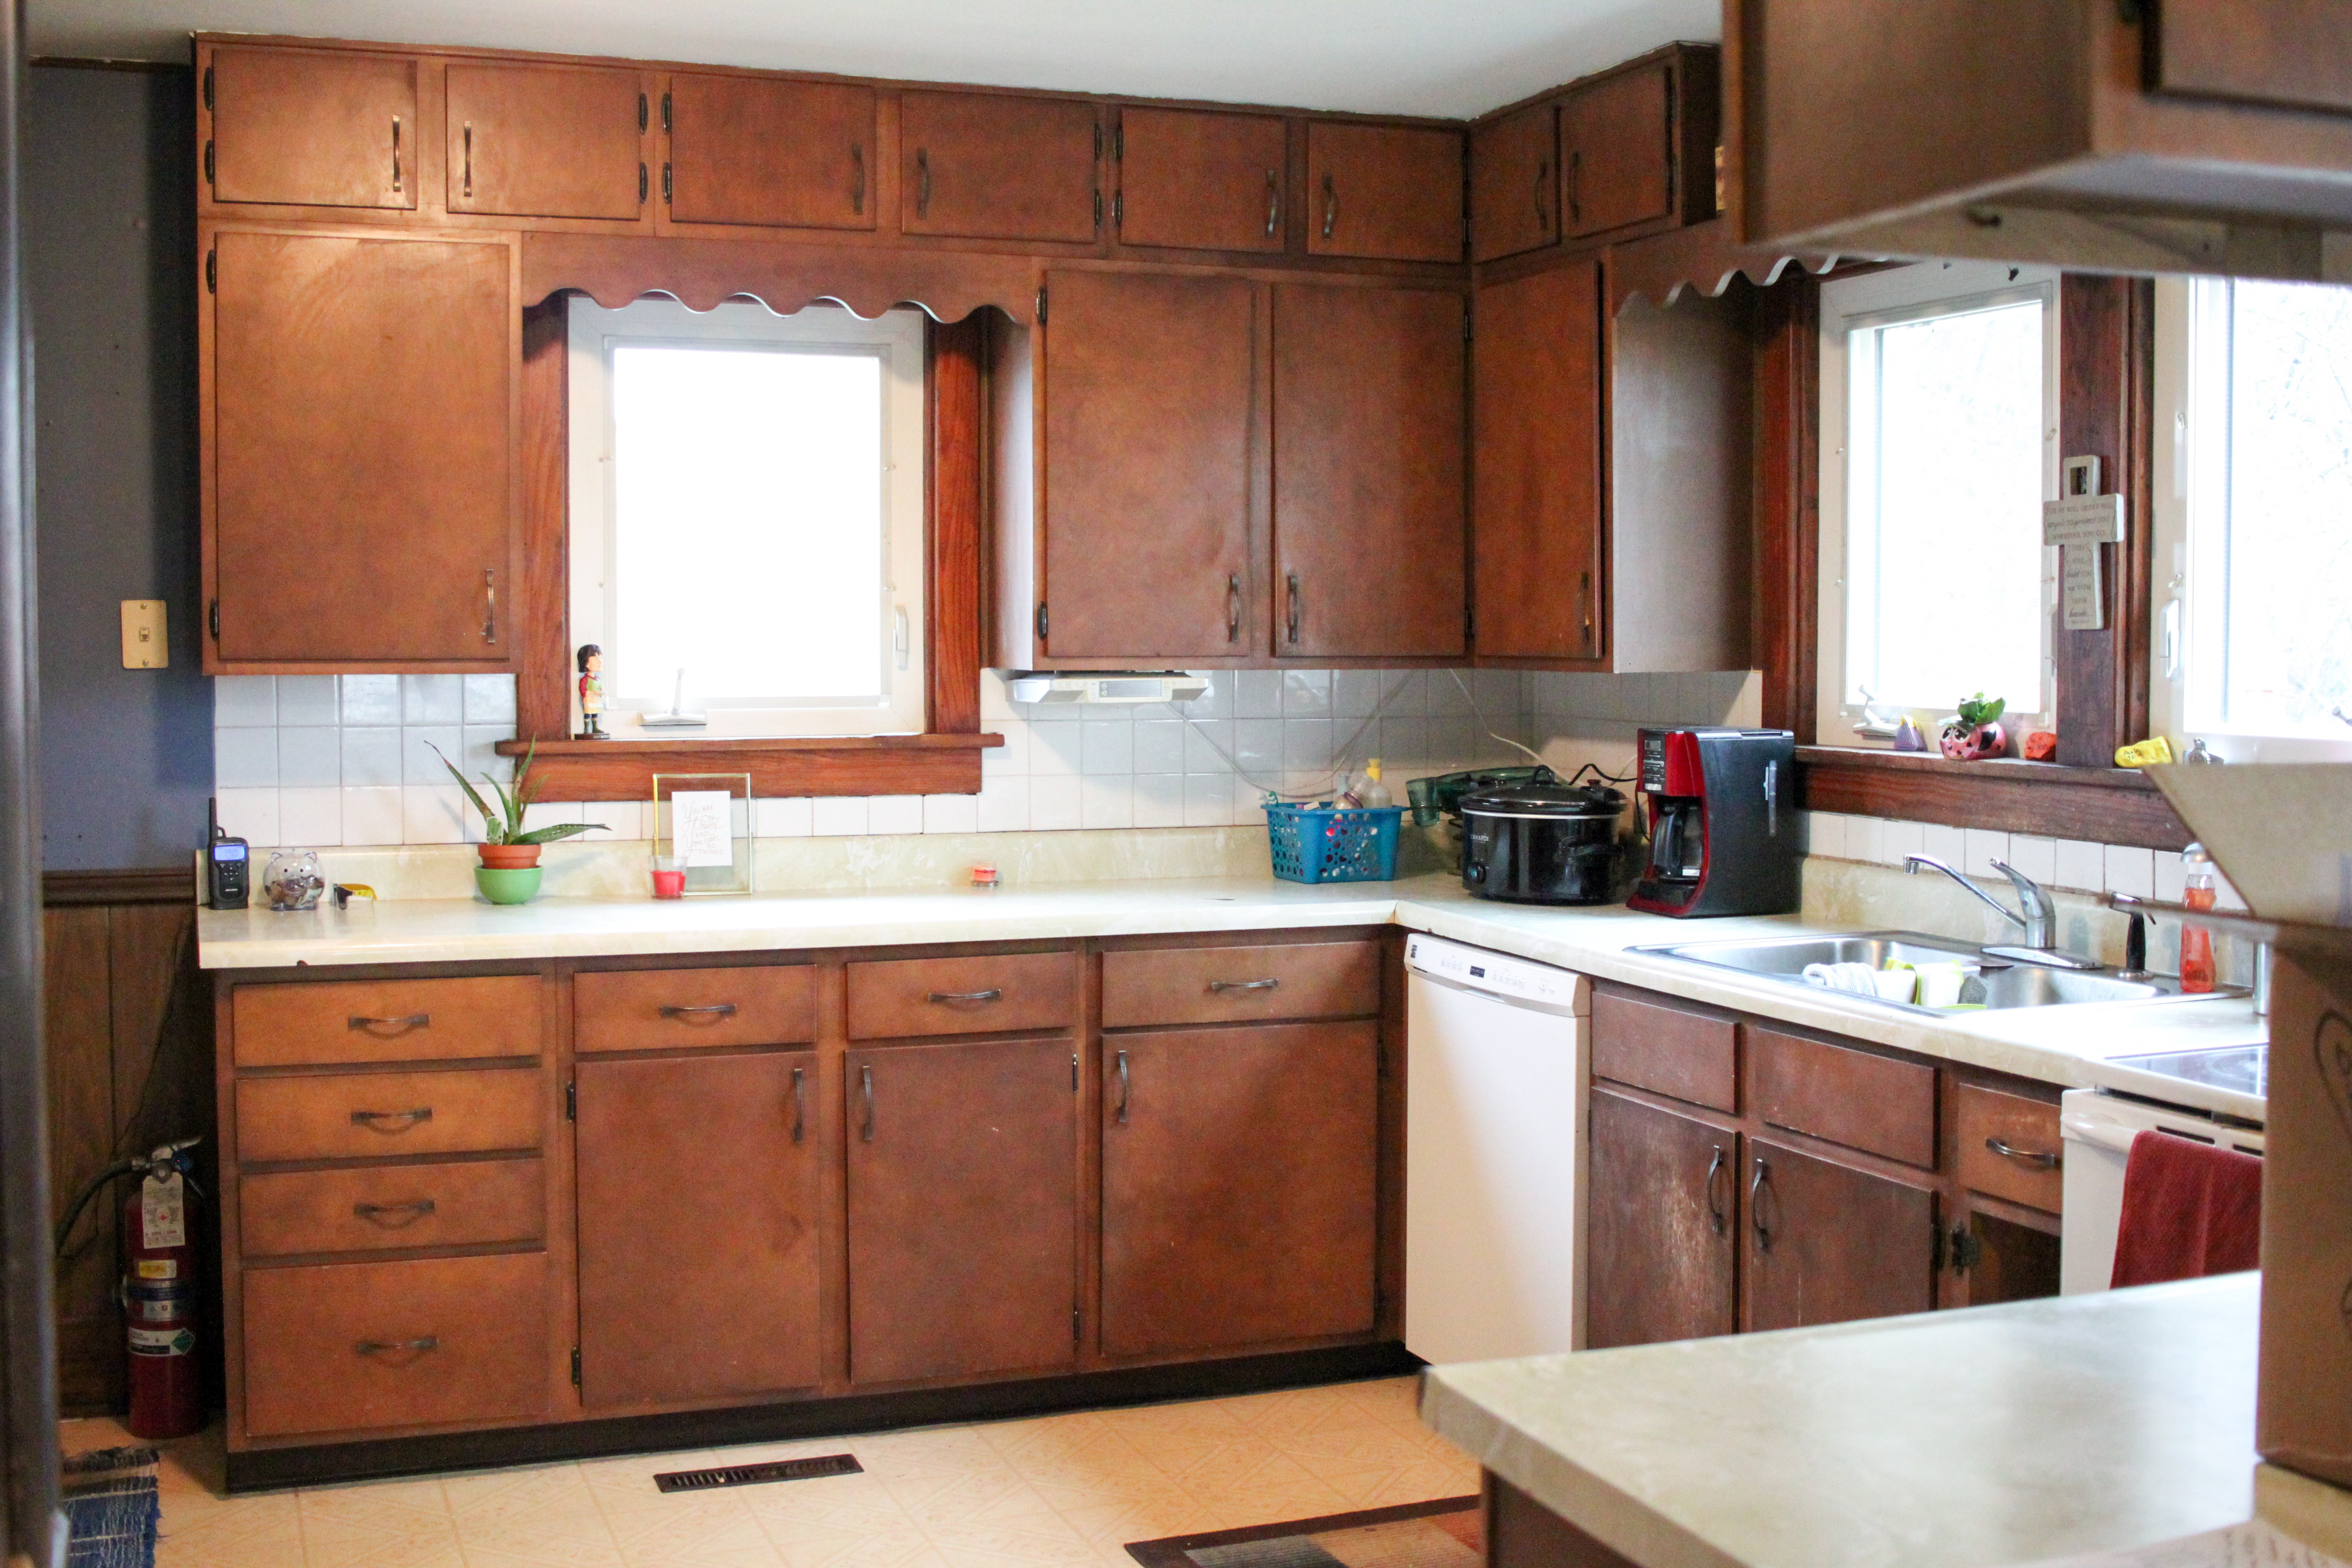
Here are some before photos of Stephanie’s kitchen. When designing, we worked around her existing ivory laminate floors, the pale green counters, and the white backsplash.


This is my friend, Stephanie!

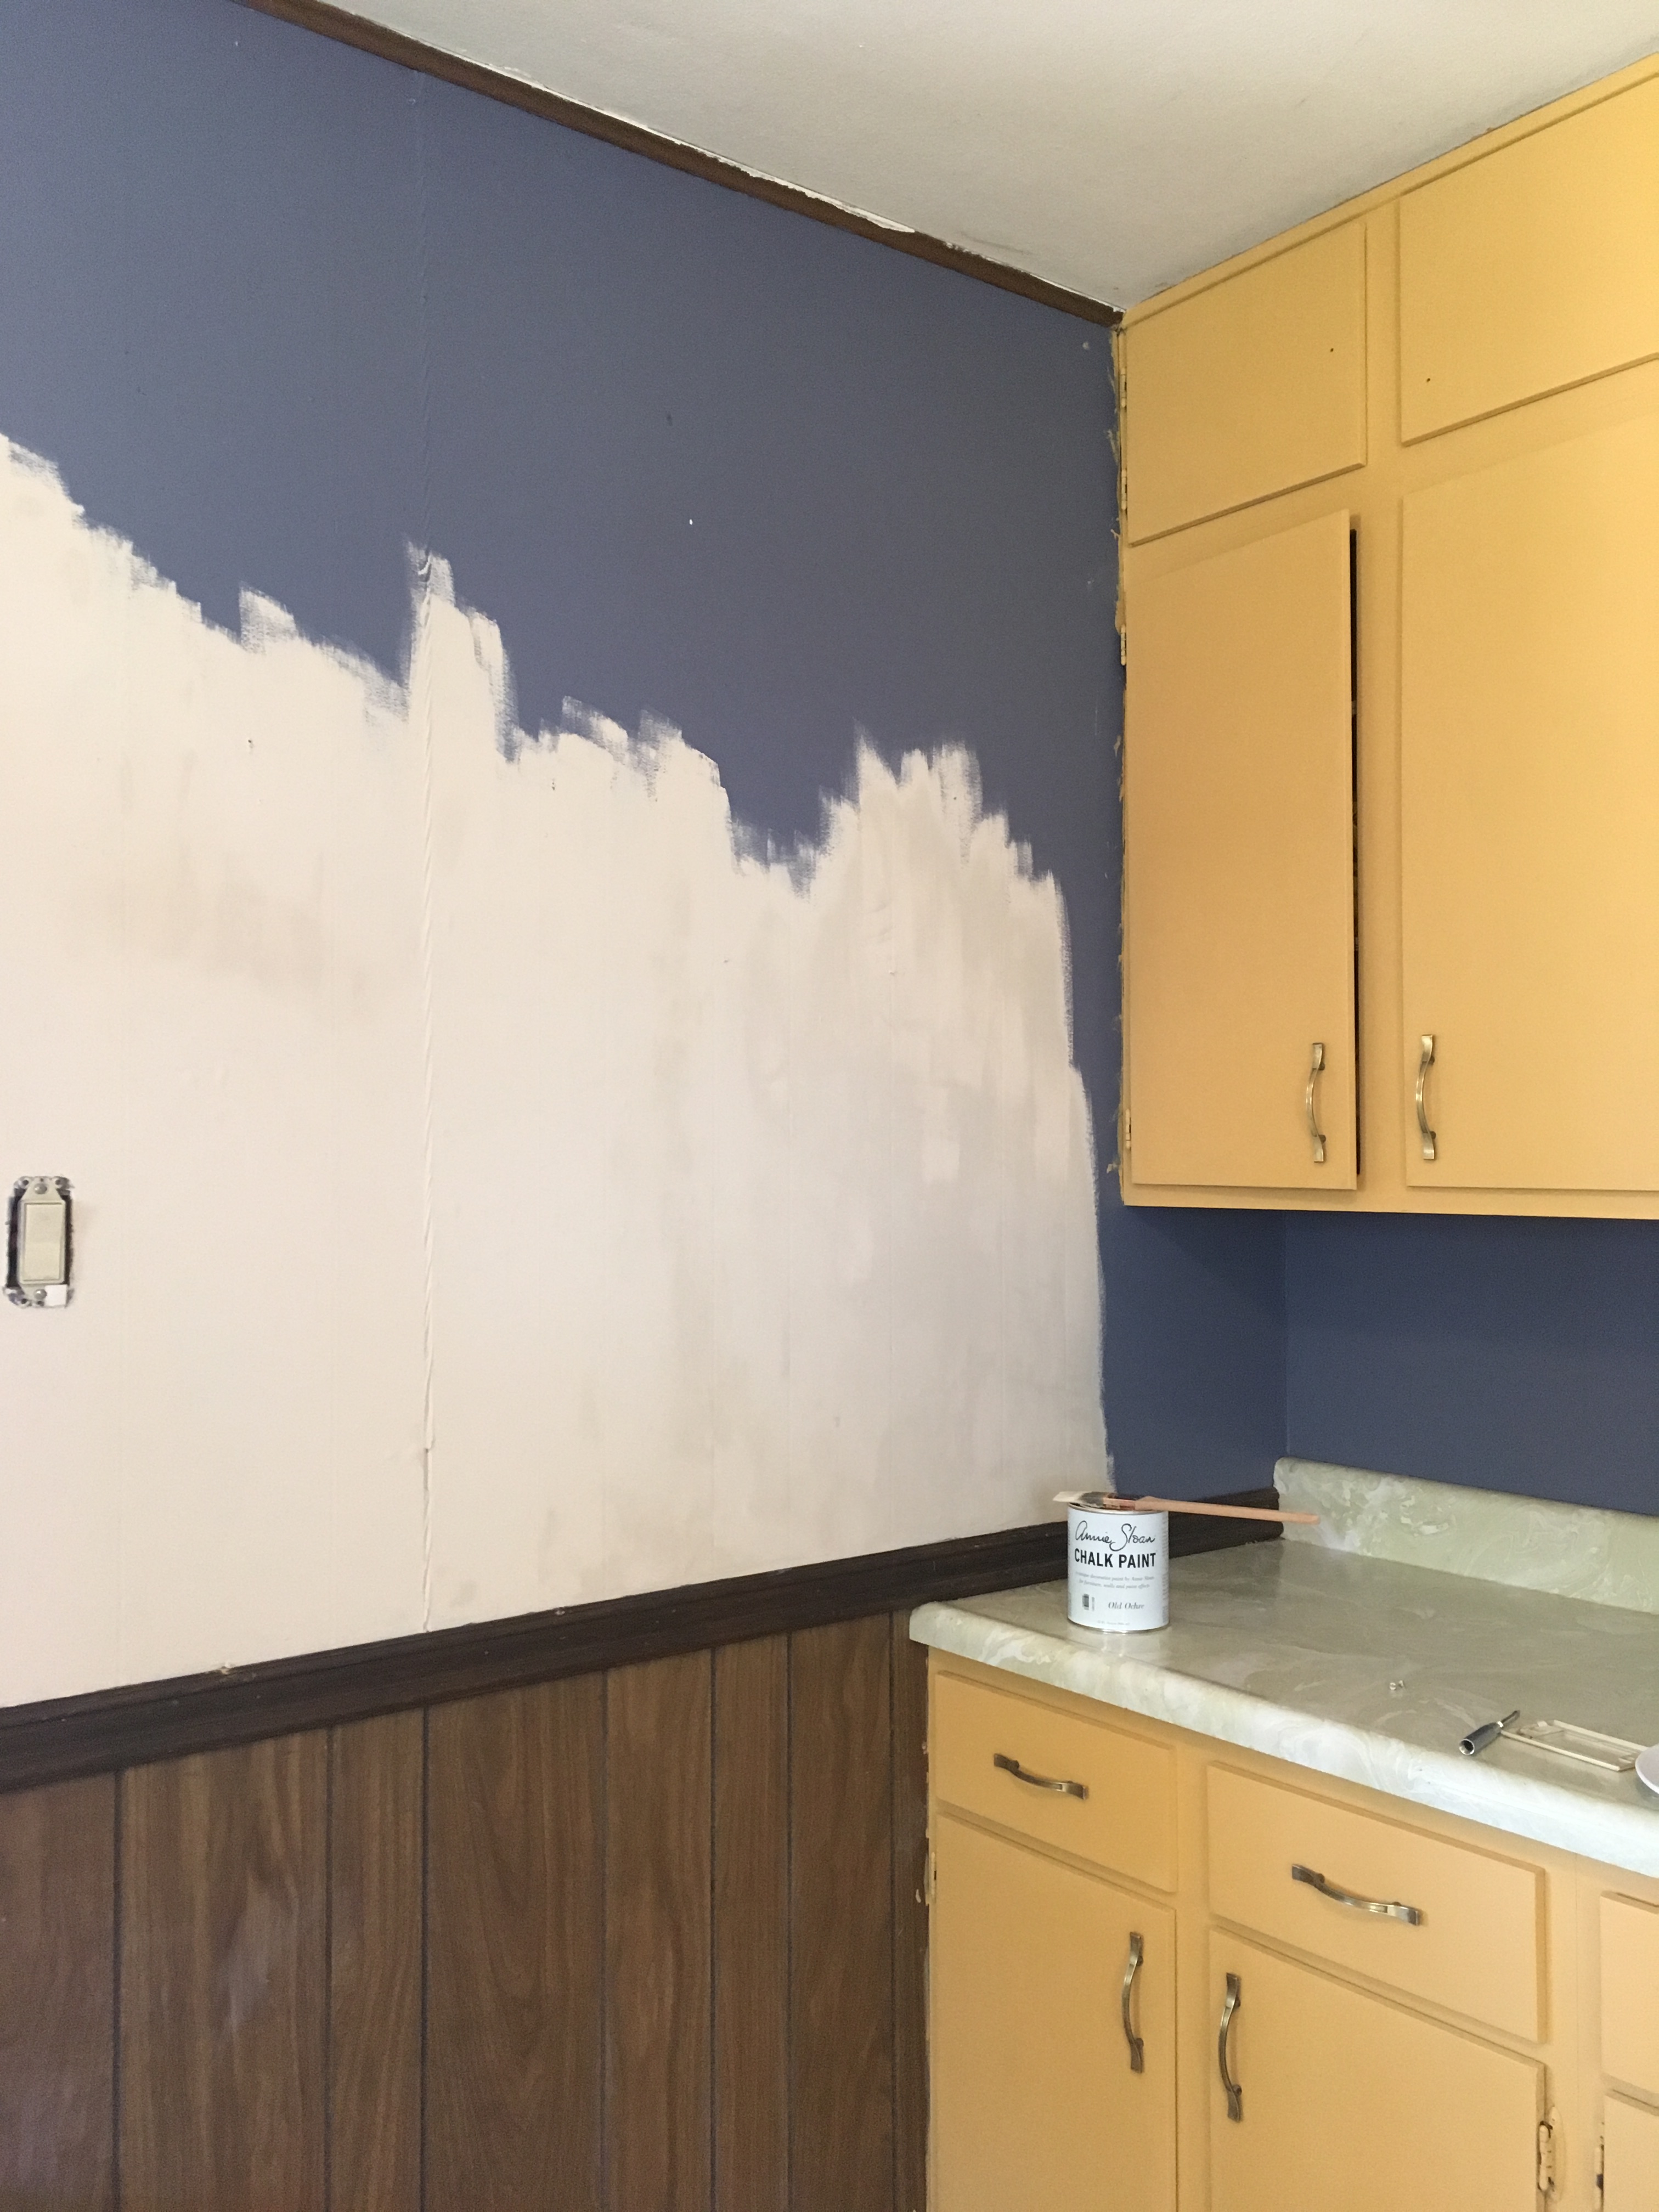
Stephanie and her husband Nathan did not want white cabinets or anything with bold colors. Stephanie was drawn to the Versailles paint, which is a pale shade of green. We decided to go with Versailles for the upper cabinets and Coco for the bottoms. Coco is a warm greige that would complement the ivory floors and pale green counters. We chose Old Ochre, a neutral ivory, for the walls. Stephanie also wanted a fun pop of color, so we chose Arles for the small section of cabinets around the refrigerator.
If you don’t know what colors you would like to use in a design, start by eliminating the colors you definitely don’t want. We knew that white, black, and bright bold colors were off the table. This limited palette made it easier to choose between the remaining colors.


Coco (Lowers) + Versailles (Uppers)
Old Ochre (Walls) + Arles (Accent Cabinets)
I won’t be writing about the Chalk Painting process in this post. I wrote about how I chalk painted my kitchen in the post $200 Kitchen Update: Sources and Process.
The Purple Painted Lady ® also has great resources for the painting and waxing process on her website.
Here are a few progress shots. Stephanie did the majority of the painting herself.


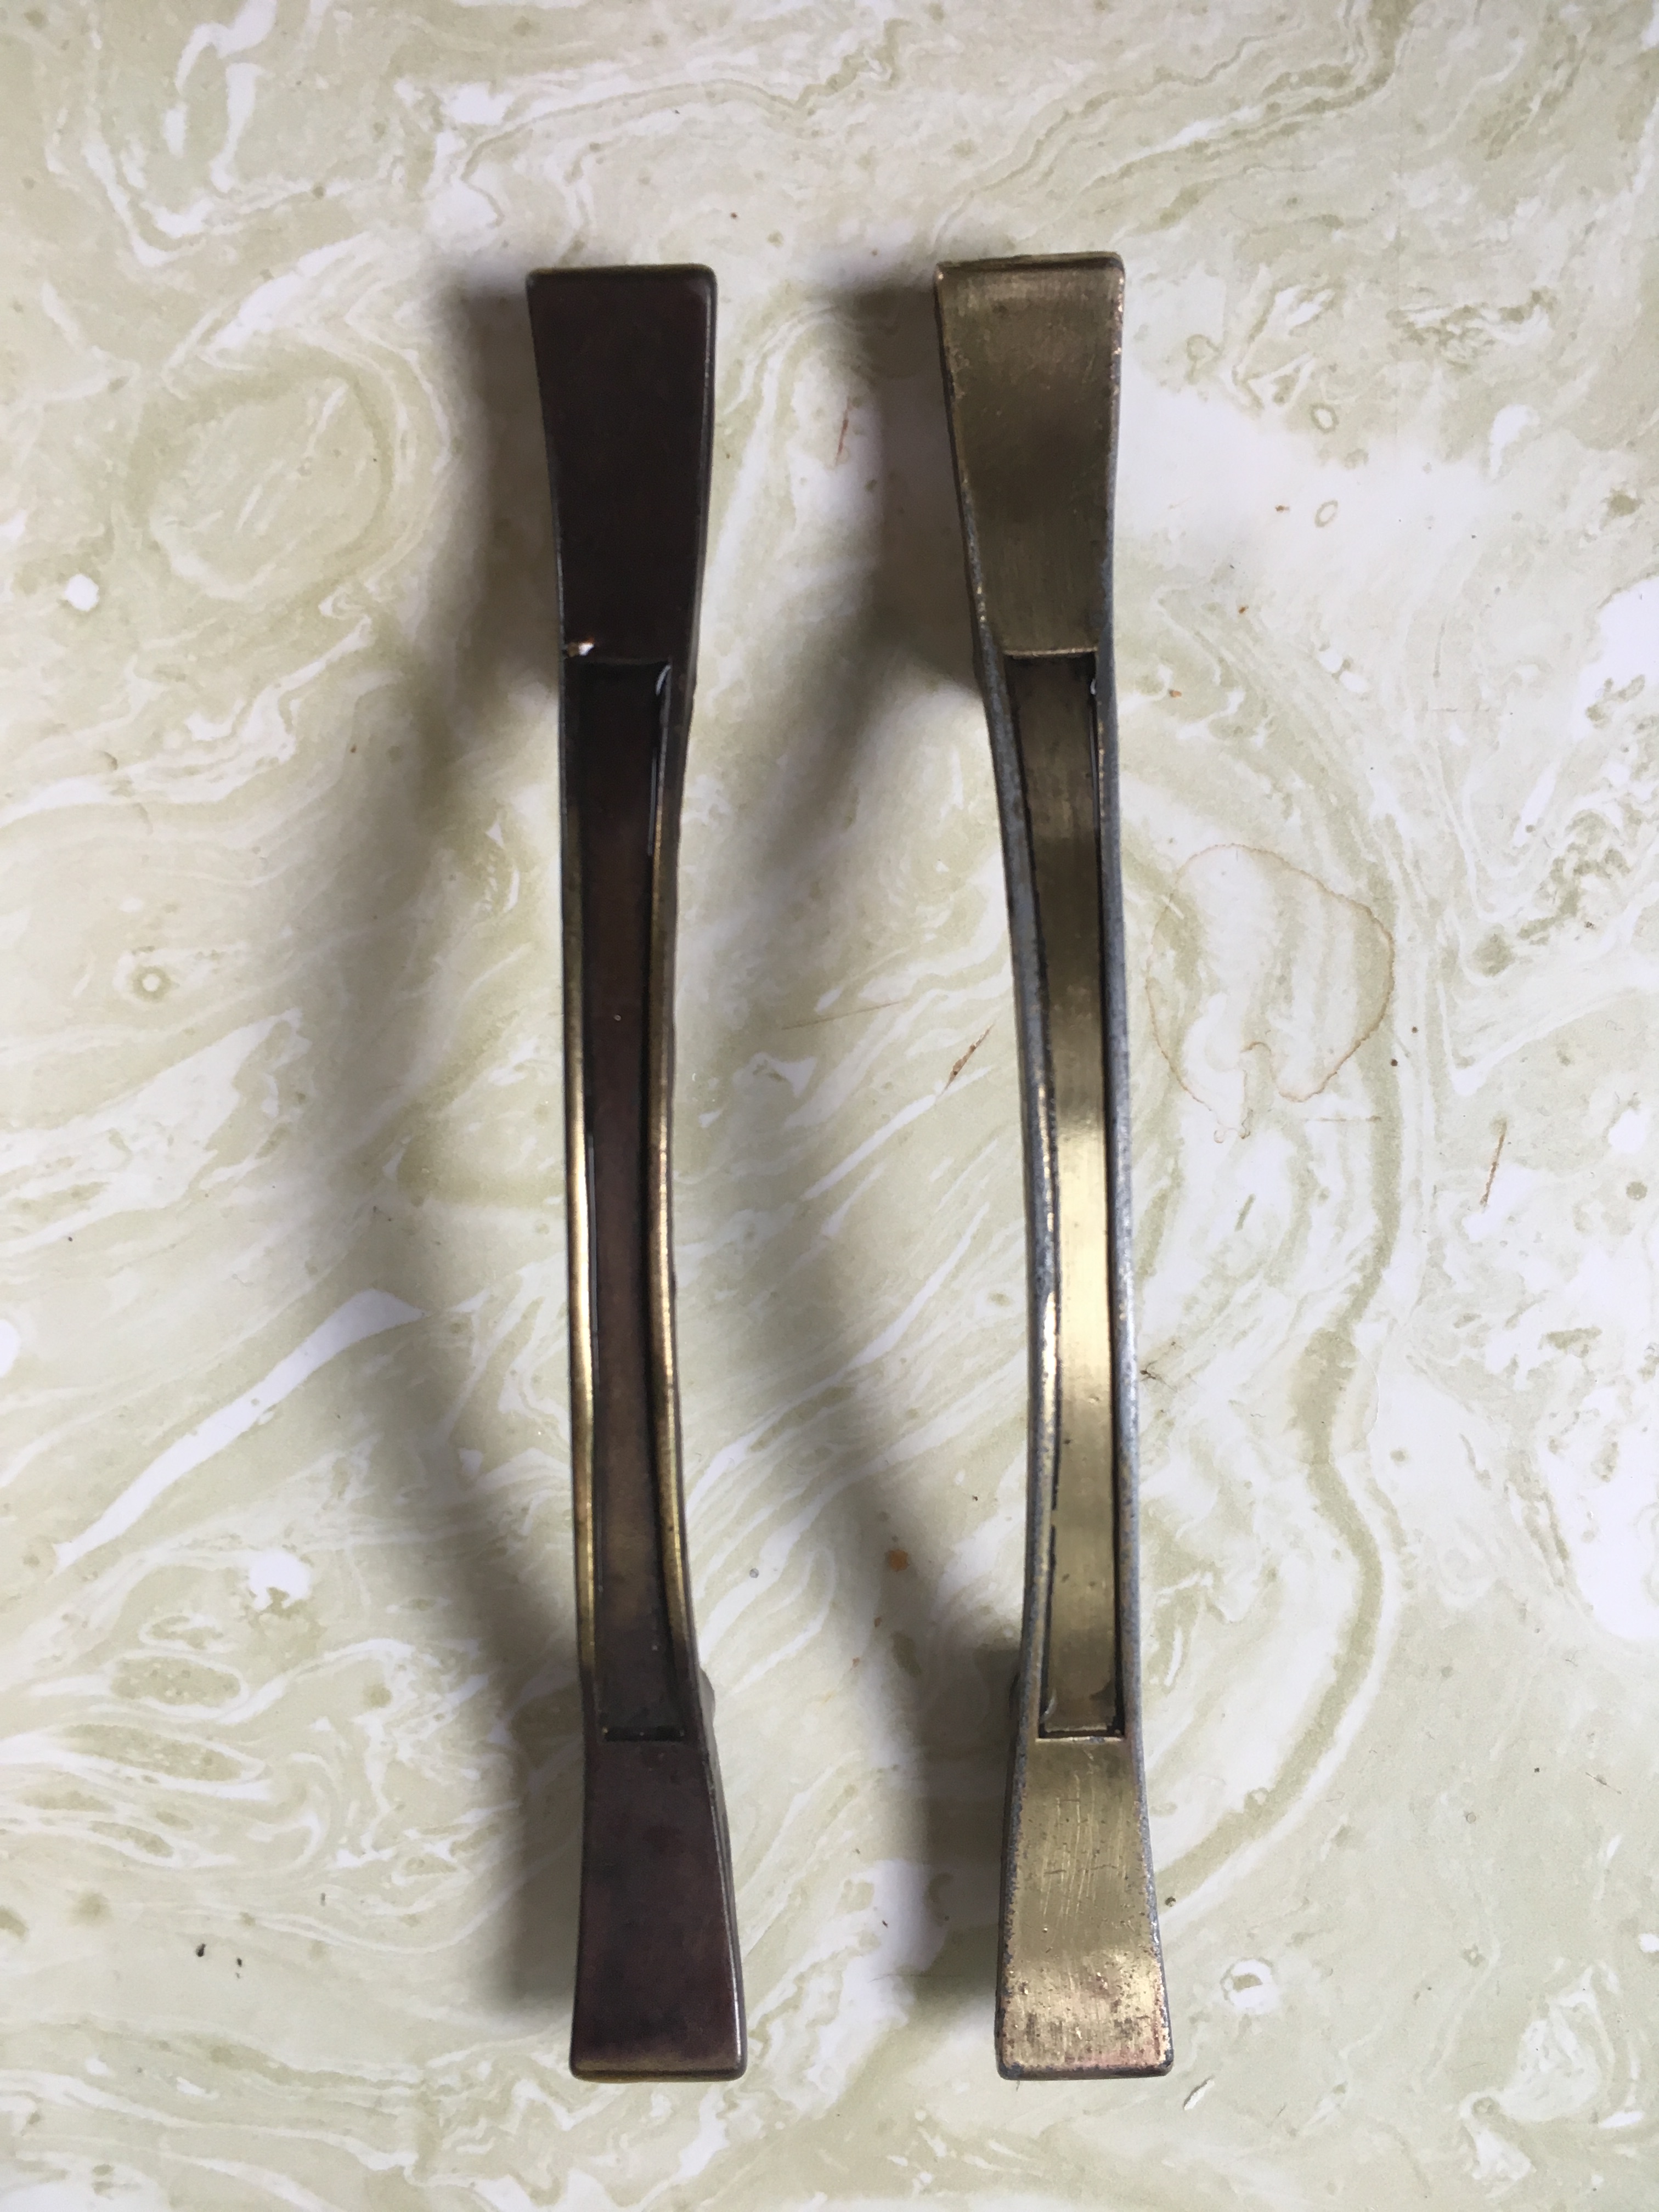
We painted the cabinets and walls, and scrubbed the hardware with a vinegar solution and natural cleaner. The handles used to be grimy and dark, but were shiny gold underneath! This goes to show that a little bit of work goes a long way, and can save large amounts of money.

Me and Stephanie with our painting buddy, Emmett! The Purple Painted Lady® gave us painting aprons to wear while we worked.
Here are some final photos of Stephanie’s beautiful “new” kitchen!


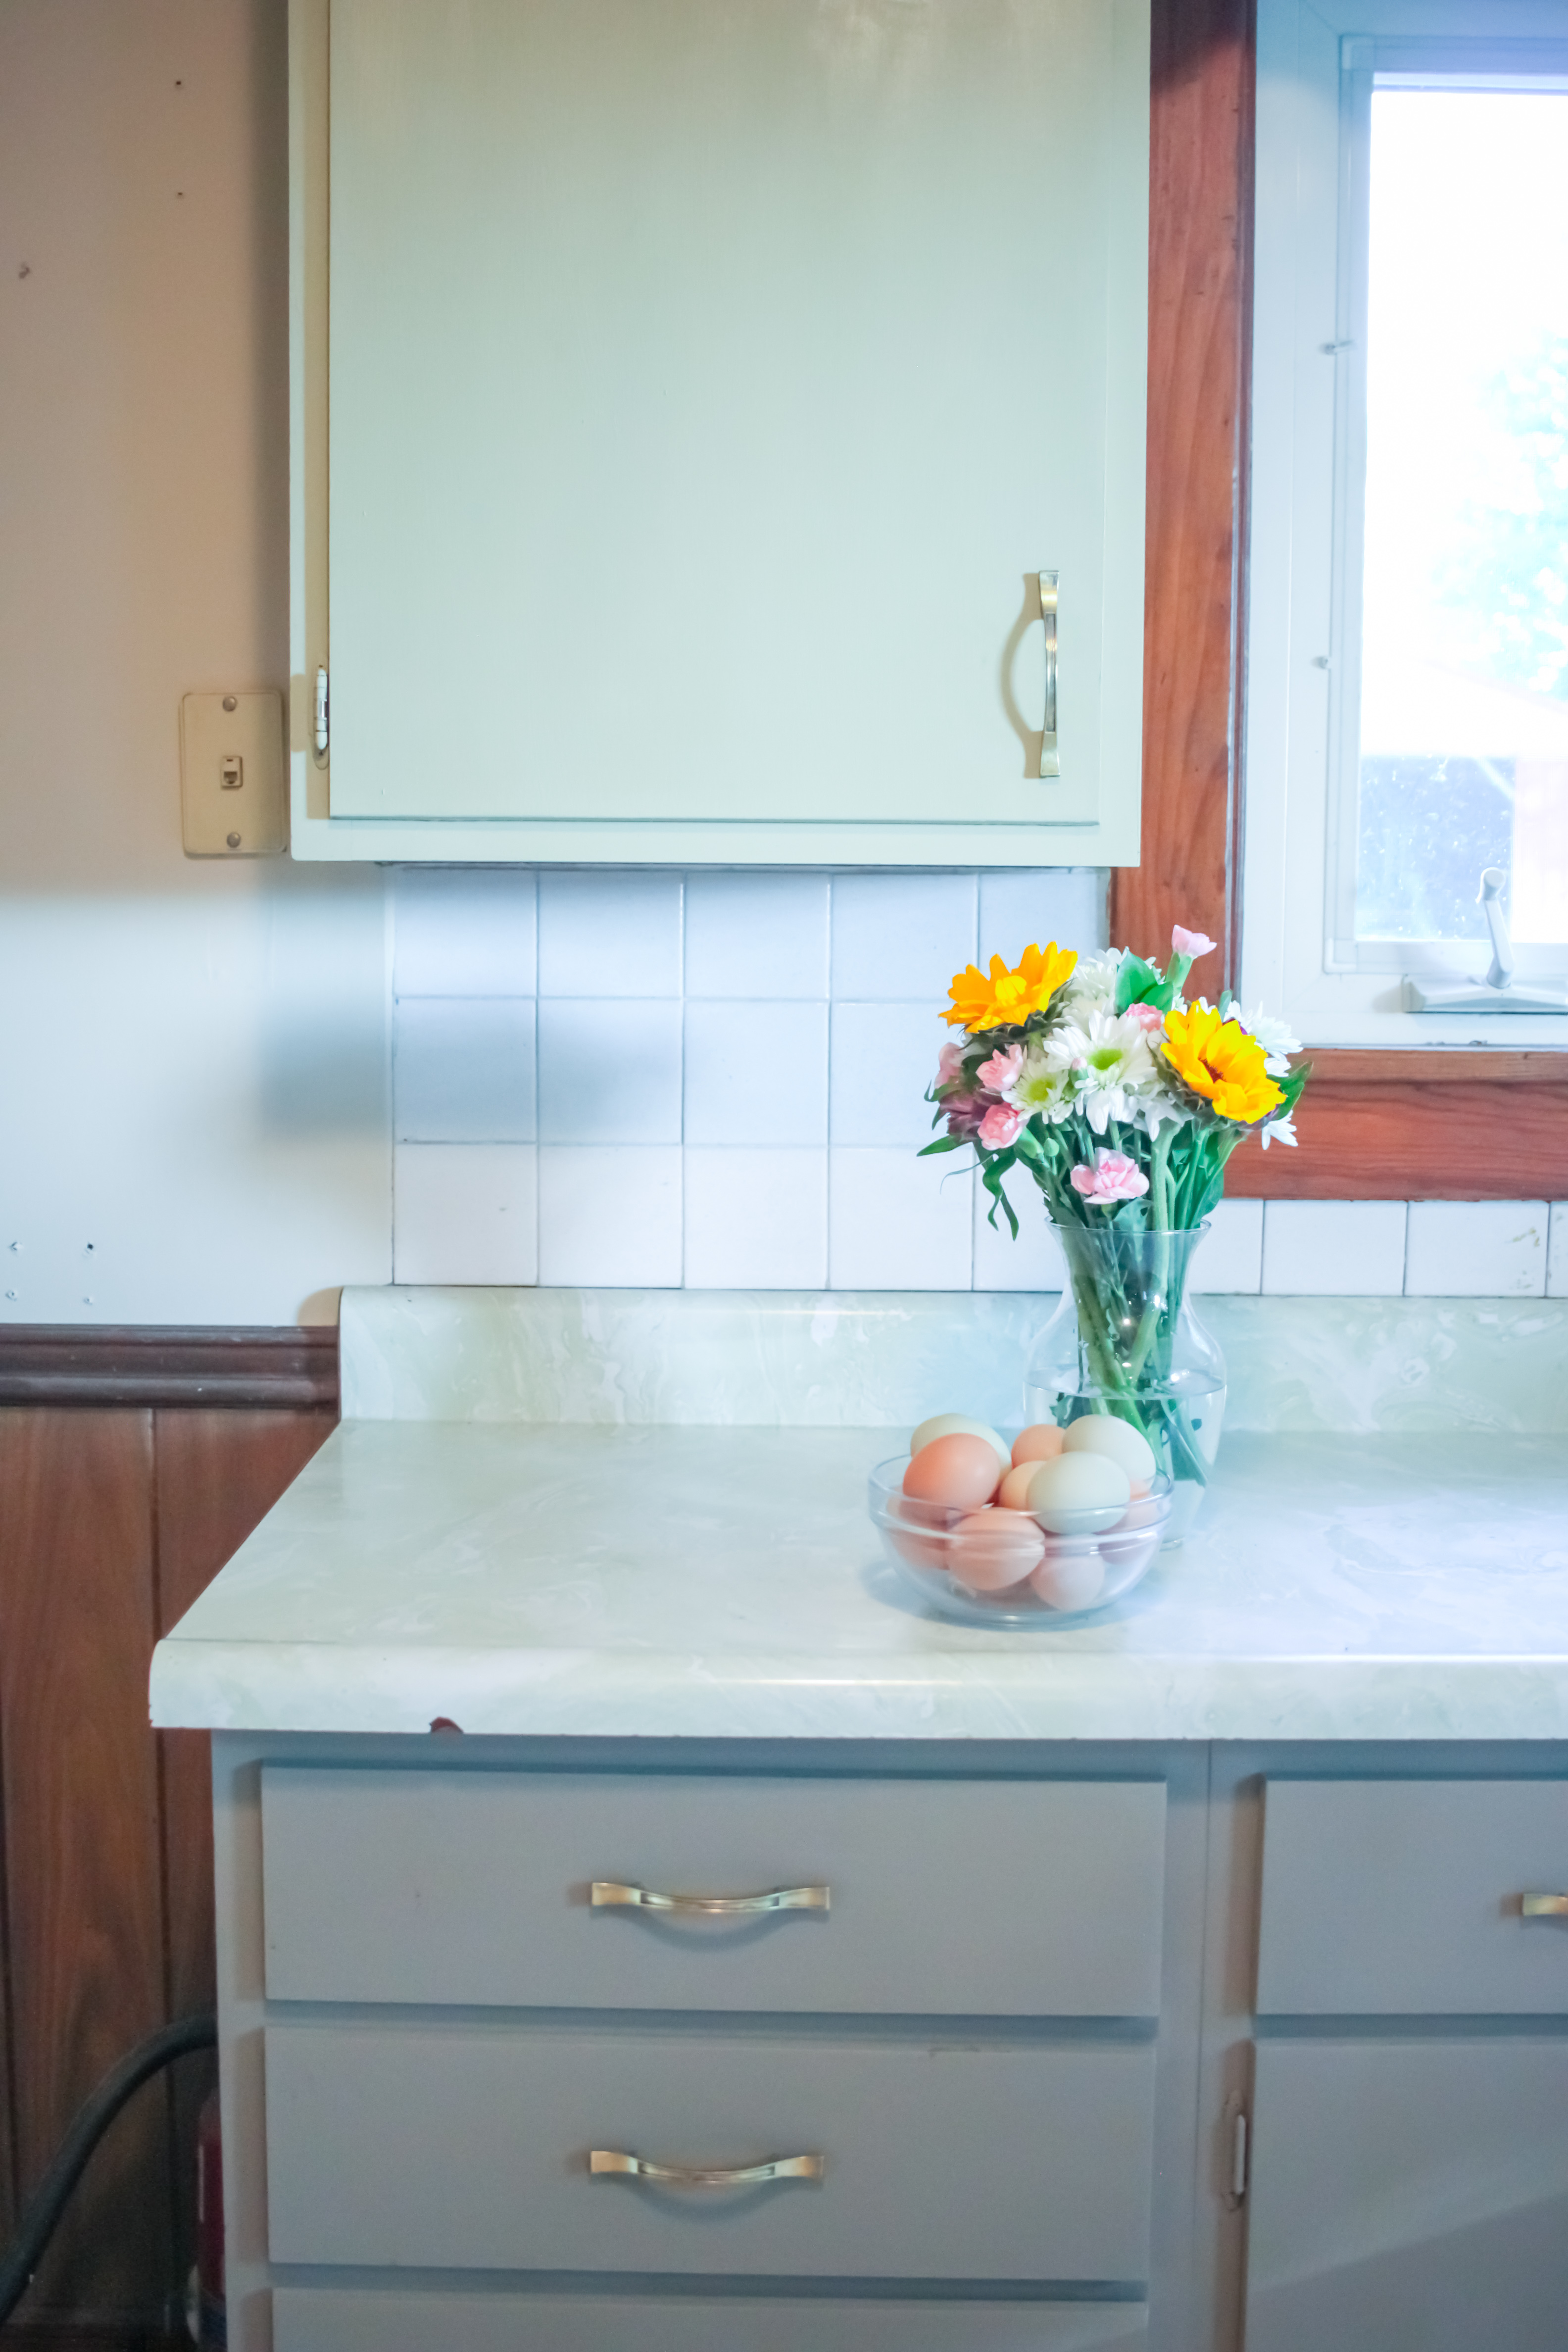
Stephanie’s family lives on a small farm that has sheep and chickens. They sell fresh eggs, so I wanted to include some in the staging decor. 🙂 We kept all of the decorative things that were already in the kitchen, and added a vintage map poster next to the yellow cabinets. Stephanie’s husband loves maps, so this was a great way to incorporate his preferences into the design. He also loves wood accents, so we kept the wood trim around the windows and the wood panelling on the walls. The other change we made was painting the closet door with chalkboard paint! This brings a fun element to the design and still helps to freshen up the room.

A pretty bowl of Stephanie’s farm eggs.
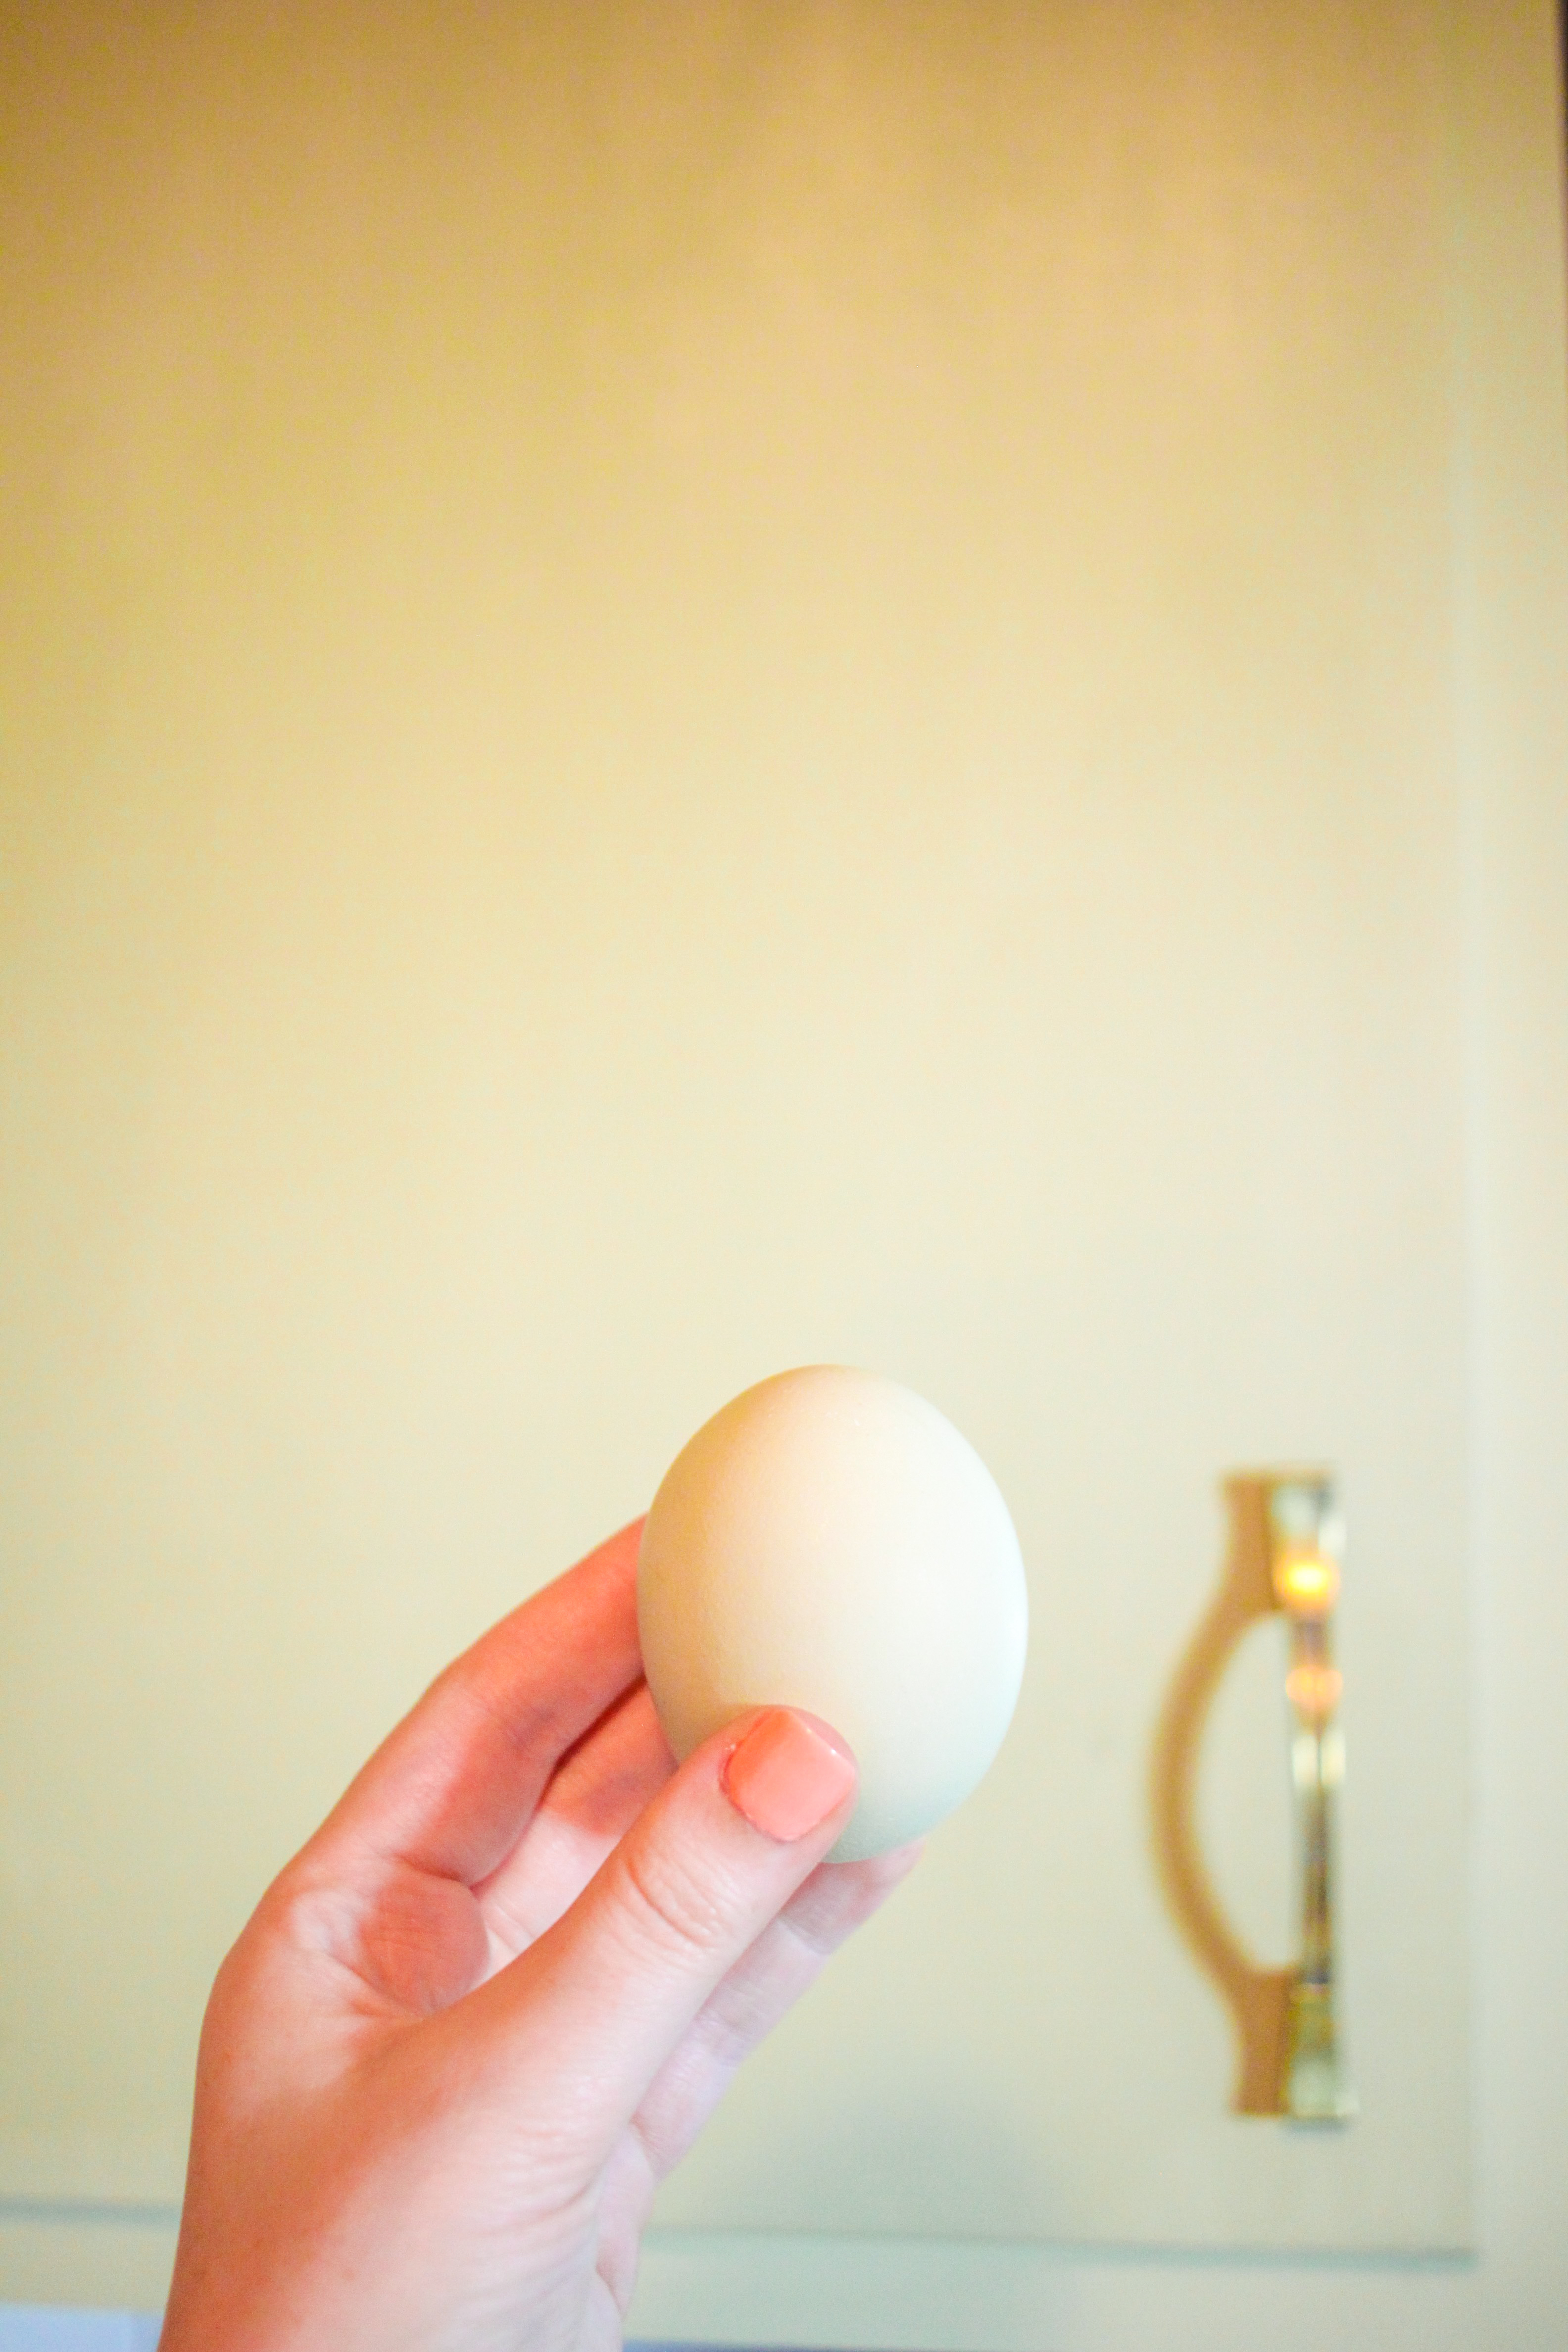
The blue/green eggs from one chicken are the exact color of the upper cabinets and countertops! This was a total accident, but we will pretend that it was a brilliant and intentional design decision.

I gave Stephanie this dish towel as a finishing touch for her kitchen. I thought it was perfect for their farmhouse kitchen!

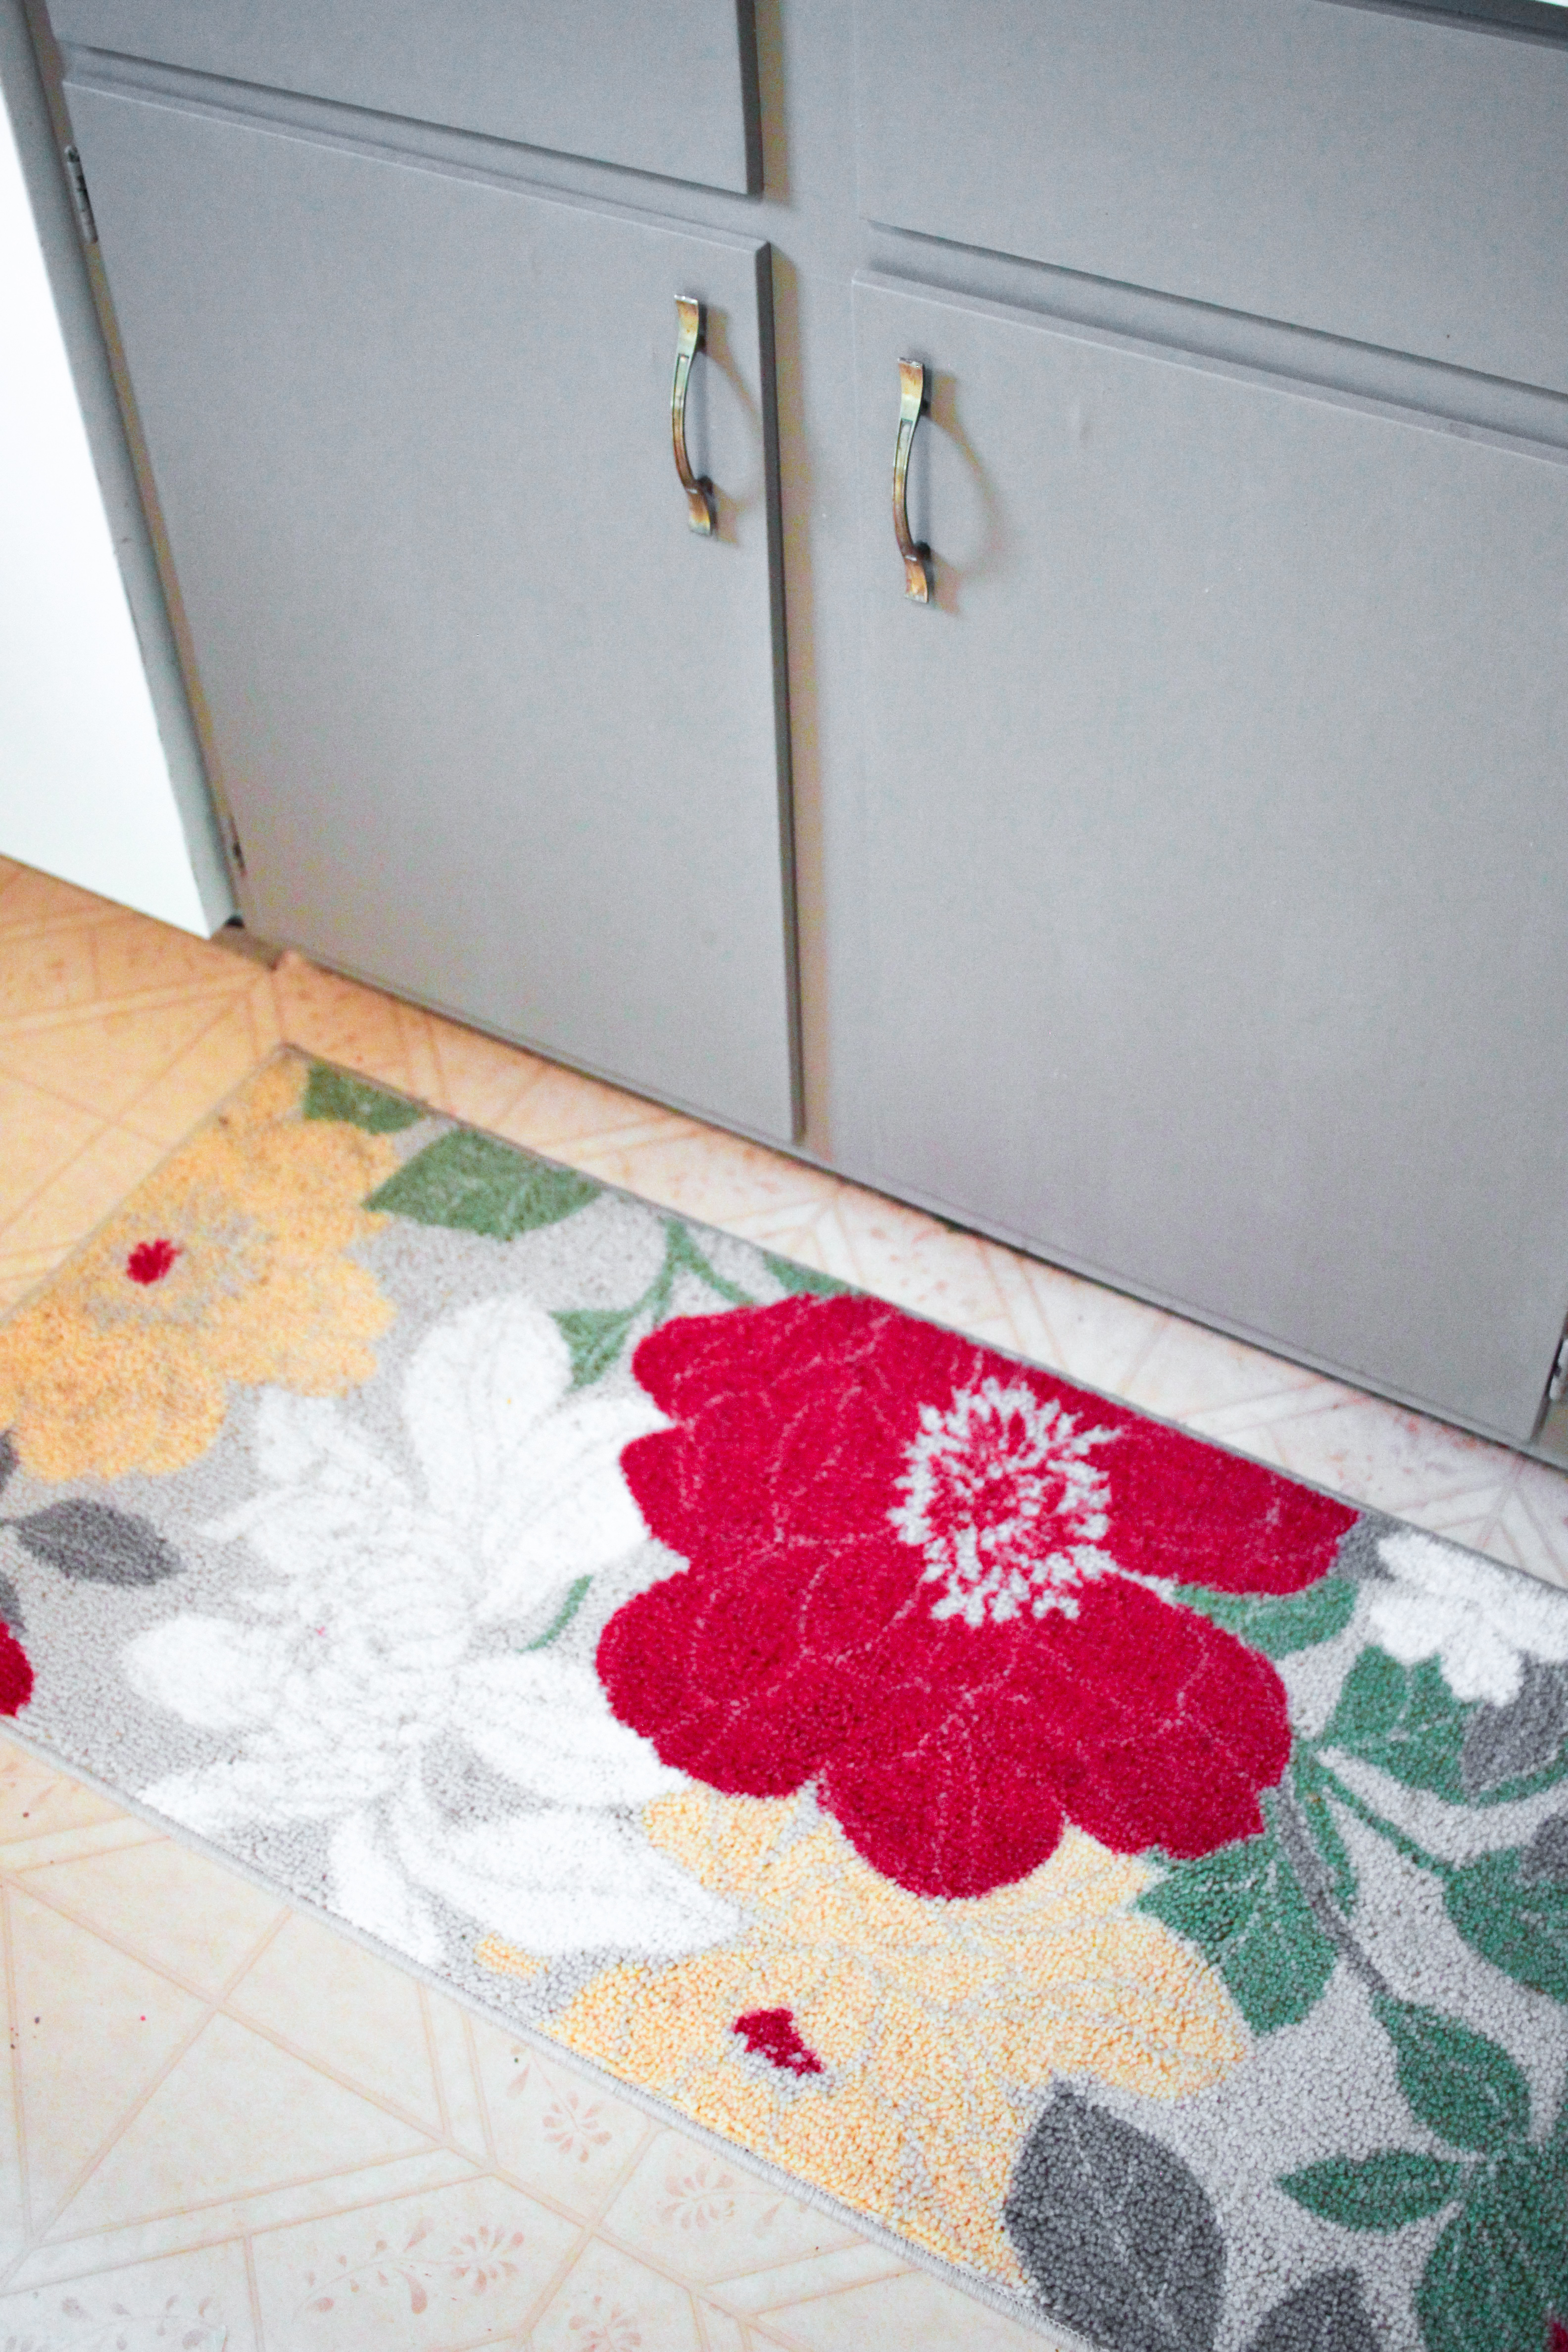
I also bought this rug from Target. It includes the greige, pale green, and mustard yellow paint colors. Stephanie has many red accents in her kitchen, so the red flowers in the rug tied everything together. This rug is made for kitchens, so it has a no-slip rubber pad built into the bottom.

(Stephanie’s youngest child, Emmett, being all cute in his highchair.)
Here is a reminder of what the kitchen looked like before, and what patience and a few cans of paint can do!
We needed two cans of Versailles (for the uppers) because Stephanie had a LOT of cabinets up there. We just used one can of the other colors. We did at least two coats of paint everywhere, and some places needed three coats. Stephanie did two coats of Annie Sloan Clear Wax to protect the cabinets from water and stains. That’s all for this project!
I would like to thank Tricia from The Purple Painted Lady® one last time for her partnership and support for this project. If you’re thinking of tackling your own kitchen, just go for it! If your kitchen doesn’t need a complete overhaul, or you don’t have the desire or budget to do so, I believe chalk painting your cabinets is the best and cheapest way to have a brand new kitchen.
You can see my kitchen transformation here. It has been shared on Today.com, Apartment Therapy, Buzzfeed, and Country Living, to name a few! Thanks for reading! Be sure to check out The Purple Painted Lady® for all of your chalk paint projects!
With love,


Leave a Reply