
If you’re finding me through the One Room Challenge, welcome to my home on the internet! I’m Avery and I live in a charming 1910 Craftsman style home in rural Iowa with my husband. You can learn more about me here, and see some of my previous design work in my kitchen, and my Fall 2018 One Room Challenge: Cozy Eclectic Master Bedroom Reveal. My design style is cozy, whimsical, and collected. You can follow along with my homemaking adventures on the Holland Avenue Home Instagram.
Catch up on all of my progress for the Spring 2019 One Room Challenge:
Week 1: High Style, Low Budget Sunroom Transformation
Week 2: DIY Tree Stump Coffee Tables
This week, I’ll be sharing about my two biggest projects- the DIY bed swing and the painted concrete floors!
$150 DIY Bed Swing
Last weekend, Ben’s sister and her family came to stay with us. Sarah and her husband, Kirk, have two little boys, and live just a few hours away in Des Moines. Kirk is an incredibly talented woodworker, and graciously agreed to help me build a bed swing. By “help me”, I mean that he did all of the difficult stuff like designing the plans, leading the construction, and teaching me how to use tools! I sent him a photo of a bed swing I liked, and gave some general instructions about how I wanted it to look. I wanted simple, clean lines, an “X” detail in the back, and thick rope for hanging from the ceiling.
Kirk designed a plan that uses dimensional lumber (aka 2×4’s and other sizes that you can buy precut, and just need to cut to length). I already had an extra twin mattress, so the plans are designed for the mattress to rest on a sheet of plywood.
The plans for this bed swing will be available to purchase on Etsy for $10.
Plans will include a detailed, measured drawing and a list of materials. Like I mentioned before, I already had the twin mattress, which saved money in my final cost.
I will send out a link (through my newsletter) to the plans on Etsy when they are finished. If you want to purchase the plans, make sure you’re signed up for the Holland Avenue Home newsletter to be notified when they are available! (I only send a few emails a year- nothing spammy!)
It took us one Saturday and about $150 in materials for the swing!
We used 40 feet of 1″ rope from Menards ($40) and spent $110 on the lumber (including a 4’x8’x1/2″ sheet of plywood).

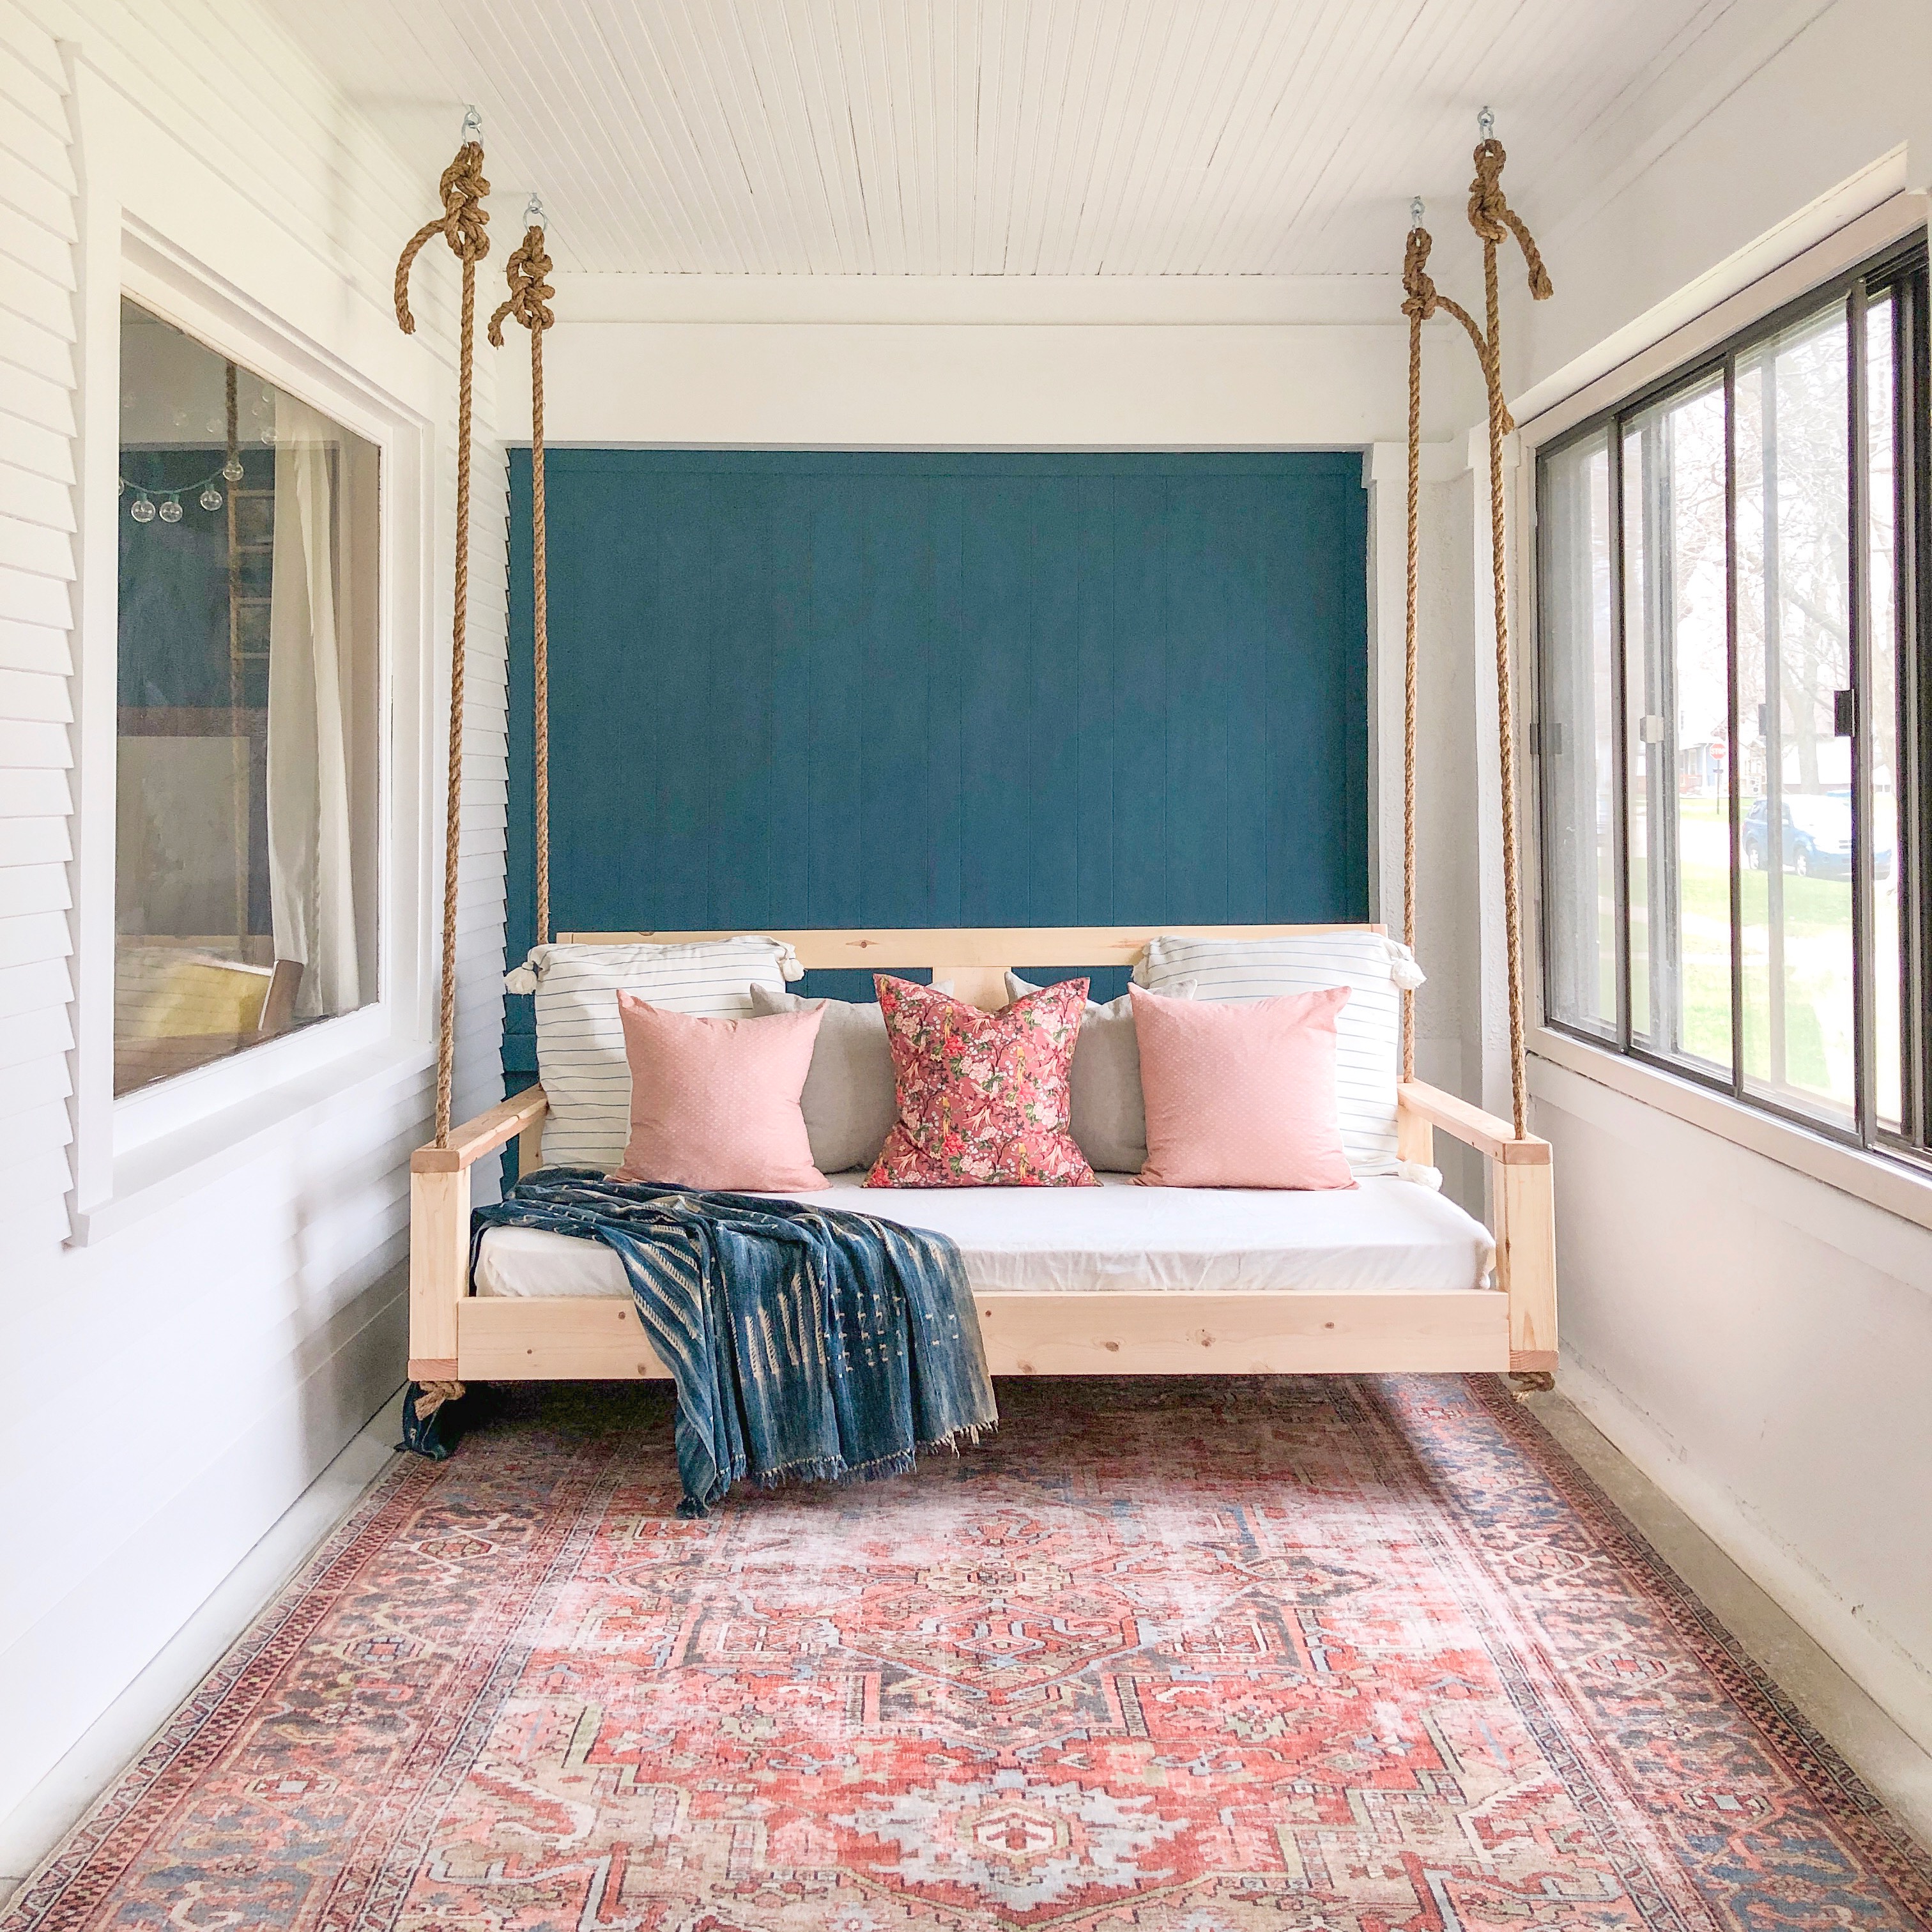
Here is the swing in our freshly painted porch. Seriously every single square inch of this porch has been painted over the last two weeks! I’ll address the floor painting later.
We set up shop in the front yard, just outside of the front porch.
This blog post won’t be a step-by-step tutorial, because it is realistically a more advanced project. If you have a friend or family member that is at least somewhat familiar with building things, you should be able to combine this rough outline with the detailed plans in order to build your own swing! We used a combination of screws, kreg-jig screws, wood glue, and a nail gun to assemble the frame.

The first step was to create the base for the outside of the frame and the plywood. After that, Kirk drilled 1″ holes in each of the 4×4″ corner posts, and attached the posts.

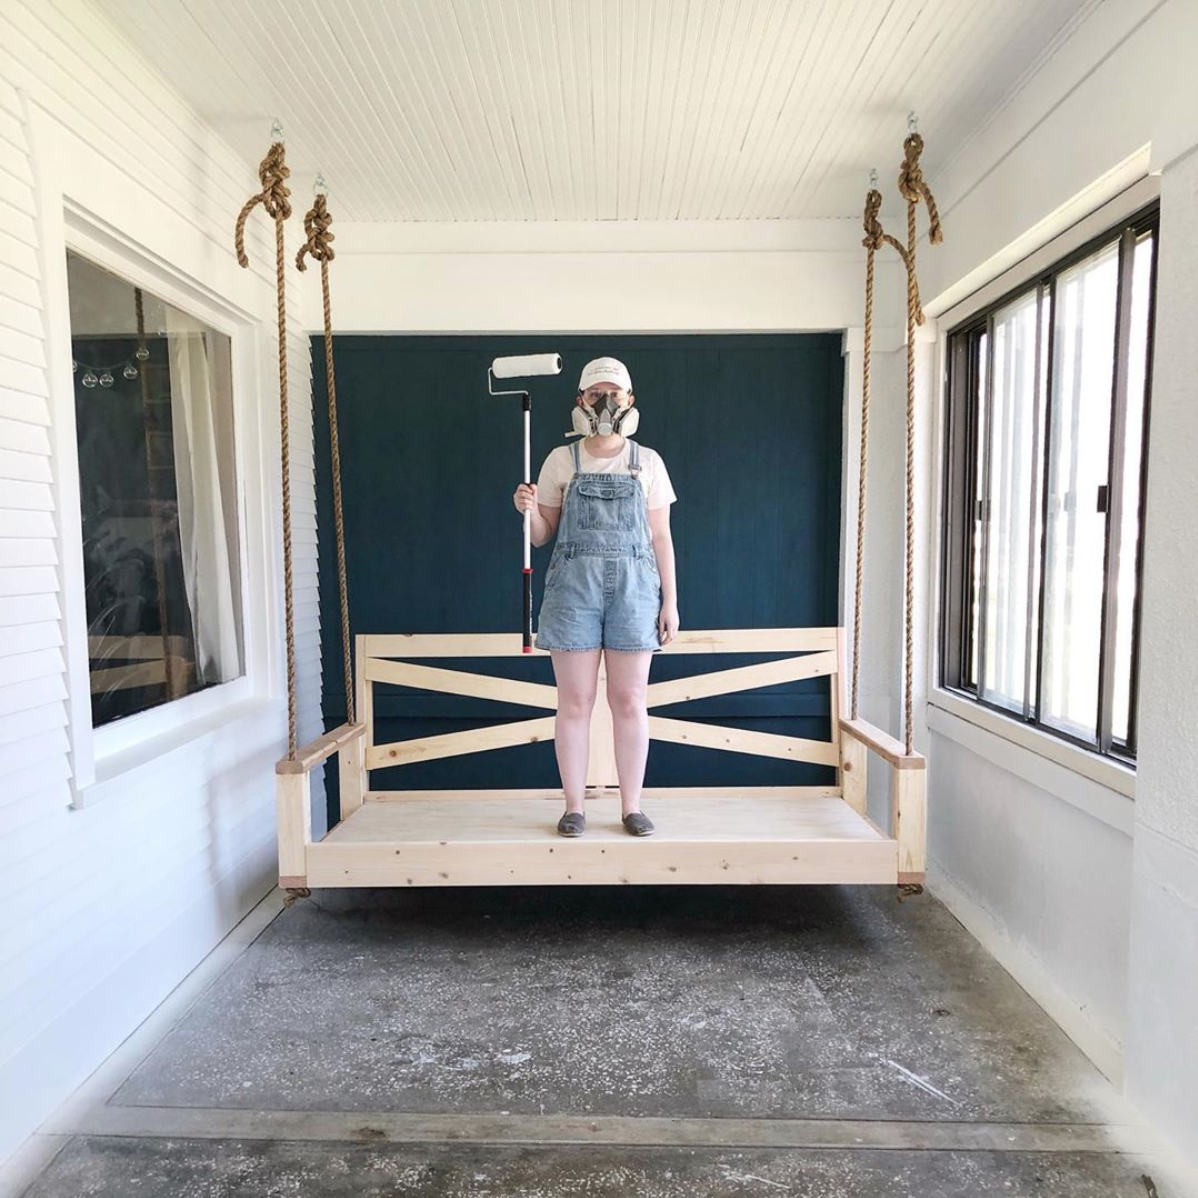
The back is on a 10 degree angle, which is very subtle but makes a big difference in comfort! After the corner posts, we built the back support and X detail. The last step was to attach the armrests, which also had 1″ holes that aligned with the holes in the corner posts.
We waited to attach the plywood until the swing was hung so that we could place the ladder inside of the frame for easier hanging.
To hang the swing, we first threaded the rope through the corner posts and armrests. We used 10 feet of rope on each corner to hang from an 8.5 foot ceiling. The triple knots at the top take up quite a bit of material.
We had 1″ holes for 1″ rope, and threading the rope created a lot of friction. I had the idea to cover the bottom few inches of the rope in painter’s tape to create a smoother surface. It worked great! After the rope was threaded, we tied a single knot on the bottom of each rope.
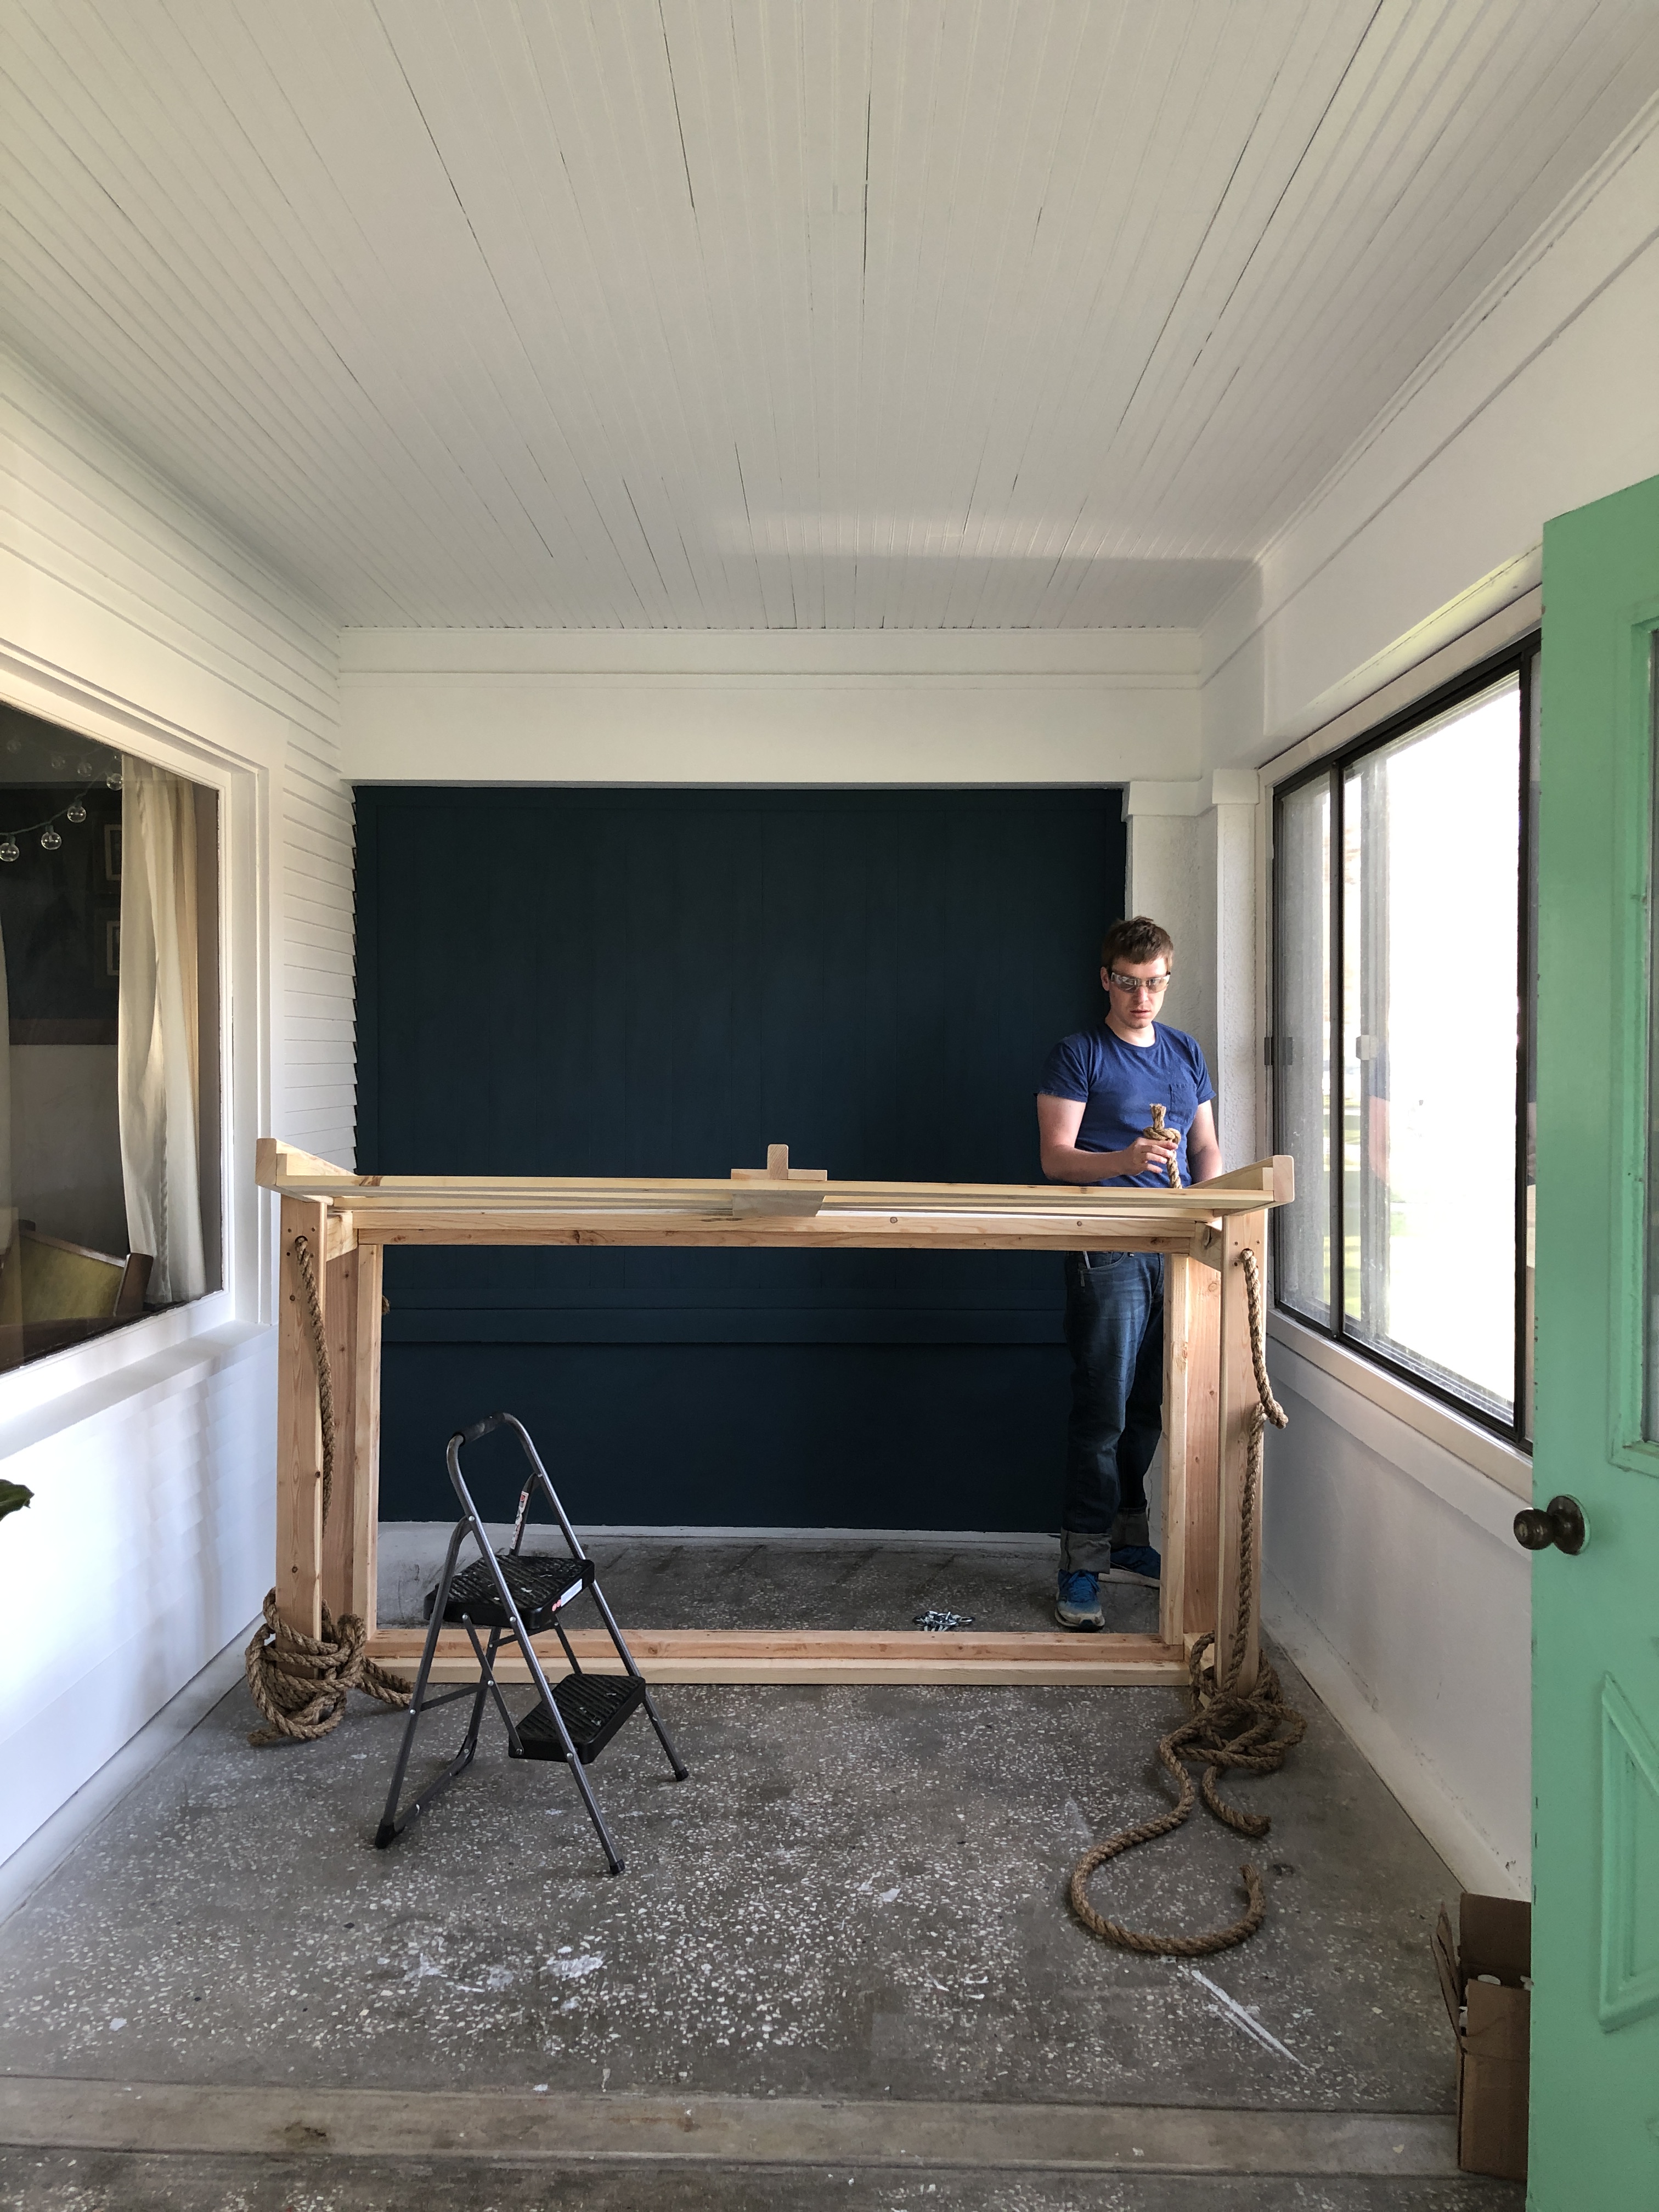
Kirk demonstrating his strength before we tackled the actual hanging part! I was nervous for this, but it was a breeze!


The most important part of hanging your bed swing is to make sure that you screw your eye hooks into ceiling joists.
You can find the joists with a magnetic stud finder. Our ceiling joists run horizontally across the width of the porch. We were pretty limited by the amount of ceiling joists, and chose to hang from the second and third joists so that there would be plenty of room for the swing to move back and forth. (The back of the swing is about 2 feet from the wall. Your ceiling joists may be closer or further away from your wall, but they are typically the same distance apart from one another.) It was about 40″ between holes on the armrests, and about 28″ between joists, meaning that the ropes come in about 6″ on each side to be 28″ apart on the ceiling.
Once we determined where the ceiling joists were, and marked where the hooks needed to be installed, Kirk drilled holes in the joists. He screwed in the lag eye screws by hand. We bought the kind that had attached hoops on the bottom, so that the rope had plenty of space to thread through. Lag eye screws will have a weight limit. Ours are 350lbs.
Once the eye screws were inserted, we propped up the swing on two 5-gallon buckets, and threaded the rope through the eye screws. Kirk tied triple knots on each of the ropes.


The hanging part was a lot easier than I expected it to be! Here we are, enjoying our work after a long day! I learned how to use a lot of different tools, and really enjoyed seeing a project come together. My first comment after we kicked out the buckets was, “This wasn’t here this morning!” It was very satisfying and rewarding to build something from scratch. It was fun to spend time with Kirk, too! We both have really strange senses of humor, so the construction puns were rolling all day. (Examples: “Don’t screw it up”, “Did you go to the hardware store and get board?”, “You saw it here first”)
While we were building the swing, my sister-in-law, Sarah, sewed pillow covers! I found four down insert pillows at our local thrift store for $1 each, and a set of L.L.Bean flannel sheets for $2. The fitted sheet covers the mattress, and Sarah used the flat sheet on the backs of the four pillows. Two of the fronts are covered in Annie Sloan linen, and two are covered in pillowcases I found on clearance at Target. The fabric was a little too pink, so Sarah tea-dyed the fabric before sewing them to give it a more muted, peachy, vintage feel!

Like I said, I know that I didn’t give a step-by-step “then you screw this piece to this piece” tutorial. But if you want to build a swing of your own, you’ll need a few different power tools and a knowledge of how to use them, which will probably include either a handy friend or your own understanding of how to work from a detailed plan! If you have any other specific questions about the bed swing that I didn’t answer, please feel free to reach out through my Contact page.
The other big progress I made this week was painting the concrete floors!
Painting the Floors
Here is a reminder of what the concrete floors looked like before. They were a strange, freckled concrete that just looked dirty. I wanted to give them a fresh look, and needed to use heavy-duty epoxy paint since this is our main entrance for guests. We live in Northwest Iowa where it is basically winter for half of the year, so this porch sees a lot of snowy boots. My friend had leftover epoxy floor paint from his business, and gave it to me for this project!

I used a Sherwin Williams two-part epoxy paint. Epoxy has a part A and part B, and it activates when they are mixed together. It is incredibly toxic, and you absolutely need to wear a respirator and only use it in a well-ventilated space. I had to keep checking our weather forecast to make sure I could paint on a warm day (with no rain for 2 days) so I could keep the windows and door open.
For my 300 square foot porch, I used a 5 gallon bucket to mix half a gallon of A and half a gallon of B, and about a quart of lacquer thinner. (You mix parts A and B on a 1:1 ratio, and will need a quart of lacquer thinner per gallon of epoxy. I started with half a gallon of both A and B, and had some left over.) It is important to mix them really well, and whatever you mix needs to be used within 3ish hours. I opened all of the windows and door, donned my respirator, and finished the painting in about two hours.
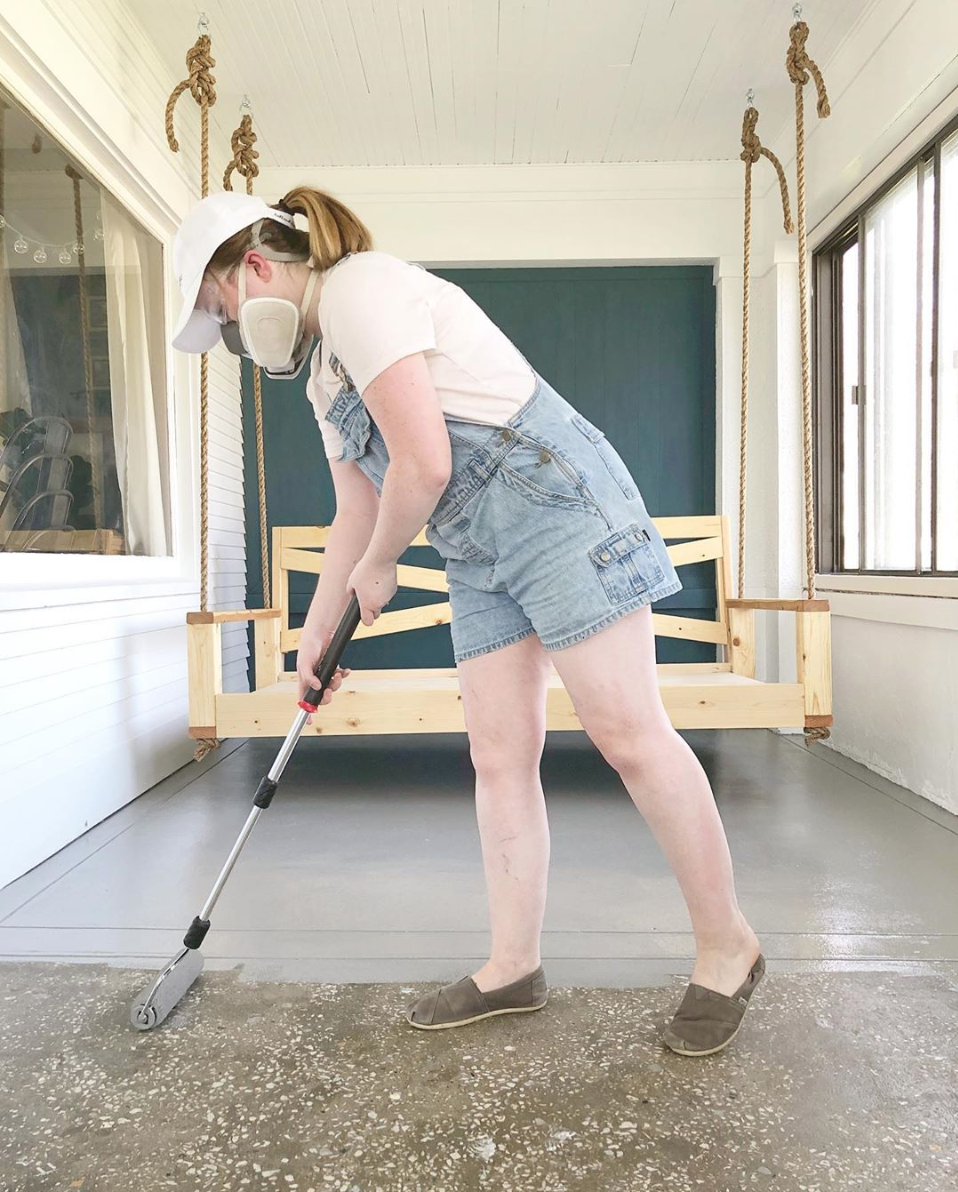
After cutting in the edges with a brush, I used a 3/8 nap roller on a pole to roll the rest of the floors. I did the sections to the right and the left first, then painted myself out the center. I locked the door behind me, and left the floors to dry for at least 24 hours before coming out to close the windows! We put a towel under the front door that opens to our living room to help with the smell, but it is already gone the next day.
I invented some interesting yoga moves in the process. My favorite was the “One-Legged-Painter”, which is what I became when I stood behind the bed swing on one foot, pushing the swing as far away as I could with my other foot so that I could roll the floor underneath. There was also the “Hunchback of Holland Avenue”, which is pictured above as I applied pressure to the just-barely-too-short-for-comfort roller handle.
Here is a before and after of the floors! I knew it would make a huge difference, but WOW!!! It feels so fresh and clean compared to the freckled concrete.
They need to cure for 7 days before I bring our furniture and rugs back out. They currently look a tiny bit streaky from the roller, and I’m wondering if it is because they are still curing. Even if they do have subtle roller marks, it is still a drastic improvement over the previous floors. Looking back, I maybe could’ve applied the paint a little thicker, but epoxy is pretty thick and I didn’t want to over-apply.
This week was full of the biggest progress yet, and I’m getting pretty close to the finish line! The only things I have left to do are pleat and hang my curtains, create my floral artwork for above the bed swing, and paint the window trim. After that, it will just be final styling and shooting the space! Ben and I are absolutely thrilled with the progress so far, and I am giddy when I think about how much we will love the finished space! We’ve already had a lazy day on the bed swing, which consisted of a Game of Thrones marathon to catch up before the new season’s second episode premiered. Monday was Ben’s day off (and the day before floor painting), so we spent our afternoon curled up on the bed swing with Louie while it rained. I can’t wait to host friends on this porch all summer!
I’ve learned a lot during this round of the One Room Challenge, but the biggest thing I’ve learned is to just “do it scared”. I’ve tackled a lot of new projects and new tools that scare me before I just jump in and decide to learn. It seems like everything I’ve done so far required overcoming fear and intentionally embracing new skills. I learned how to use an electric sander and worked with polycrylic for the first time for my DIY Tree Stump Coffee Tables in week 2. In week 3, I learned how to mask off a room for paint spraying, and even learned how to use the sprayer! This week, I learned how to use a saw, a nail gun, a krek-jig, and epoxy floor paint. I won’t be blogging about them until next week, but today I used Rit Dye to dye my Ikea curtains. It scared me, too, but they look great and I have a new skill in my arsenal! Every one of those projects scared me before I started, but so far they have all turned out wonderfully and have given me a sense of accomplishment.
If you have a DIY project that scares you, just do it scared! You may make mistakes, but don’t let that hold you back from learning new things. And who knows- maybe you’ll invent some new yoga poses in the process!
You can follow along on the Holland Avenue Home Instagram and Instagram Stories for behind-the-scenes progress before it comes to the blog. I’ll be sharing weekly updates here on my blog, and you can get reminders every time a post goes live through entering your email into the “brighten my inbox” tab to the right of this post.
Don’t forget to check out the design plans of the Featured Designers and other Guest Designers on the One Room Challenge Blog.
Thanks for following along, and stay tuned for next week’s project- making Ikea curtains look high-end with Rit dye and pleating, and the final styling touches!
Catch up on all six weeks of my Spring 2019 One Room Challenge:
Week 1: High Style, Low Budget Sunroom Transformation
Week 2: DIY Tree Stump Coffee Tables
Week 4: DIY $150 Bed Swing and Painted Concrete Floors
Week 6: Before & After High Style, Low Budget Sunroom
![]()

Don’t forget to save this project on Pinterest!


Leave a Reply